Light Tracer Render 2.3
Dear Light Tracer users!
The fresh release of Light Tracer Render 2.3 has finally arrived! Our team worked hard on providing new great features without losing focus on simplicity and ease of use.
We take this opportunity to say a big thank you to all our users. Your feedback and support is the key to building a great product for everyone! Below, we invite you to take a look at the changelog and see what’s new.
Online material library
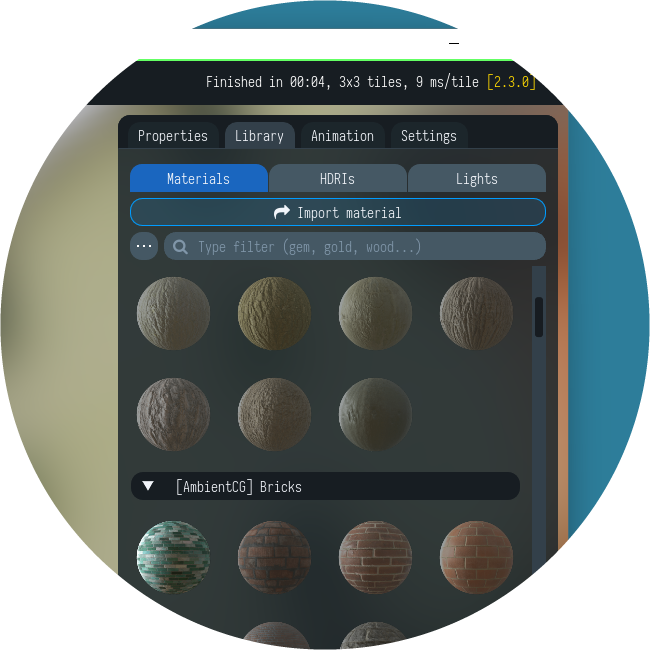
Perhaps the most long-awaited feature is the online material library. In the Library tab, now you can find 1500+ PBR materials of plastics, woods, cloths, leathers, metals, paints, etc. A small part of the materials is built-in in the Light Tracer installation (about 150 materials). The rest are downloaded on demand from the great https://ambientcg.com resource. Everything that you'll find in the Library is covered by a CC0 Creative Commons license. That means you may use them in any way and in any context with no royalties or attribution required. Of course you stil can make a PBR material manually in the Properties tab. Read more about materials in this tutorial.
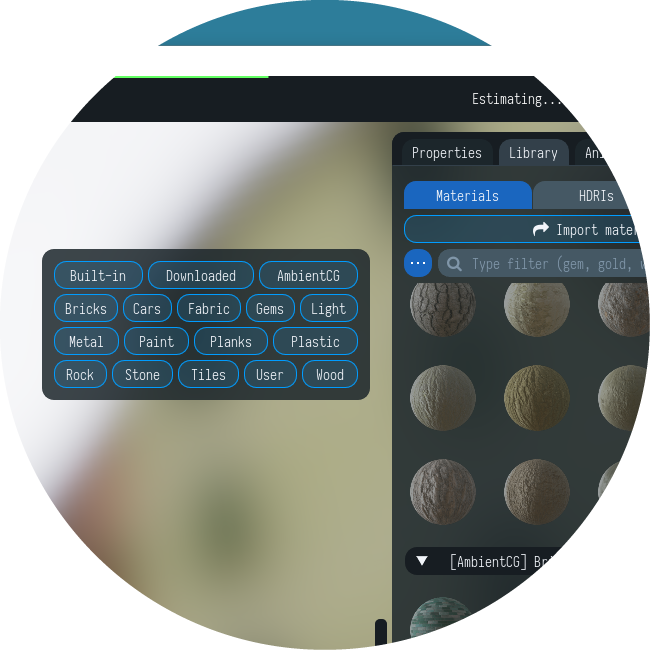
The materials are arranged in categories that can be collapsed for a more convenient exploration. Light Tracer Render has simple material search capabilities. The first option is using the tags popup, where you can quickly select a category of interest (for example, "Built-in" to display materials included in the installation, "Downloaded" to show already loaded materials, and "AmbientCG" to display assets from https://ambientcg.com). Also, you can enter custom queries in the search bar. For example, to search for gold presets, you can enter "gold", "go", "metal gold", or "me go":
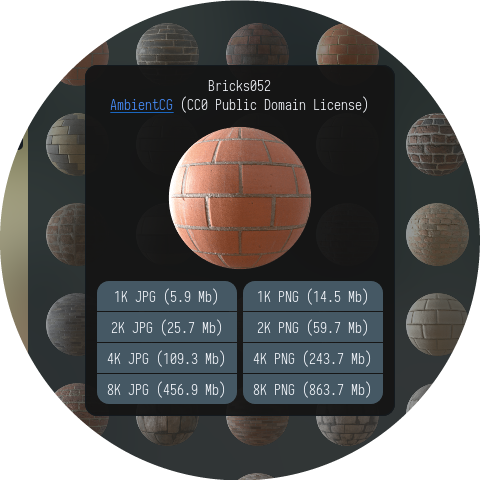
When you click on a downloadable material, the Light Tracer will prompt you to select a specific asset that you want to download. As a rule, materials are available in JPG or PNG formats and resolutions from 1K (1024x1024 pixels) to 8K (8192x8192 pixels). Please note that asset size affects not only the downloading time but also the rendering performance. The higher the texture resolution, the more GPU memory is used, and the lower the performance:
If necessary, the material asset can be re-downloaded in a different quality or deleted from the local storage. These actions are available in the context menu when clicking the right mouse button on the downloaded material.
The rest of the work with downloadable materials does not differ from the built-in ones. To apply a material, you can simply drag it on the scene object or click on the material preview button.
Start using Light Tracer Render today
Import SketchUp models
The fresh release allows you to import your SketchUp models directly into Light Tracer Render for fast and easy 3D rendering. SketchUp has a simple material model that allows specifying color, transparency, and (optional) texture map. During import from SketchUp, Light Tracer Render creates diffuse materials with the specified color/transparency. If there are textures, they will also be imported and assigned to the Base color slot. One limitation is that Light Tracer Render loads front materials only (whereas SketchUp supports assigning two different materials for the front and back sides).
After model import, we recommend replacing the materials of windows and glazing elements on Thin Glass (just type "Thin" in the search bar in the Library). Simple SketchUp transparency is much less realistic, although such rendering settings can be used as-is. Below is an example of rendering a SketchUp building model in Light Tracer Render:
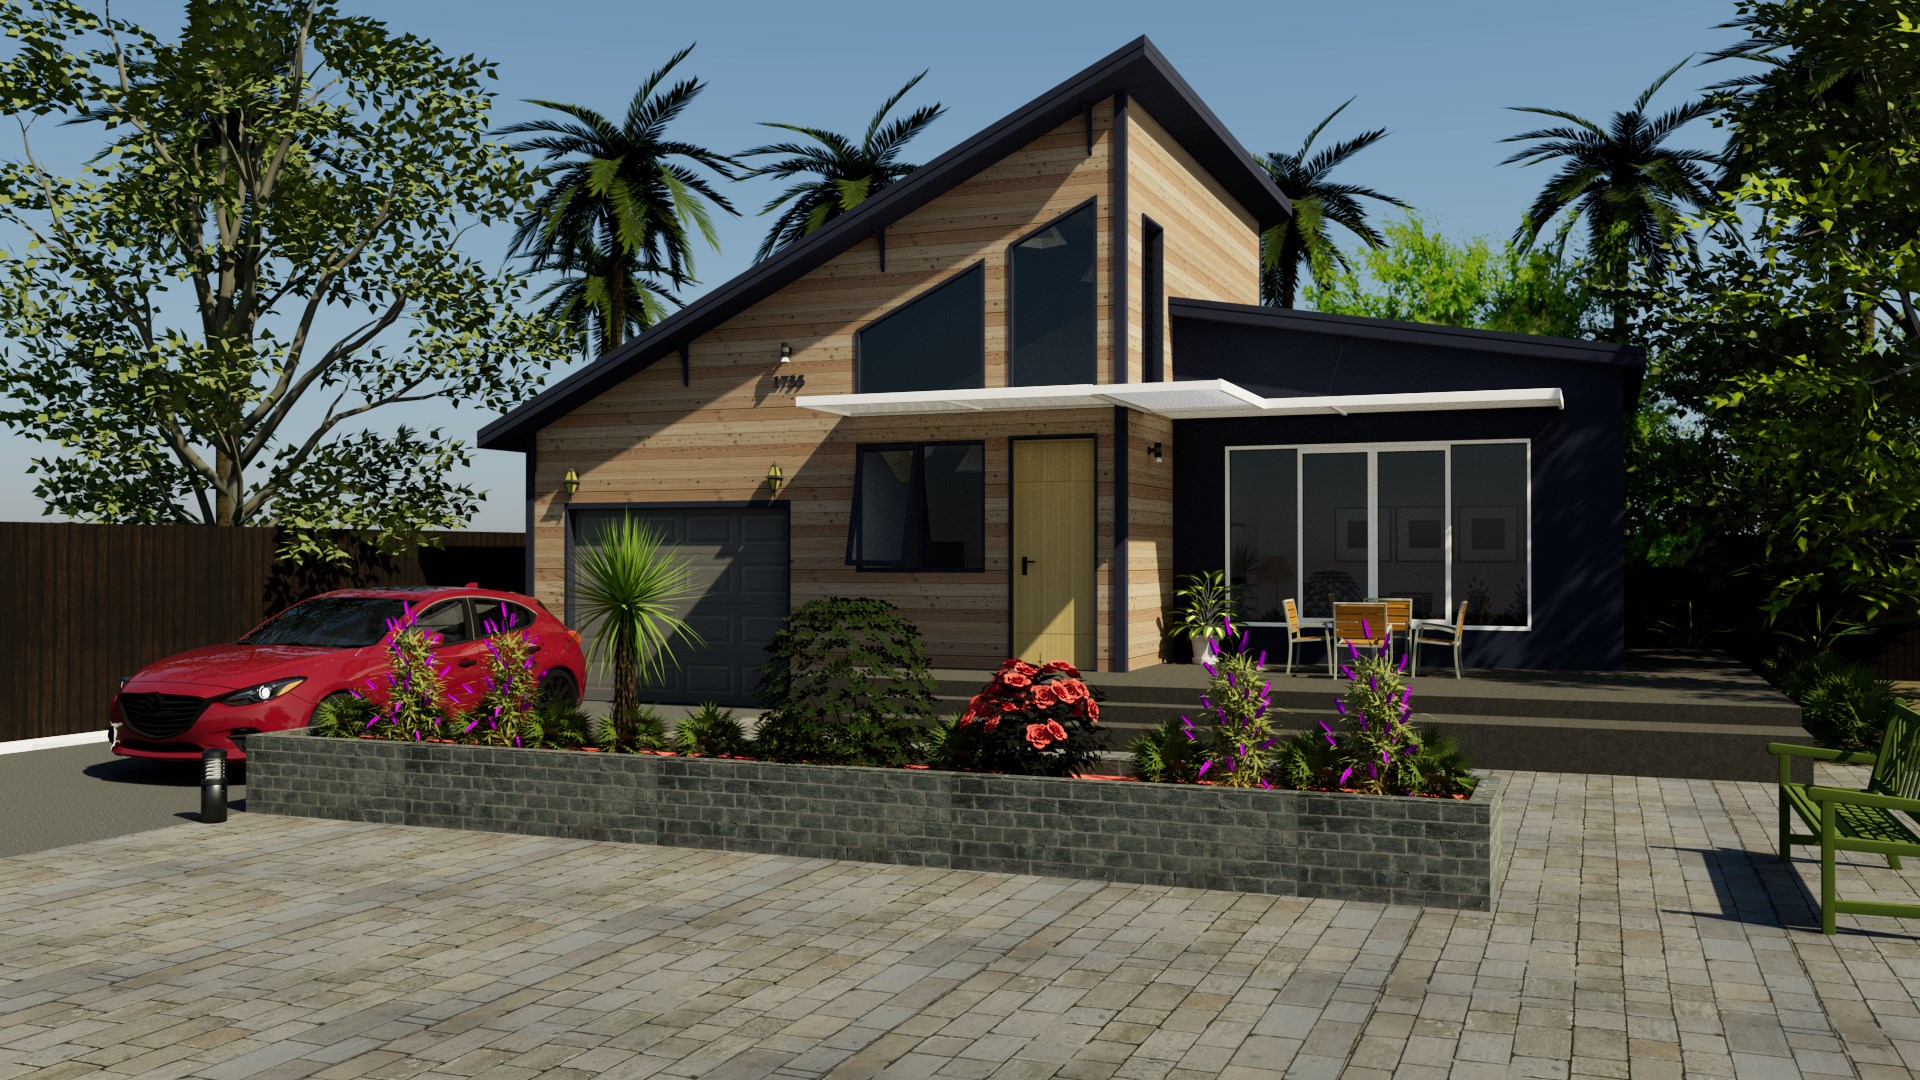
Country House by Le Minh (grabcad.com/library/country-house-3)
Recall that recently Light Tracer Render got support for the analytical model of sky & sun (by Hosek and Wilkie). This type of environment map is great for making quick architectural renders like the example above.
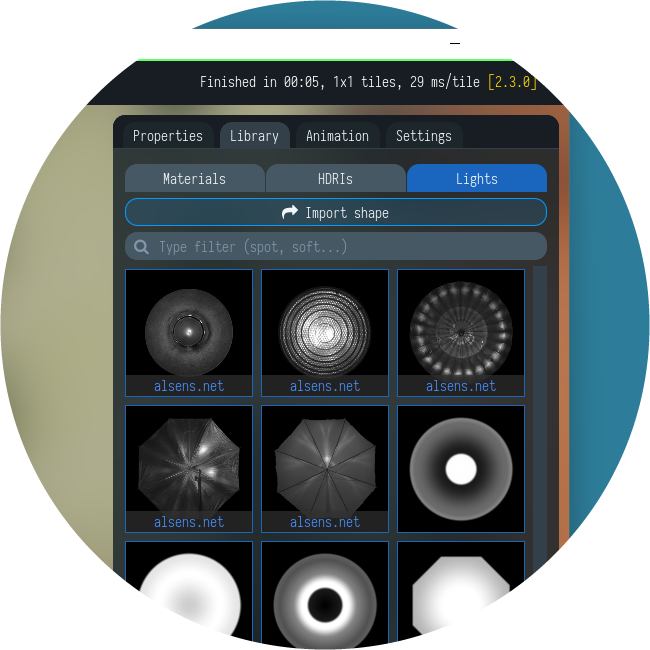
Studio lights library
The fresh release allows you to effortlessly create realistic studio environments with high dynamic range lighting for life-like product renders. In the Library on the Lights tab, you'll find more than 30 studio light presets. These light sources can be used to “draw” a custom environment map. Some of presets are synthetic, but most are based on the real-world measurements and capture techniques. Each is adjustable for size, color temperature, and more.
Light sources can be positioned on the Environment tab using the interactive real-time preview of the environment map. Select the source in Scene Explorer or click on it directly on the preview. After that, it can be moved and rotated using the 2D manipulator:
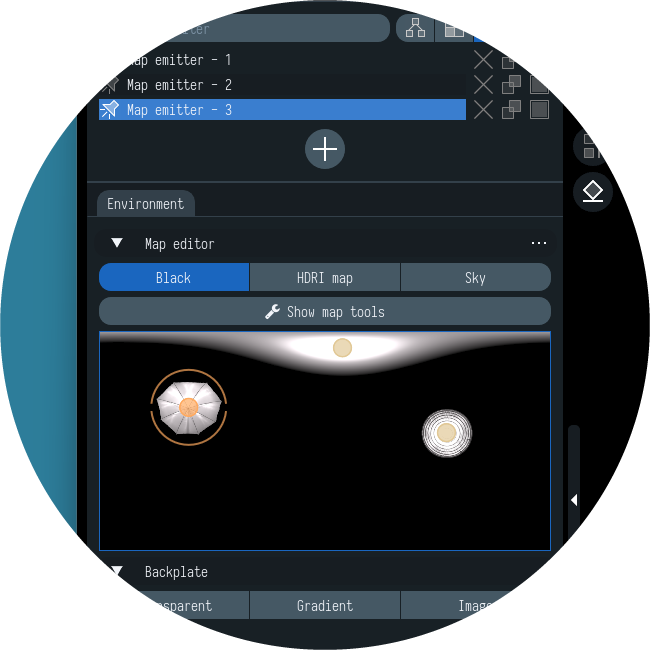
Parameters of the selected light source can be adjusted in the Properties tab. Adding, positioning, and editing light sources is performed directly on the GPU in real-time. That simplifies the lighting setup and makes it more responsive and enjoyable.
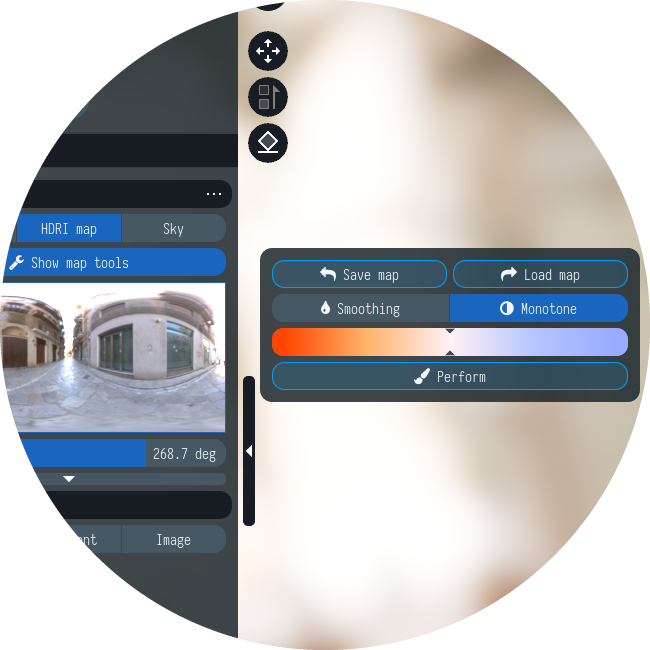
By the way, the new version has additional features for processing the HDRI environment map. Now, along with blurring the map, it is possible to make it monochromatic with the desired color tint:
Improved tone mapping and color grading
The new Color Correction widget on the Settings tab allows for more precise control over the brightness and tone of shadow areas (lift), midrange areas (gamma), and bright areas (gain). Three color wheels can be controlled by dragging the white point that lies at the center of the wheel in its default state. When you adjust the position of this point, it shifts the hue of the image towards that color in the respective tonal range. The slider under each wheel allows adjusting the color lightness of that tonal range.
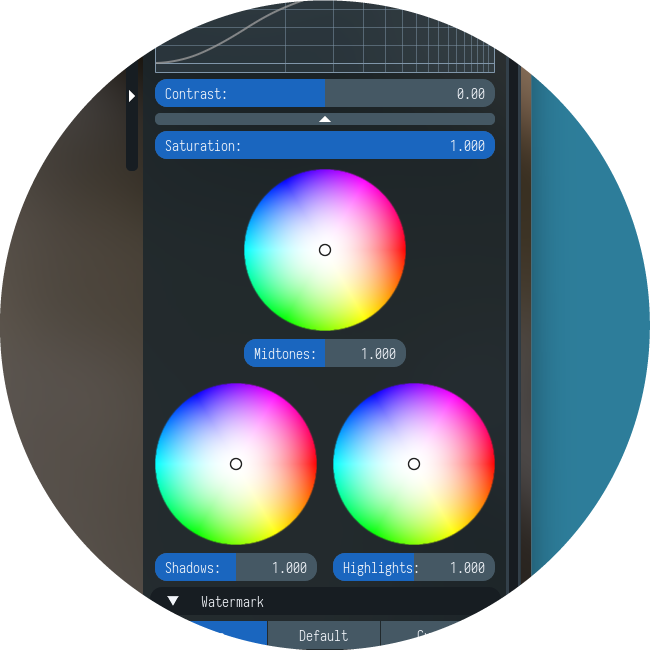
Saturation controls the intensity of color within your image. Moving the slider down will cause colors to get more muted and greyscale.
Light Tracer Render uses the ACES (Academy Color Encoding System) pipeline created by hundreds of industry professionals. In the new version, the ACES workflow was deeply revised. In particular, the inverse ACES transformations have also been implemented, which finally make it possible to correctly blend the bloom effect on top of the backplate (both for the case of a gradient backplate and a custom image):
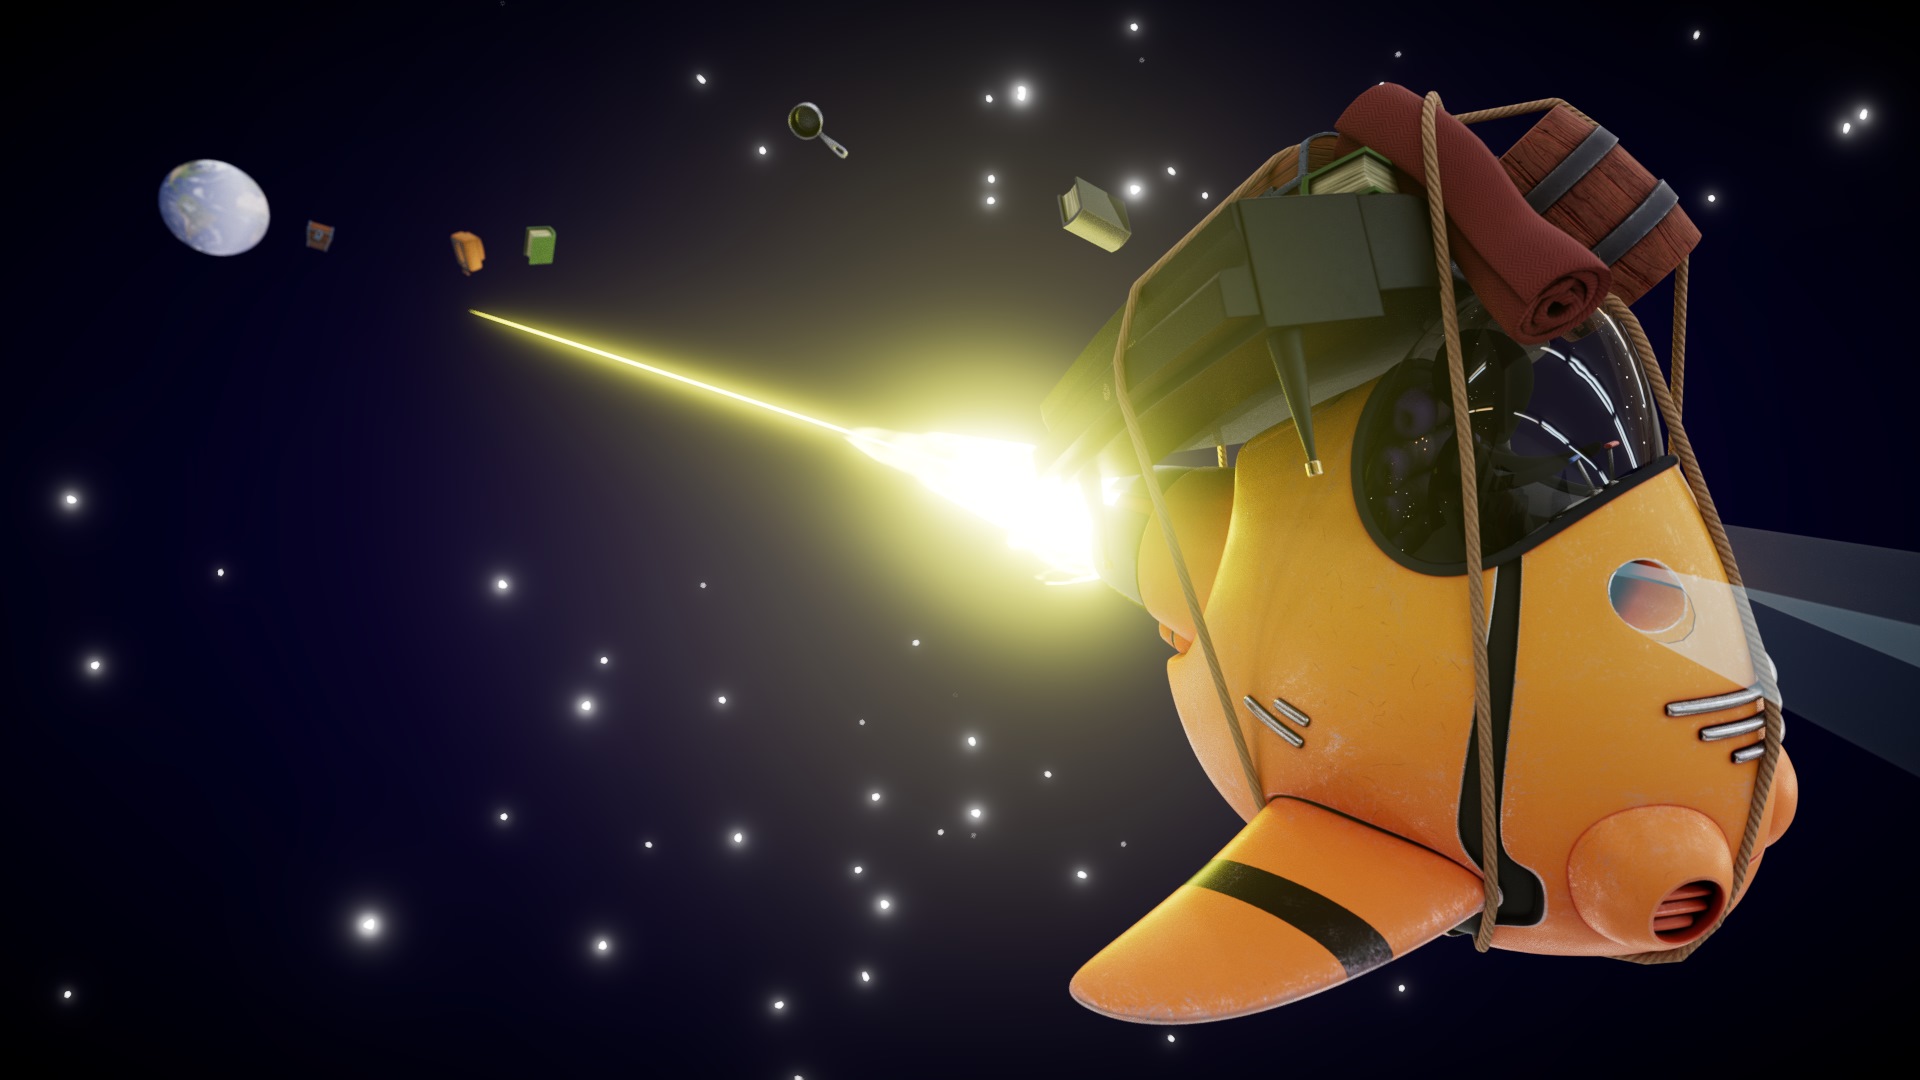
Render of Alien explorer model by Warkarma (skfb.ly/6YVQP)
New animation capabilities
The updated Light Tracer Render has significantly improved animation support and workflow. Firstly, the glTF loader can read all the animations, including skeletal ones (that were previously available only for FBX). Saving an animated scene (including skeletal animations) is also fully supported. In this sense, support for animations has become complete.
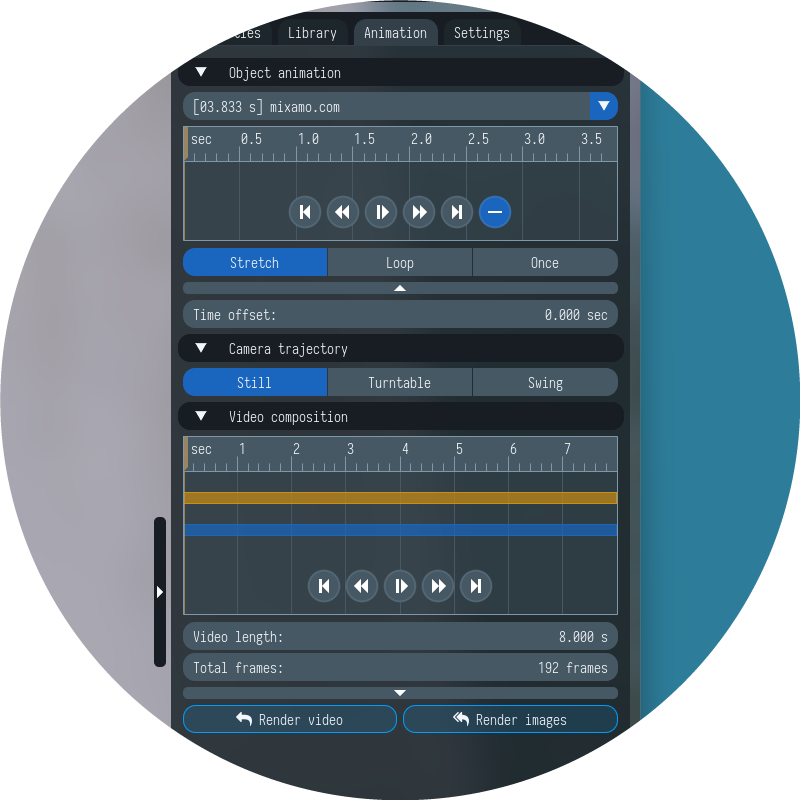
Secondly, the animation and video compositing UI has been completely redesigned. All the animation-related functionality is now available on the dedicated Animation tab. A 3D scene can contain several animated objects. For each object, you can preview its animation tracks and select one of them to include in the output video (see Object animation). Since the tracks can be of different lengths, you can choose the playback mode for each of them. For example, a track can be time-stretched (Stretch mode) to fit the video length, or looped to play it repeatedly (Loop mode). Also, for each track, a time offset can be specified, from which it starts playing in the video.
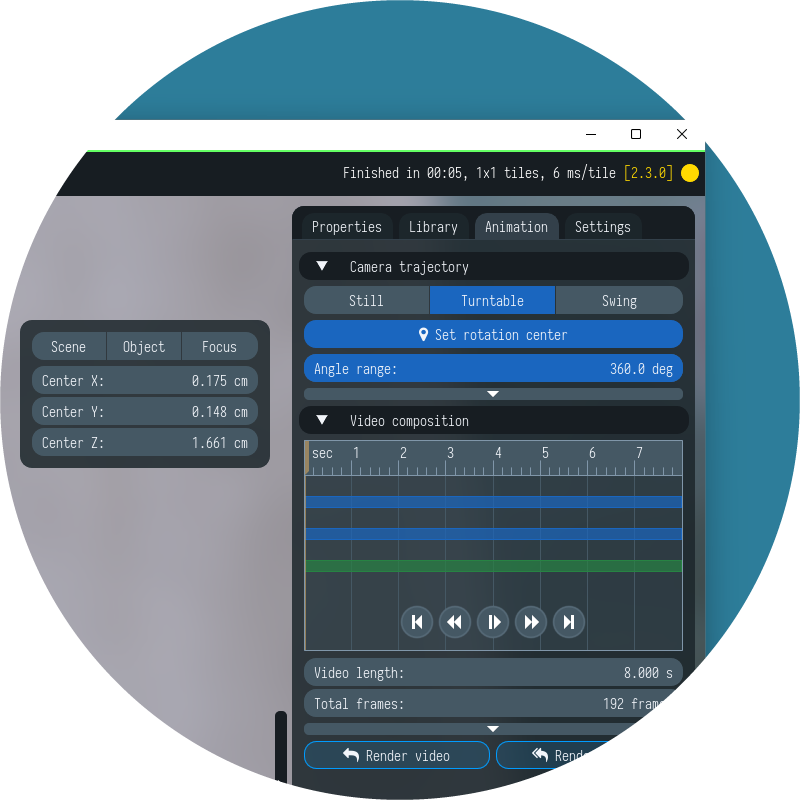
Along with character tracks, a camera's track can also be included in the timeline (see Camera trajectory). As before, two trajectory types are supported: the classic turntable path and the figure-eight path, which is well suited for product rendering. For each trajectory type, you can click the Set rotation center button to adjust the point around which the camera orbits. The rotation center can be quickly set to the center of the scene (Scene), the center of a selected object (Object), or the camera's focus point (Focus) which is the white circle appearing when you rotate the camera. Also, the trajectory center can be manually adjusted by moving it with the transform control.
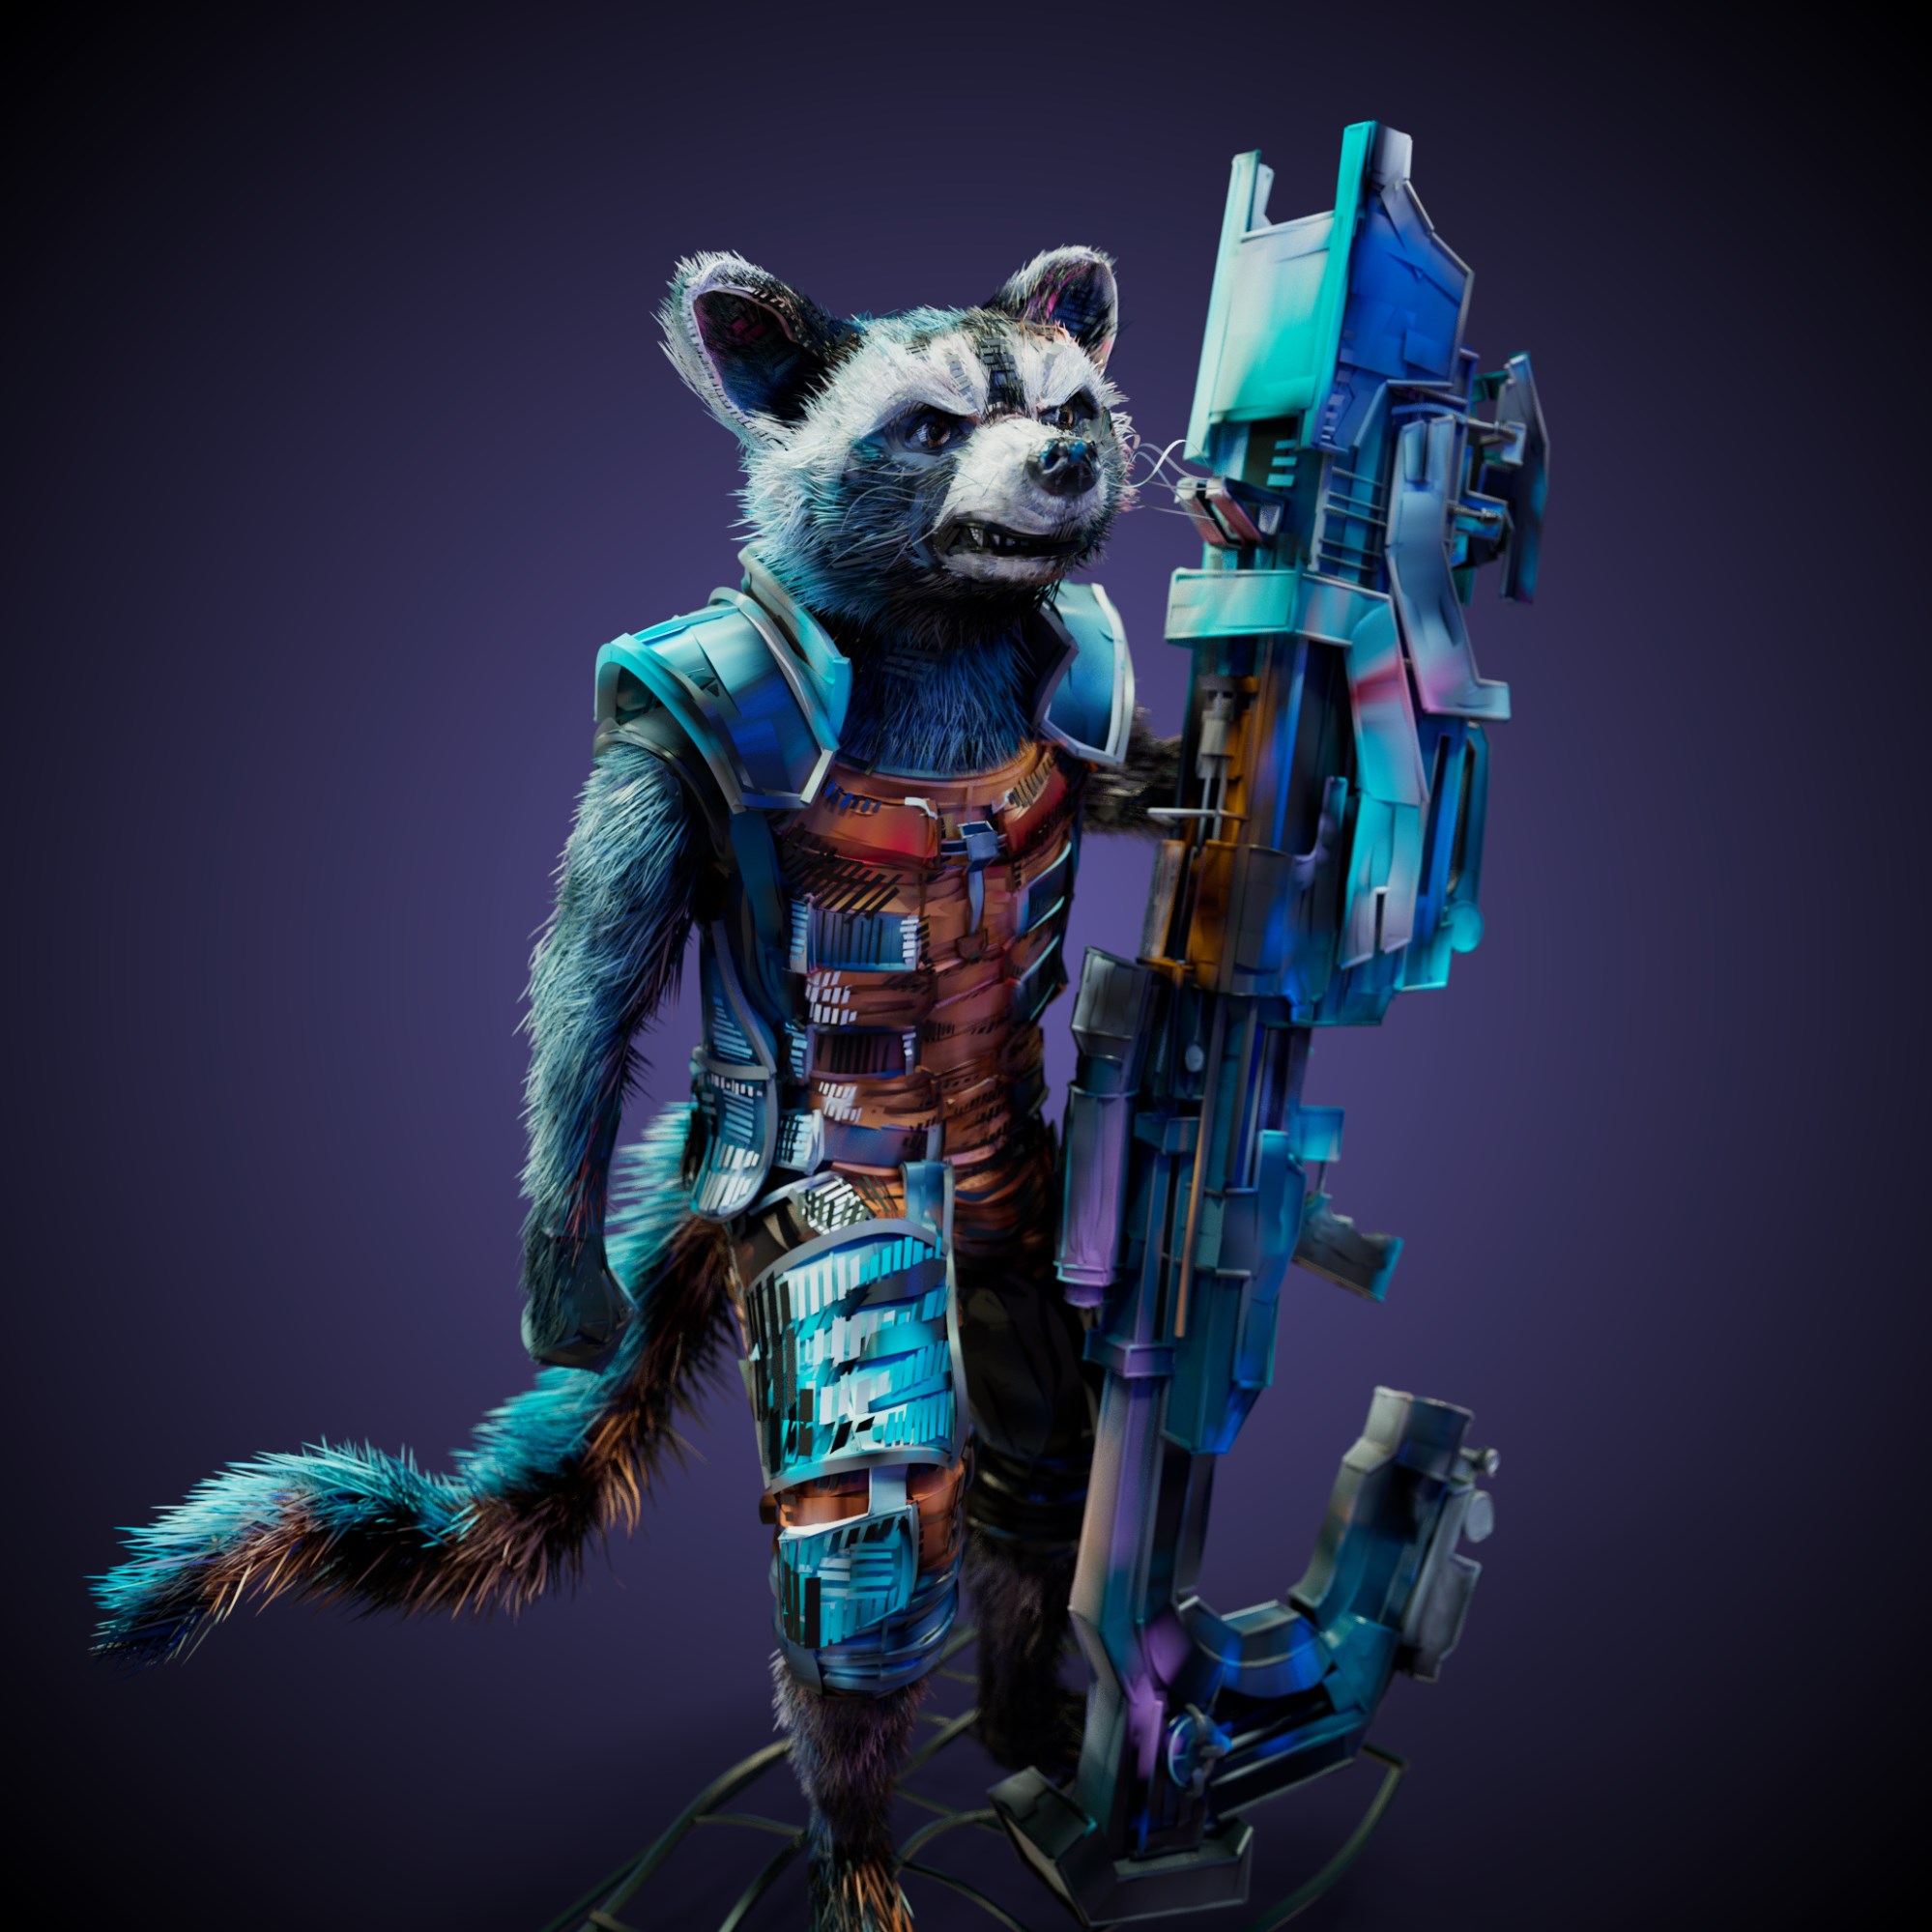
Veribot by nonlly (skfb.ly/6QYR6) and Mech Drone by WillyDecarpentrie (skfb.ly/LMro)
Vertex colors and PLY import
The new version added support for polypaint models created in software such as ZBrush. Vertex colors are loaded automatically from the glTF and PLY format which is also supported in the new release. PLY models can be loaded now in both native and web versions.
The limitation is that in Light Tracer Render, a material cannot have both vertex colors and textures. Therefore, texture maps cannot be assigned for models with vertex colors. Below, you may find a render of poly painted model made with CoolPaintr VR:
Polypaint 3D character by Apeinator (skfb.ly/6RXNE)
Minor improvements
As usual, there are many more improvements not included in this blog post but included in the release. For example, we added support for 360° Views to create panoramic shots (in the Settings tab). This feature is especially useful for car or house interior configurators, where your design can be easily presented on a website. We also updated the HDRIs library, which is now available on the Library tab. Finally, we've optimized ray tracing shaders, resulting in a 5-10% performance improvement in some scenes.
Your feedback is very welcome, as always. Feel free to ask any questions in our Discord community!