Light Tracer Render 2.9.0
We are pleased to announce the new release of Light Tracer Render 2.9.0! We appreciate your patience for this release, and we’ve packed it with features that we believe are well worth the wait.
This new release radically expands the animation capabilities, allowing you to create arbitrary movements of scene objects, environment maps, and cameras. All this is implemented uniformly and is easily accessible via the redesigned Timeline. You'll love how easy it is to make stunning animations that show off your artwork! Plus, we've redesigned the 3D manipulator, upgraded the UX, expanded the material model, and added loads of new materials. We invite you to read the details about all these innovations.
Start using Light Tracer Render today
Keyframe-based animations
The new release offers a unified approach to keyframe-based animation of scene objects, cameras, and environment maps. A keyframe is a crucial state that defines the starting or ending position of an animated object. The key parameters include things like Pivot point, Position, Scale, Rotation, and Visibility. By setting keyframes at specific time intervals, you can define the important poses or movements in an animation sequence. Light Tracer then fills in the gaps between keyframes, creating smooth movement.
Let's say you wish to bring a bouncing ball to life. Set the initial keyframe on the Timeline where you want the ball to start. Next, position a second keyframe where you want it to land. Finally, place the third keyframe on the Timeline where the ball will be after it bounces off the floor. These keyframes can be added on the Animation tab using the Plus button or ‘K’ hotkey:
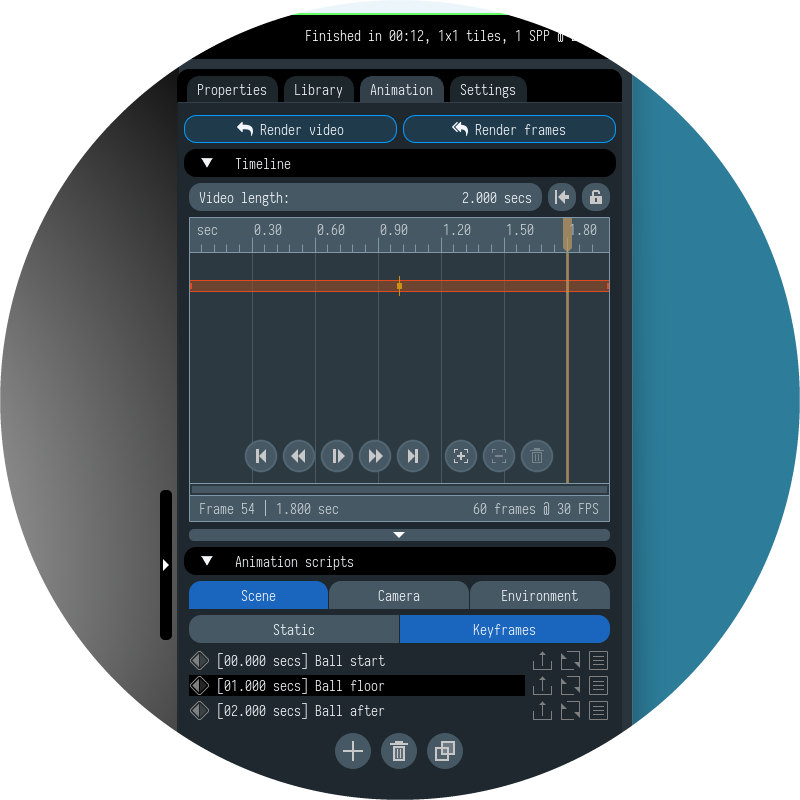
In the example above, three keyframes have been added. They are displayed both on the timeline itself and in the list of keyframes if you select the ball object. We placed them in 1-second increments, but you can drag them on the Timeline to set the desired intervals. Setting a linear time progression between keyframes would lead to an even and robotic change of ball position:
If we want to mimic natural movement well, we need to adjust easing parameters for each keyframe. The ball will ease out of the original position, then accelerate and bounce sharply off the floor, and finally ease into the final position. You can adjust each key’s easing to slow down or speed up the time at the entry or exit of the key. For a keyframe that corresponds to the landing position of the ball, we want to speed up the time on both the entry and exit, creating a bounce effect:
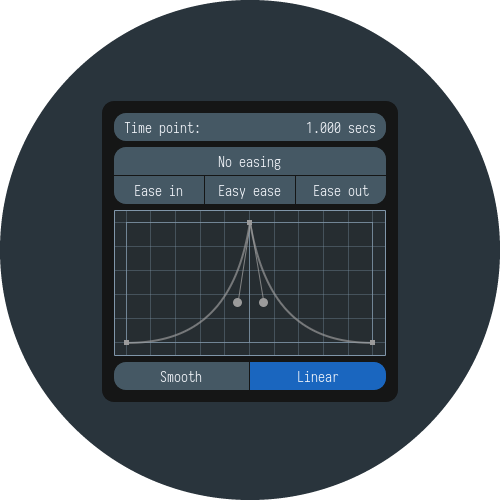
You can select multiple keyframes and edit their easing and time intervals between them all at once. There are also some widely used presets you can use to automatically set the easing curves (Easy in, Easy ease, Easy out, No easing). With the right easing settings, the ball moves much more naturally:
Along with time-easing parameters, each keyframe has a spatial interpolation parameter that can be set to Linear or Smooth. This setting affects the trajectory along which the object moves. For a sequence of Linear keyframes, a piecewise linear trajectory is constructed. If the keyframes are Smooth, then the object moves along a smooth trajectory of cubic spline. You can mix and match different types of keyframes. Light Tracer automatically switches between smooth and linear curves. Below, you can see the difference between a smooth and piecewise linear motion:
The same animation approach is now available for the camera path and environment map. For the camera, you set key points it needs to pass through. Note that lens settings like field-of-view, focus distance, and f-number are also captured by the keyframe, letting you simulate smooth focus changes with a real lens. For the environment map, keyframes capture its settings: brightness, orientation, position of the sun, atmospheric parameters, etc. Each keyframe animation, whether for objects, the camera, or the environment map, gets its own track on the Timeline. Each track is color-coded to avoid possible confusion.
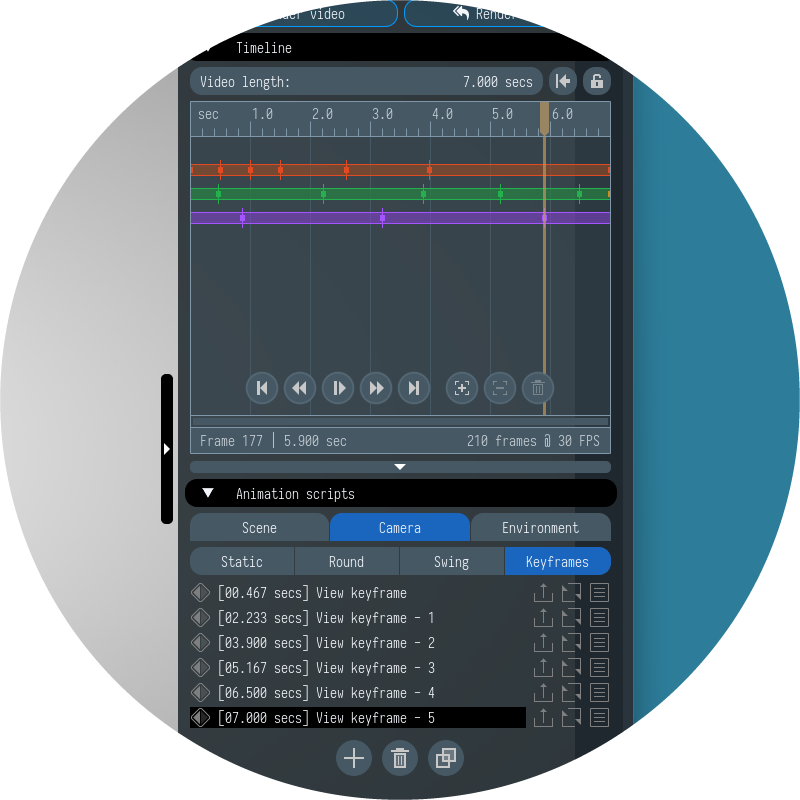
We've improved the Timeline to make editing keyframes much easier. You can now scroll and zoom with the mouse wheel or dedicated buttons. You can move tracks and keys arbitrarily and reorder them freely. By default, you can drag selected keyframes without affecting others, but sometimes you need to move keyframes without changing the time intervals for the following keyframes. Light Tracer offers a special mode for this, activated by a lock icon next to the Video length control. Give this mode a try – it's easier than it sounds. Don't forget to use the 'Space' key to play and stop the animation. This makes setting up a video much easier!
Baked animations management
As we plan to expand the capabilities of physics simulations in the future, this release makes some long-term changes. We've moved captured physical animations into their own category. Now, they represent the motion of all dynamic objects in a scene and not tied to individual ones. After recording the simulation, you will see a new global take in the Physics takes tab. To add it to the Timeline, select it and click the Plus button:
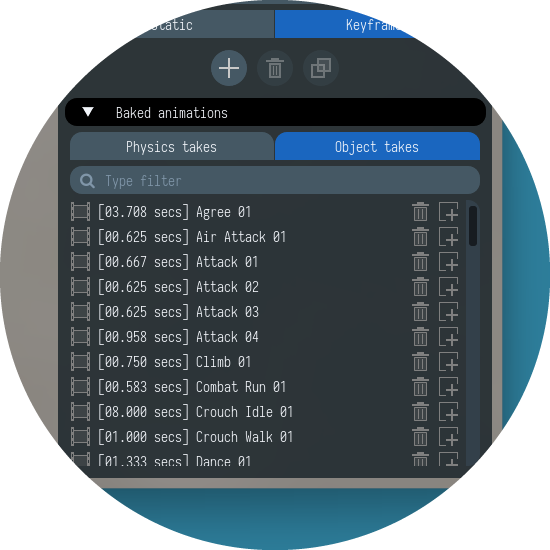
The transformations from baked animations are separate from those set by keyframes. This lets you freely combine baked animations with keyframe-based ones. For instance, you can take a character walking in-place and use keyframes to move it around the scene.
New 3D manipulator
The latest update introduces a new 3D manipulator that aids in setting animation keyframes. First, the new manipulator lets you move, rotate, and scale objects without changing modes:
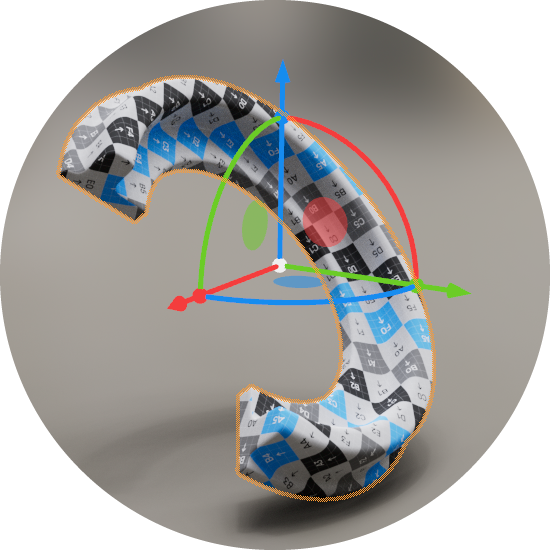
Secondly, it allows you to not only set object orientation but also keeps track of the exact number of turns. And this becomes fundamentally important for setting keyframes. Let's say you want the object to make three full turns (360° ✕ 3 = 1080°). You only need two keyframes for that: one for the start and one after three turns around the axis. Even though these two positions look the same, the object will rotate three times as it moves from start to finish.
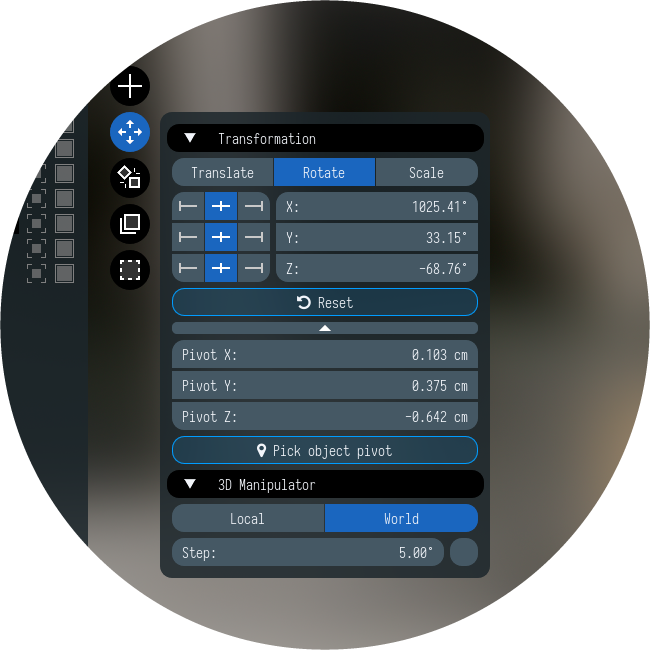
We've introduced significant changes to the Transform widget as well. You can now set rotation angles freely, both positive and negative, in any range. Also, it is possible to set a custom pivot (anchor) point for transformations like rotation and scaling. You can use presets for 'left', 'center', or 'right' positions along each axis, set coordinates manually, or pick a point on the object using the Pick object point button. You usually want to rotate a part around a specific point or axis. For example, the lid of a box needs to be rotated relative to the hinges. Therefore, setting the pivot point is fundamentally important.
Improved materials
Along with the animation workflow changes, the new version offers an extended material model. Firstly, the Principled material now has a new Diffuse transmission parameter. Along with Opacity, it has been moved to a separate Transmission group:
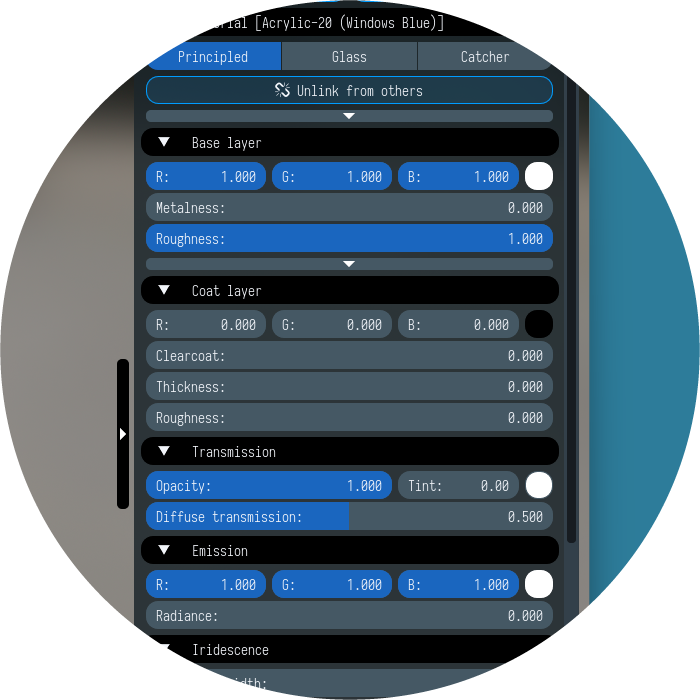
Diffuse transmission helps model materials where light is scattered diffusely to the other side of the surface, such as foliage, paper, rough transparent plastic, curtains, etc. Such kinds of materials don’t exist in pure form, so this model should be combined with normal diffuse reflection. Setting this parameter to 0.5 means that diffuse scattering will consist of equal parts reflection and transmission. 0.0 means total diffuse reflection (the default value), while 1.0 means total diffuse transmission. Typically, you would need about 0.5 Diffuse transmission to simulate realistic materials. Below, you can see the clear difference between the two scenes. The foliage on the right was rendered with 0.5 Diffuse transmission:
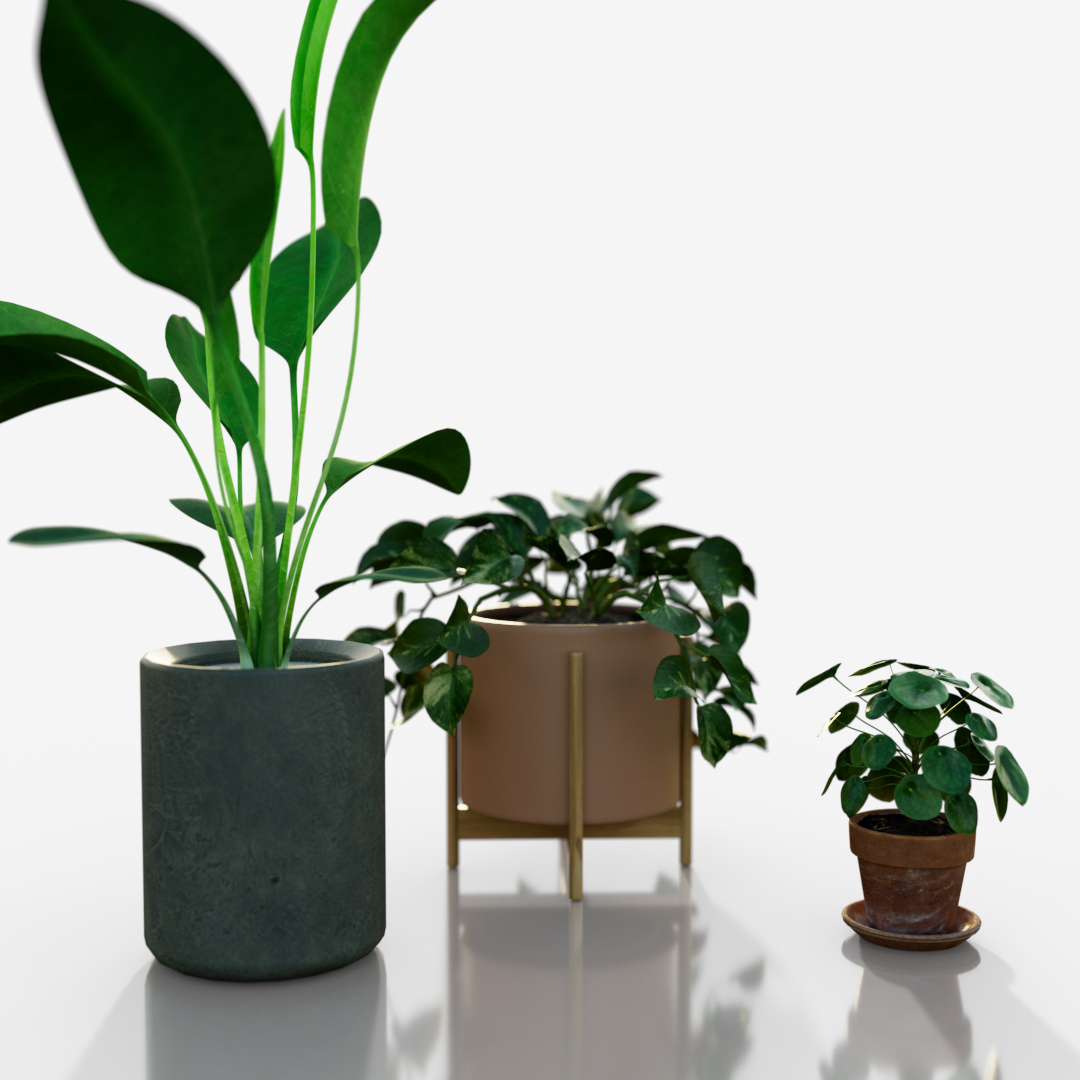
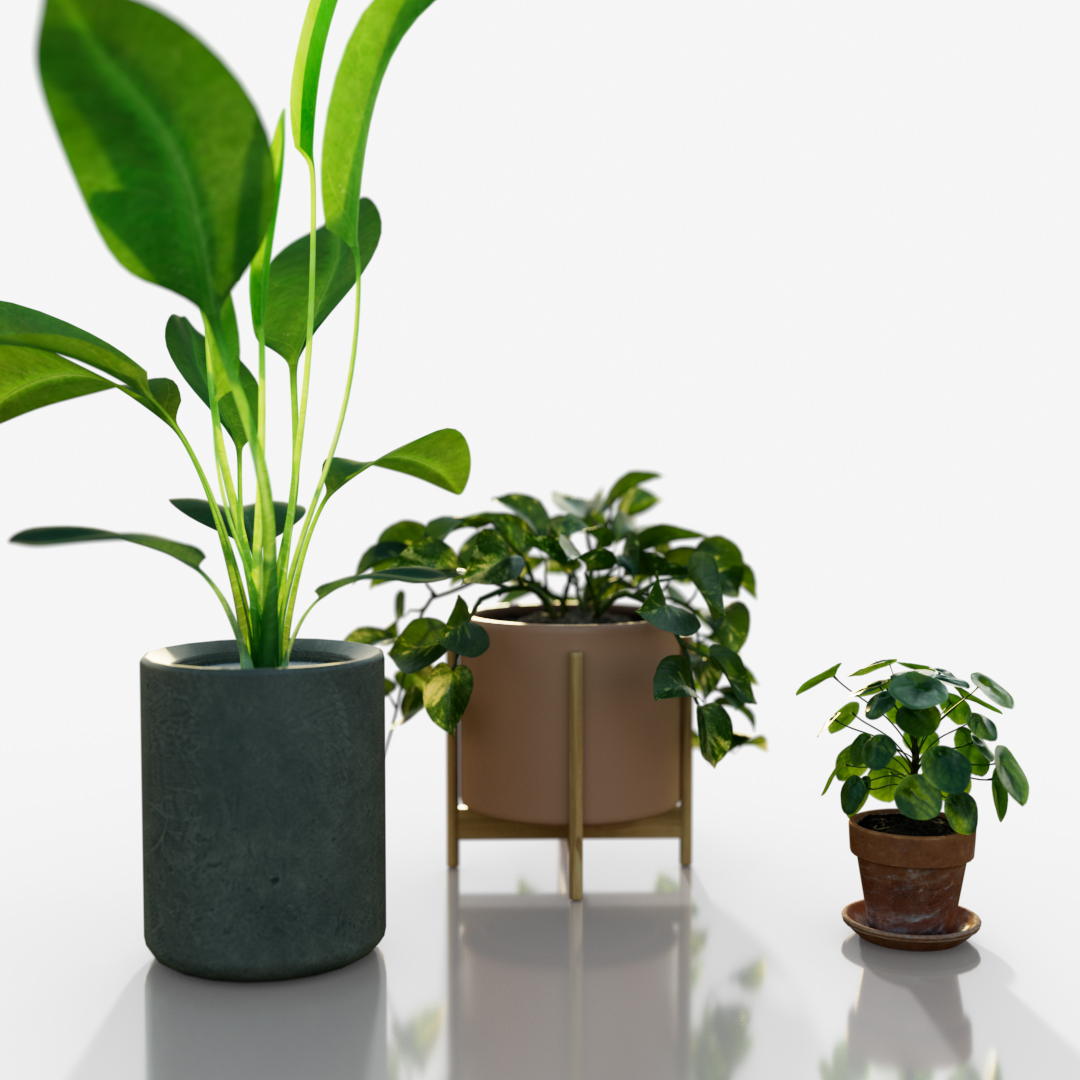
Another new feature is a combined catcher for both reflections and shadows. You can set the reflection amount using the new Reflections parameter. A value of 0.0 gives you a pure shadow catcher, and 1.0 gives you a pure reflection catcher. Now, you no longer need to combine these two catchers manually with external tools. By the way, for the renderings above, a 0.5 Reflections value was used for the catcher.