Light Tracer Render 3.0
We're happy to announce a major milestone in Light Tracer Render's evolution! After an incredible journey of innovation and development, we've completely reworked our rendering core from the ground up. This new foundation isn't just more powerful – it's built to be flexible and cross-platform, paving the way for exciting developments to come.
The new rendering core harnesses cutting-edge 3D APIs including Vulkan for Windows and Metal for macOS, with a WebGPU version on the horizon (for modern web browsers). One of our most exciting additions is full support for hardware ray tracing, allowing you to tap into the impressive capabilities of the latest NVIDIA and AMD GPUs. Don't have an RT-capable card? No problem – we've ensured full compatibility with all graphics cards.
This release marks just the beginning of what's possible with our new architecture. We've already implemented numerous improvements and enhancements (detailed below), and we're seeing fantastic performance gains. Better yet, we're preparing to roll out even more of your most-requested features in upcoming updates. Stay tuned – the best is yet to come!
To celebrate this milestone and thank our community for its ongoing support, we’ve made this update as widely accessible as possible. For existing subscribers, version 3.0 is now automatically available. Perpetual license holders can upgrade to 3.0 at a 50% discount — no promo code required. The discount will apply automatically when using the upgrade link on your account page. Additionally, all Perpetual licenses purchased after December 1, 2024, are already upgraded to version 3.0 at no extra cost!
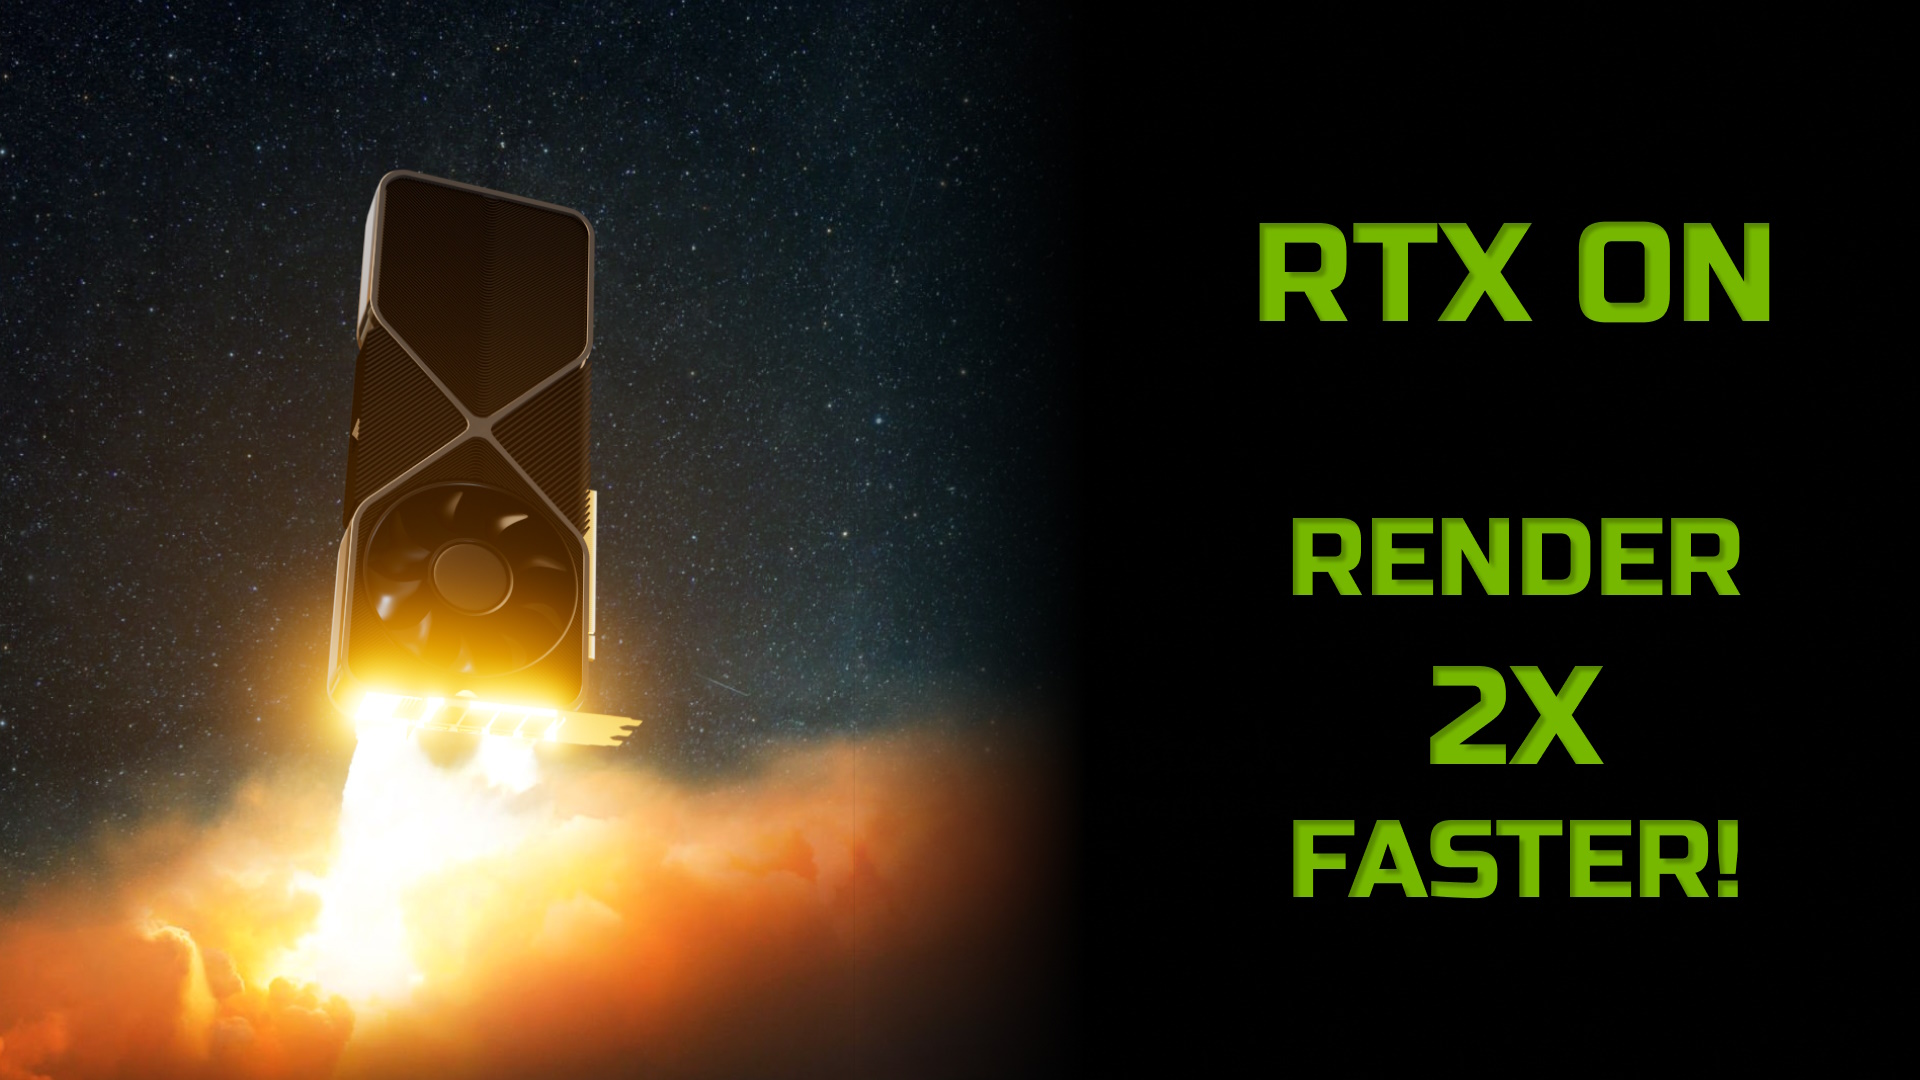
Hardware ray tracing support
The new version features a completely redesigned rendering core, including the ray tracing system itself. Light Tracer Render will support a wide range of hardware for years to come, thanks to its adoption of the latest cross-platform 3D APIs. Most importantly, it now supports RT cores found in modern graphics cards. Let's explore this technology and see what benefits it brings.
As you may know, modern GPUs contain thousands of general computation cores (AMD Compute Units or NVIDIA CUDA Cores), though they're not quite as "general-purpose" as the name suggests. These are compact, specialized processors that handle pixel shading and other visual effects. Until now, Light Tracer relied exclusively on these cores for image calculation.
NVIDIA has made ray tracing a priority, launching their RTX graphics cards with dedicated RT (Ray Tracing) Cores in 2018. AMD followed suit in 2020 with their RX 6000 series. AMD's approach uses Ray Accelerators, which are integrated into the architecture to enhance ray tracing performance of their compute units. This development gave us RT-capable hardware from multiple vendors and cross-platform 3D APIs to utilize it. But what does this mean in practice?
Interestingly, the actual ray tracing code in any comprehensive rendering engine is relatively small. While ray tracing is complex in principle, it requires minimal code. The majority of the codebase handles materials, light sources, render logic, sampling, and related functions.
Ray tracing remains computationally demanding, typically consuming about half of the total render time, though this varies by scene. Some scenes are more demanding in terms of maps and materials, while others are more ray-tracing intensive. As you might expect, RT cores only accelerate the ray tracing portion of the calculation, not all the algorithms involved in image synthesis.
But let's move on to the practical results! Here are benchmark scenes showing the performance improvements across different graphics cards:
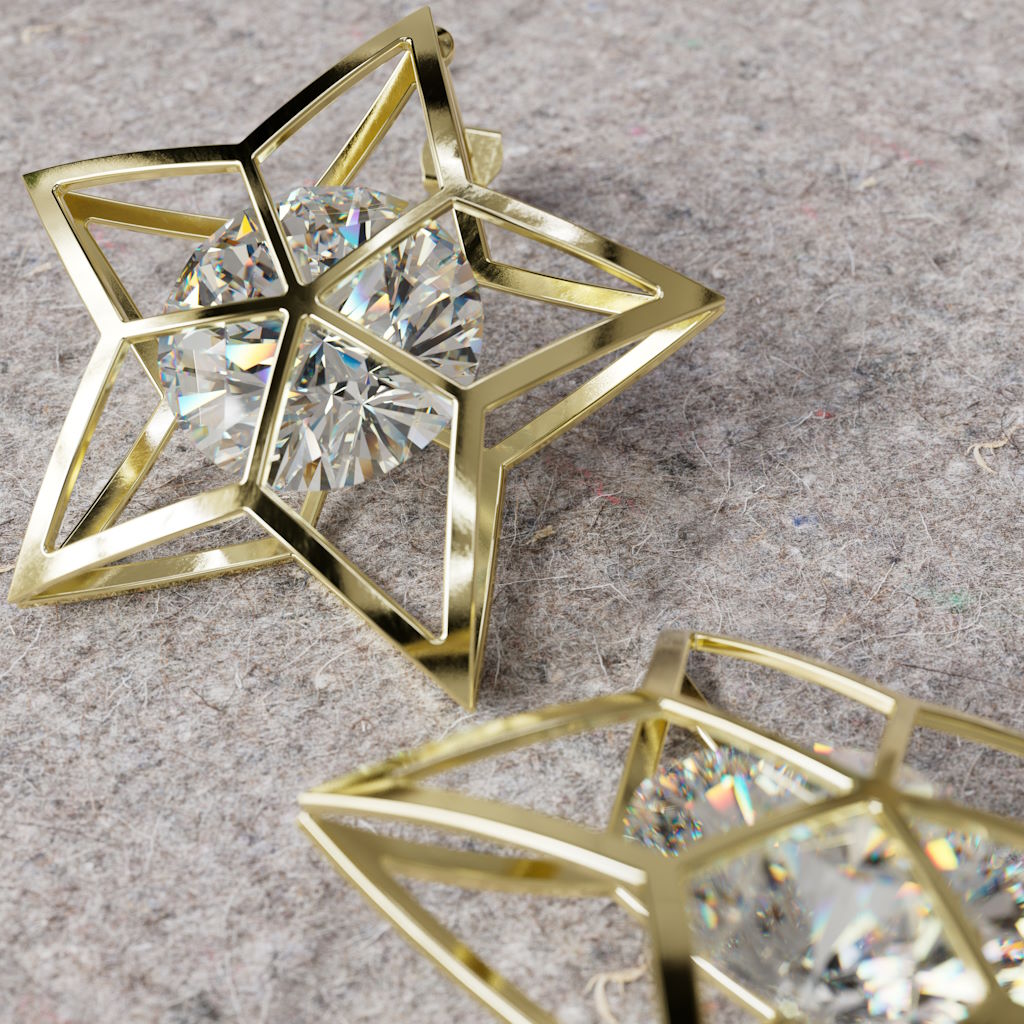
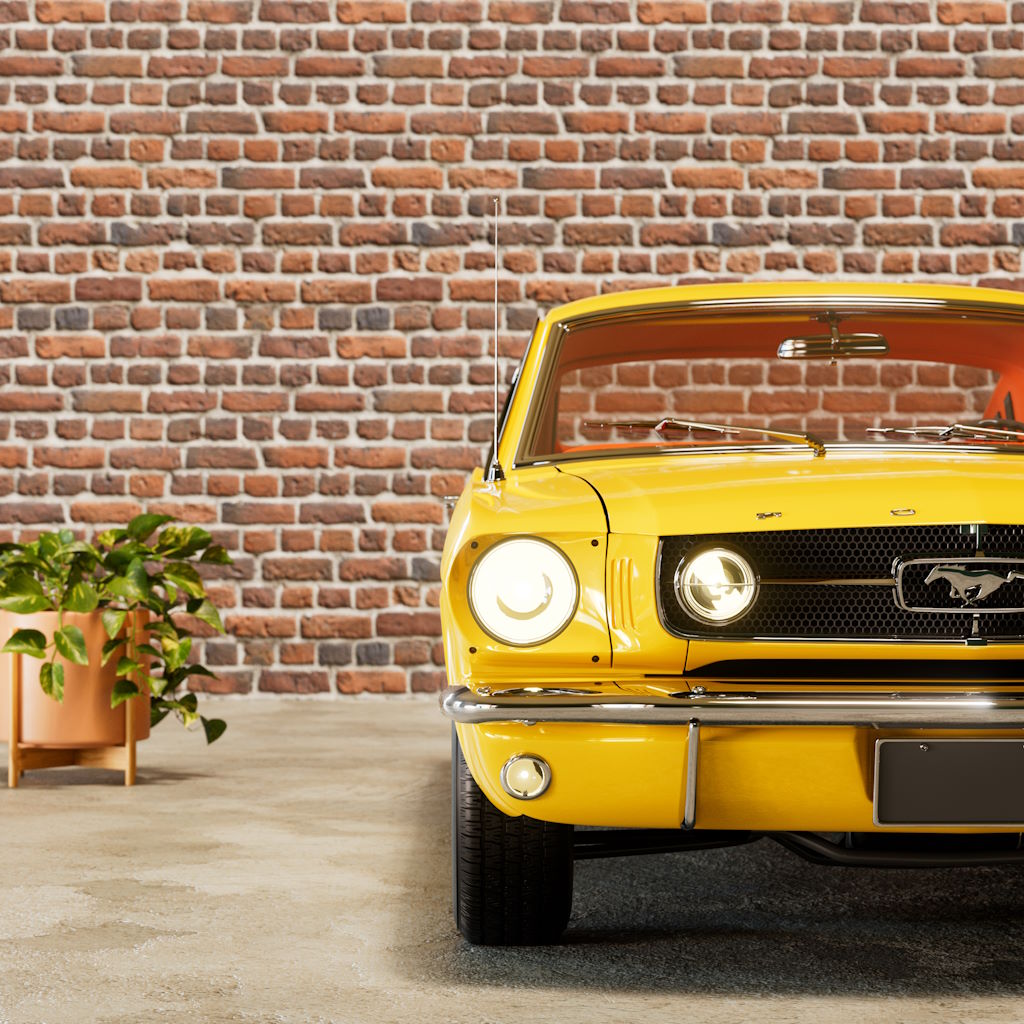
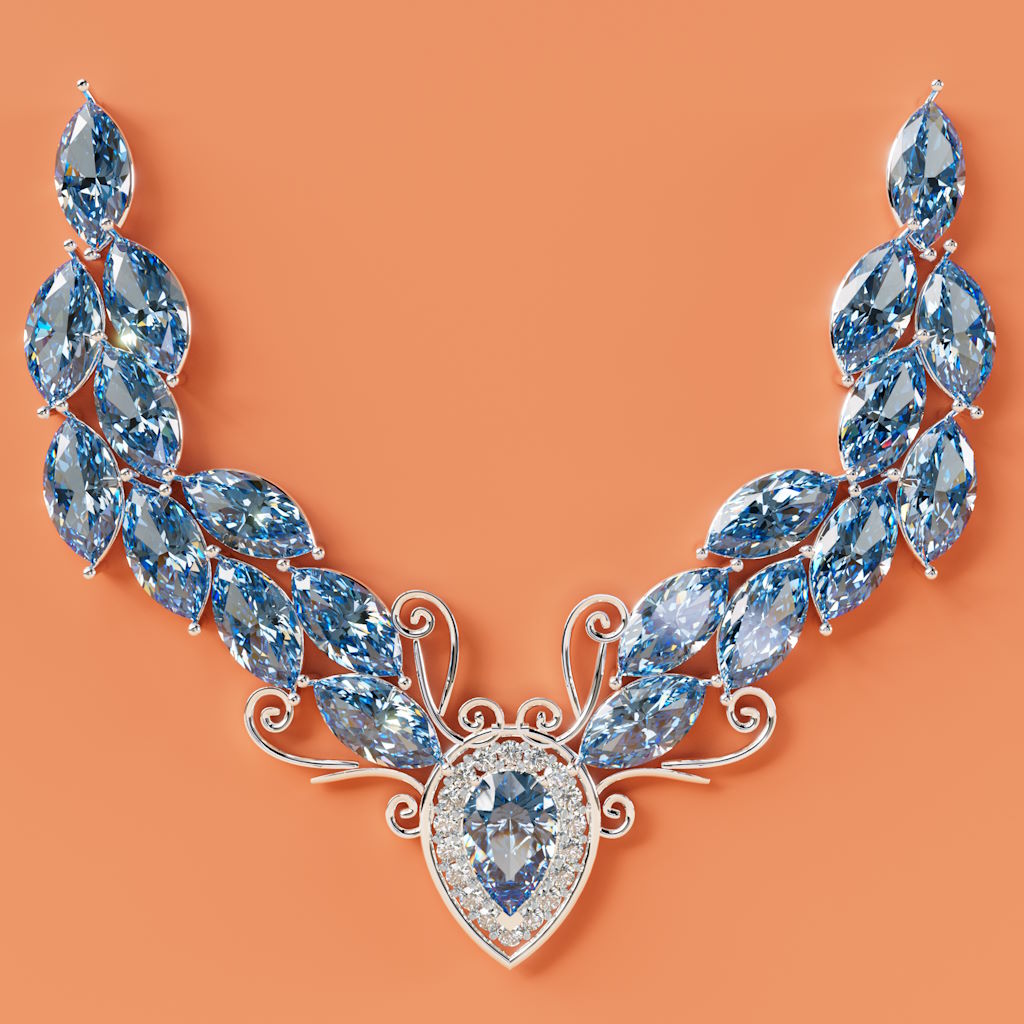

And here you can see the gains for NVIDIA and AMD GPUs (specific card models are not important; the gain factors will remain approximately the same):
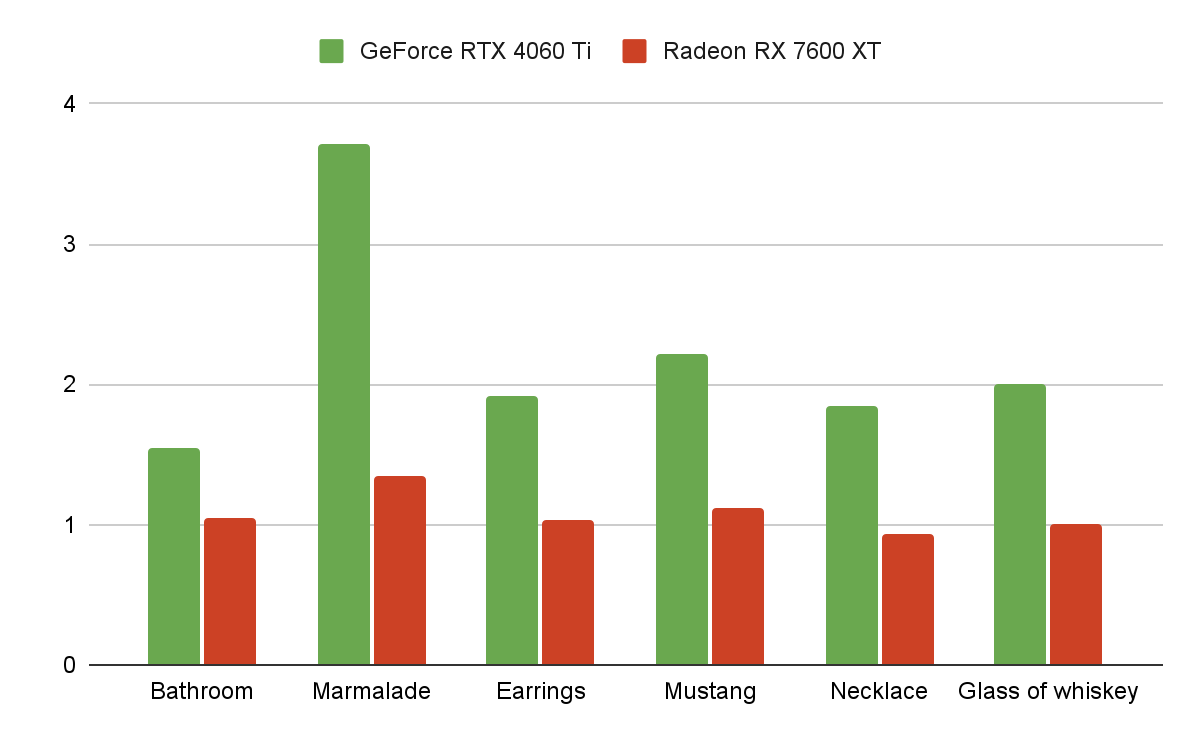
NVIDIA cards (GeForce RTX 2000 series and newer) show the most dramatic improvements from hardware ray tracing, with rendering speeds increasing by an impressive 2-3 times! AMD's ray tracing support is more recent, and currently only Radeon 7000 series owners can see some performance boost. At the moment, we can state that AMD’s hardware ray tracing is not very benefitial, and highly optimized software implementation in Light Tracer provides approximately the same speed. While AMD currently trails NVIDIA in ray tracing performance (as seen across modern 3D games), the upcoming Radeon 8000 series, featuring the new RDNA 4 architecture, promises significant improvements. We're looking forward to testing these new cards and sharing the results with you.
Improved image-based lighting (IBL)
Keyframe animation of map lights
In the last version, you could animate various parameters of the environment mapping, but the light sources didn't move. The new version fixes this while keeping the same animation approach. You activate the environment animation track and then add keyframes corresponding to the pivot positions of the lights (just like for other IBL parameters).
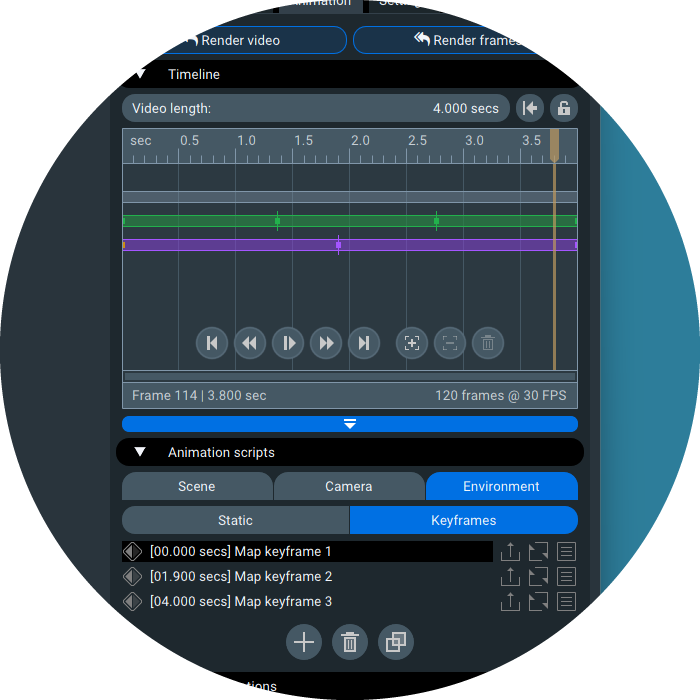
Based on this data, Light Tracer constructs a continuous path for the lights' movement. Below, you can see a combined animation of map lights, camera, and physics-based motion.
By the way, you can animate not only the movement of lights over the map but also their color, temperature, power, size, and other parameters available in the Properties tab. Additionally, you can turn the lights on and off during the animation (this setting is available in the Scene Explorer tab).
Adjusting resolution of environment map
Before, Light Tracer automatically picked the internal resolution of the environment map. This was done to show both the environment map and light sources drawn on top of it with reasonable quality. Sometimes, though, the resolution wasn't enough to show some details clearly. In the new version, you can set the preferred resolution of the HDR image manually:
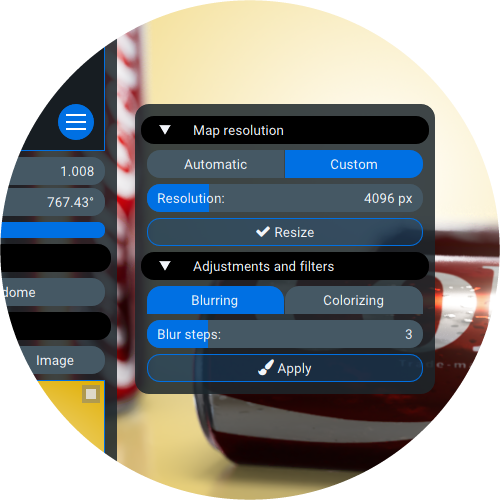
To change the map resolution, switch to Custom mode, set the desired size in pixels, and click the Resize button. As before, basic HDR image filters are available in the same window below: a special blur for spherical maps and converting to a monochromatic image.
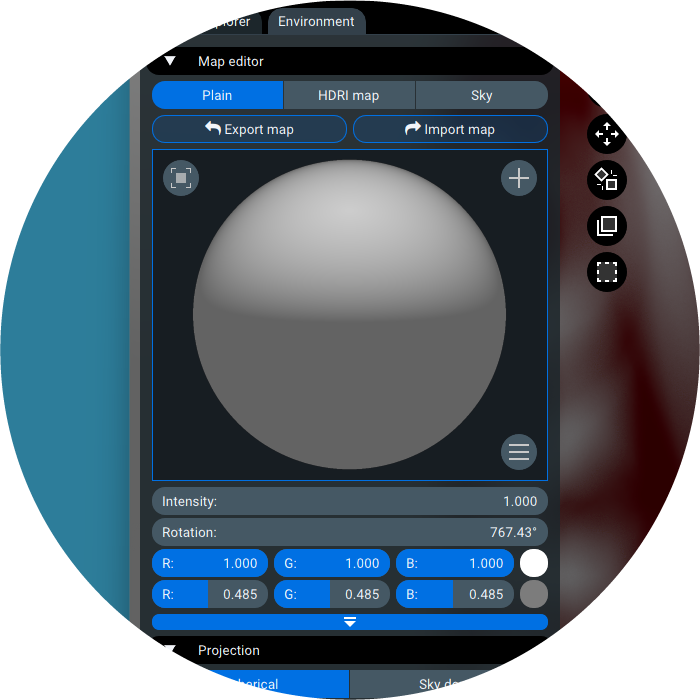
Gradient environment mode
There's a new feature that's pretty useful — you can now create a gradient environment map. In Plain mode, you can adjust the color at the top and bottom of the environment. By itself, such a map creates very uniform lighting, but it's a good basis for custom studio lighting. You can open the Library | Lights tab and drag HDR light presets from it onto the scene.
These settings can also be animated by adding keyframes to the Environment track (in the Animation tab).
Improved usability
The lighting setup is now more user-friendly. A Plus button has been added next to the Chrome-ball preview, allowing you to instantly add a new light (as shown in the screenshot above). To its left, you’ll find a toggle button to show or hide all added map lights in the camera view — though they’ll remain active and continue illuminating the scene. With the latest release, dragging-and-dropping light presets from the Library tab has also been streamlined: when placing a preset, the light automatically positions itself so its highlight lands directly over the spot where you release it.
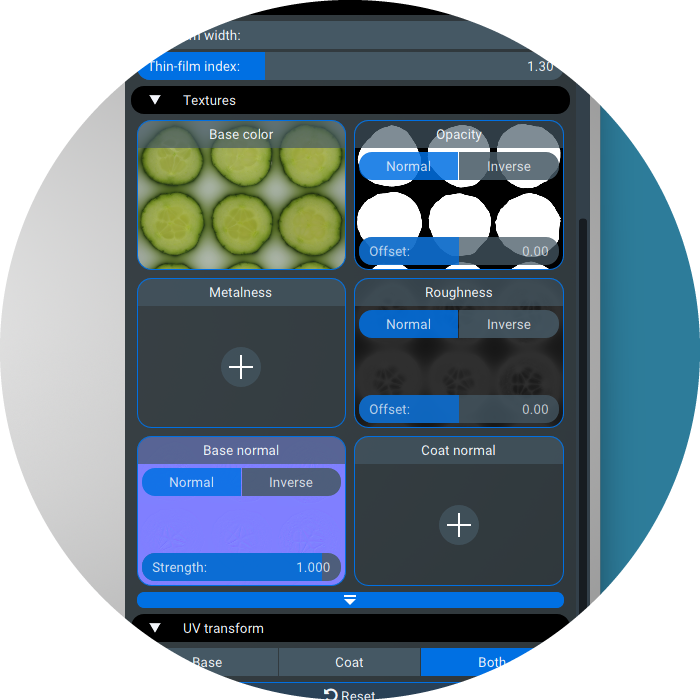
Improved texture mapping
The Properties tab now includes powerful new tools for working with texture maps. You’ll find expanded control over most texture types — such as adjusting the value offset or inverting maps — features particularly useful for refining transparency and surface details. These adjustments now update in real time, allowing you to see their effects directly on the texture previews. All settings are conveniently positioned above the previews, ensuring quick access and effortless fine-tuning.
The Reflection catcher has been upgraded again. Now you can also set Roughness and Normal maps for it, just like you would for a regular material:
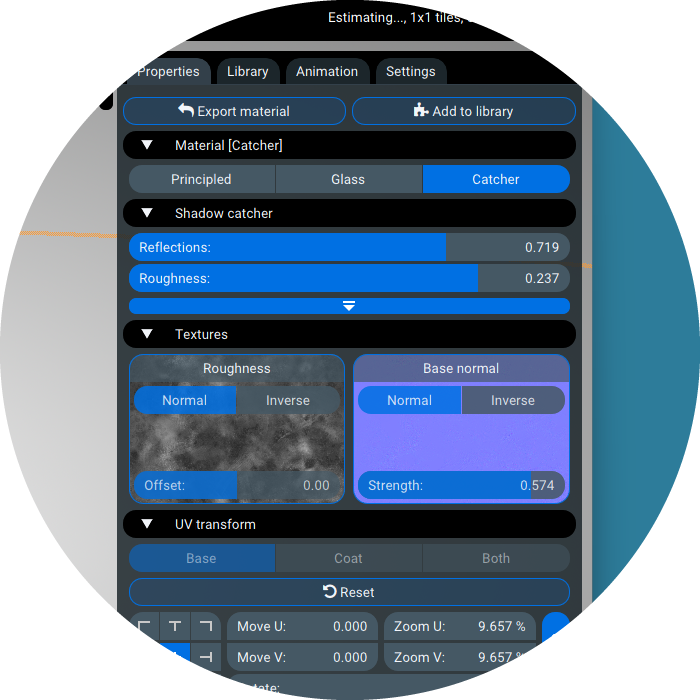
This opens up new creative possibilities and allows you to create surfaces that reflect light in interesting ways. Don't forget that you can combine reflection and shadow-catching surfaces by varying the Reflections parameter in the Properties tab.

Improved physics simulation
You might already know that Light Tracer Render’s physics engine lets you simulate object interactions for realistic placement and even record animations. The catch? It can’t handle completely random shapes — instead, objects need to be approximated using sets of convex hulls. Earlier versions used a popular industry library to create these hulls, but the setup took ages (it was often a huge roadblock for using physics). Now, we’ve developed our own super-fast hull-building method, and it’s a total game-changer. Prep time has improved massively — now taking under a second in most cases! This opens up tons of new ways to use physics simulations without the wait.
Next-gen AI denoising
The latest version offers GPU-accelerated AI denoising, based on the state-of-the-art Intel® OID library. The library supports GPUs from different vendors, including NVIDIA, AMD (RDNA 2 and RDNA 3 architectures), Intel (Xe and Xe2 architectures), and Apple silicon graphics (M1 and newer). You'll be amazed at how much faster denoising has become!
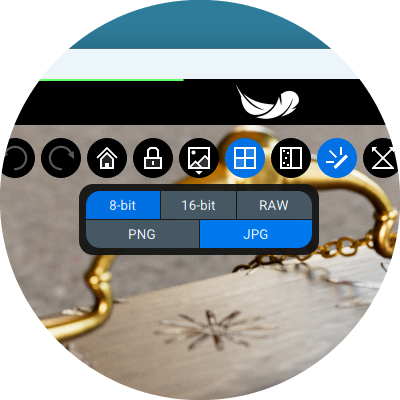
Improved image export
We have reviewed the capabilities of exporting renderings to various image formats. We've stopped saving 16-bit PNGs because they took forever, and there's no point in keeping them around. PNG, like JPG, is now 8-bit and is written very quickly. If you need to export a 16-bit image, you can now use the PSD format. We've also redesigned the export dialog, which lets you easily browse through different formats and pick the best one for the job:
General improvements
Refreshed look & feel
We've given Light Tracer Render a bit of a makeover, and we're excited to share it with you! We've tweaked the layout of the widgets to streamline things and make it more user-friendly. We've also touched up the fonts, icons, tips, animations, names of some buttons, etc. We hope you enjoy the updated and more contemporary look of the app.
Better numerical controls
You can now use simple math expressions in Light Tracer UI controls. If you want to transform the current value using a simple formula, just type the corresponding expression: for example, instead of "123.0", you can enter "123.0 + 2.0", "123.0 - 1.5", "123.0 * 17.0", or "123.00 / 5.5".
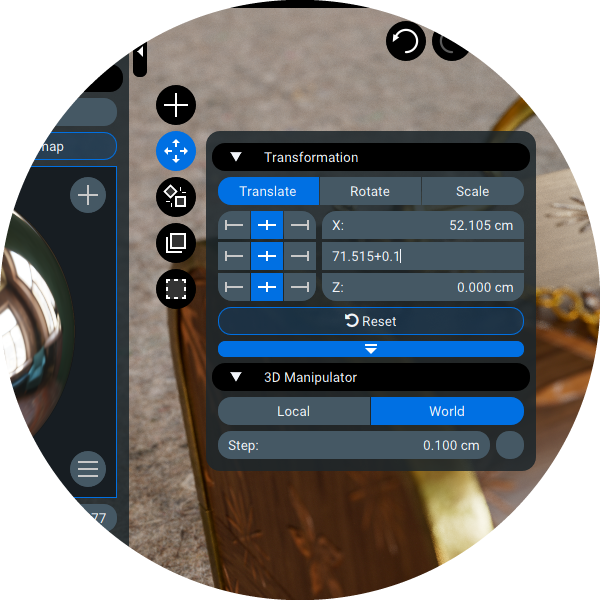
This can be useful for placing objects on a grid, keyframe animation (e.g., rotating by +360 or +720 degrees), and other operations when you know exactly how much you want to change the current value.
Input adjustments via drag controls have been significantly improved. To modify values incrementally, simply hold the left mouse button and drag horizontally—left to decrease or right to increase. Additionally, it now supports continuous adjustments beyond screen boundaries, eliminating the need to repeatedly reposition the cursor during adjustments. This streamlined workflow ensures precise control over parameters without interruption.
New settings window
The new version has some advanced Settings that you can access via the burger menu in the upper left corner of the window. The settings are divided into logical groups. First, you can select the Rendering backend that will be used for ray tracing (if you have a compatible GPU). Software RT is an optimized software ray tracing used by previous versions of Light Tracer. Hardware RT is a new implementation that uses the RT cores that we discussed above. By default, Light Tracer itself chooses the most suitable backend, but you can change it (for example, to evaluate what kind of gain you get from using hardware ray tracing).
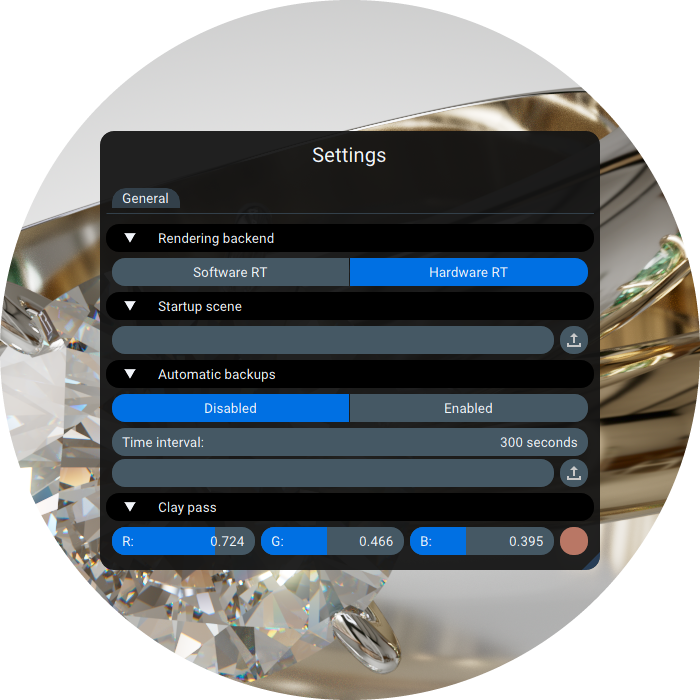
The next setting allows you to set the path to the Startup scene, which opens when the program starts. You can use this scene as a preset, in which lighting, backplate, cameras, standard materials, and much more are configured.
Next is a block of Auto-save settings, which are now officially supported. You can set a path to a folder where intermediate states of your scene will be stored. That helps if Light Tracer app was terminated incorrectly for some reason. You can also set the Time interval in seconds at which auto-saves will be performed.
Finally, in the last section, you can set the color that all materials in the Clay pass will be painted (passes are selected next to the main menu in the upper left part of the screen).
Hopefully, the new Light Tracer Render update will help you create even more stunning images of your 3D projects, and you'll get there way faster. We're always listening to your feedback, so don't hesitate to share your thoughts. If you have any questions, our Discord community is always open to chat.