Tutorial: Basic UI
This tutorial is designed to introduce you to Light Tracer Render
This tutorial covers the basic principles of working with Light Tracer Render, including importing 3D models, setting up the camera view, adjusting the HDRI environment map, assigning materials, and exporting the rendering result. The instructions below apply equally to the native and web versions of Light Tracer Render.
Start using Light Tracer Render today
UI overview
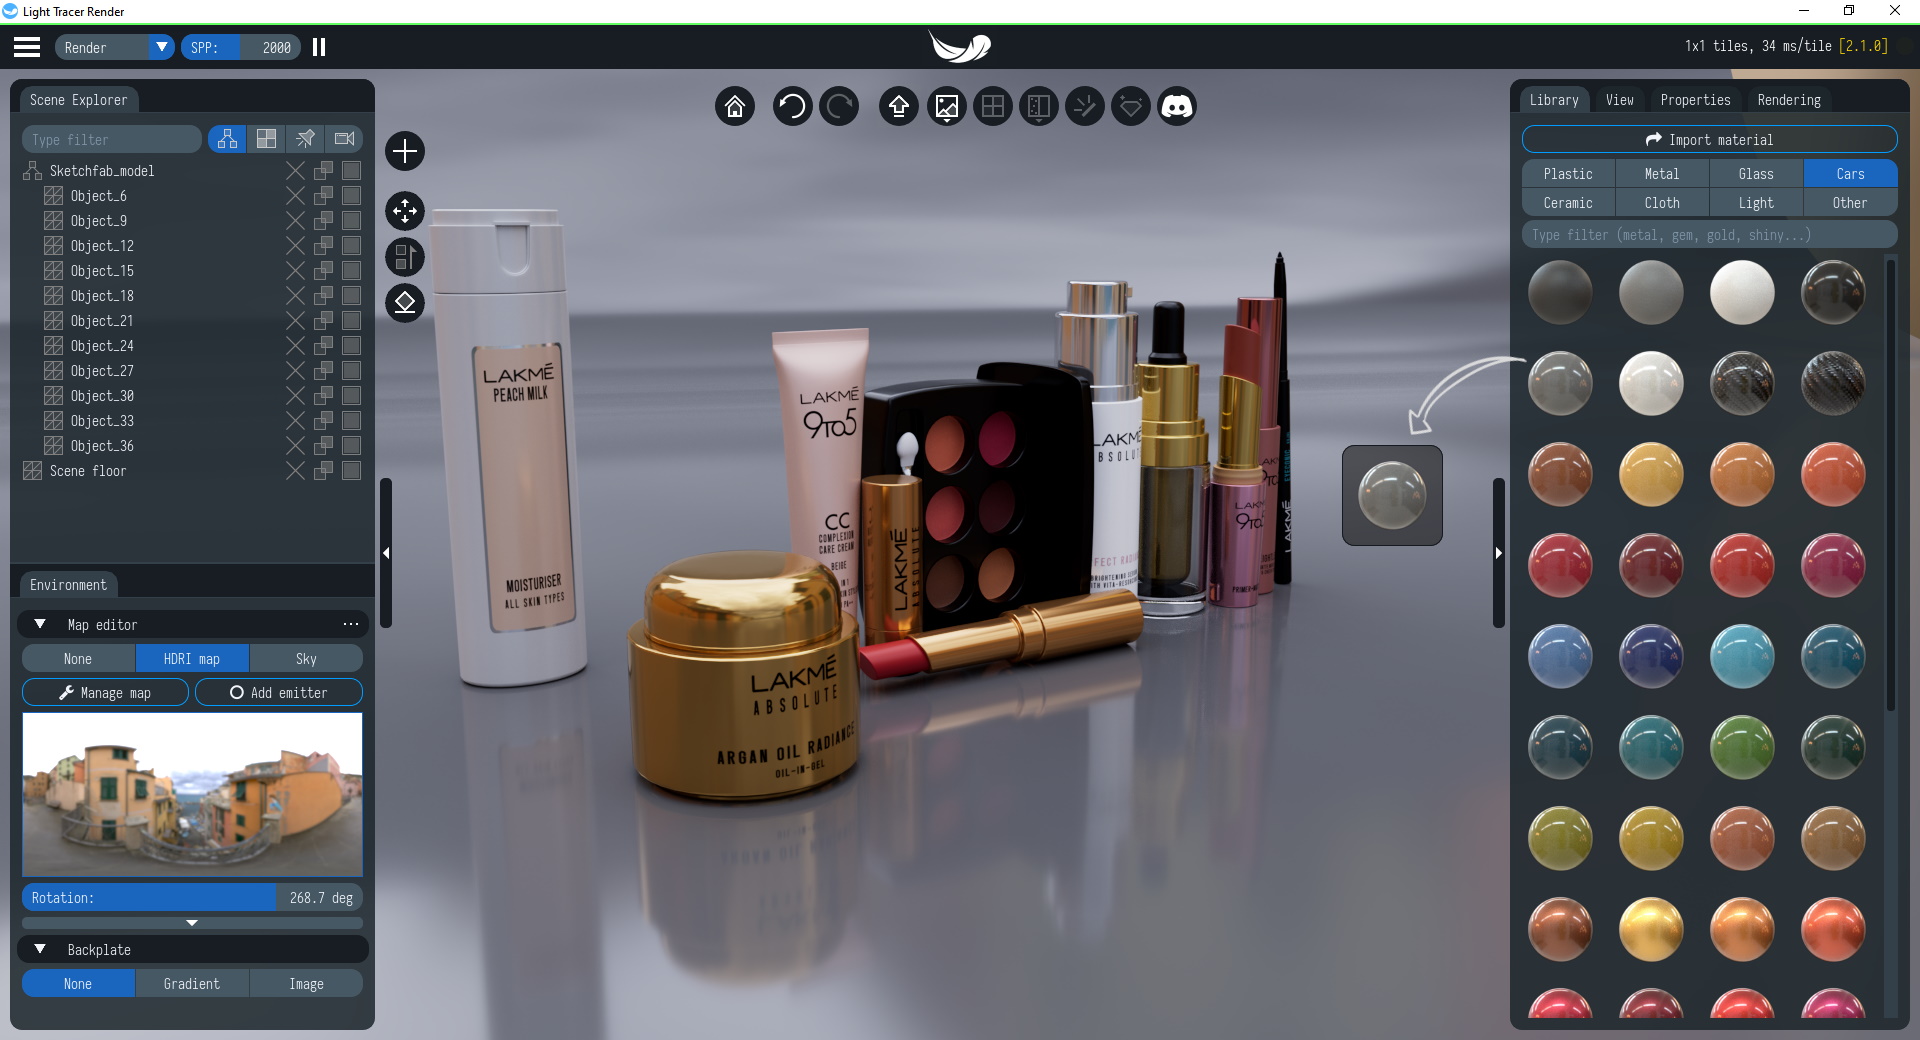
Let's start by importing a 3D model. The easiest way is to drag the model file into the Light Tracer window. To get started, you can download some models from Sketchfab, where you may find a lot of great artwork. We liked the cosmetics model (https://skfb.ly/oqPRn) by The Motion Tree. The zipped glTF file downloaded from Sketchfab can be dragged into Light Tracer directly, and you don't even have to unpack it. Along with this, Light Tracer supports import from 3D file formats such as OBJ, STL, FBX, DAE, VOX (MagicaVoxel), and CAD formats like STEP, IGES, 3DM. As you drag the model, an import dialog opens where you can select settings, such as the vertical axis used by the model:
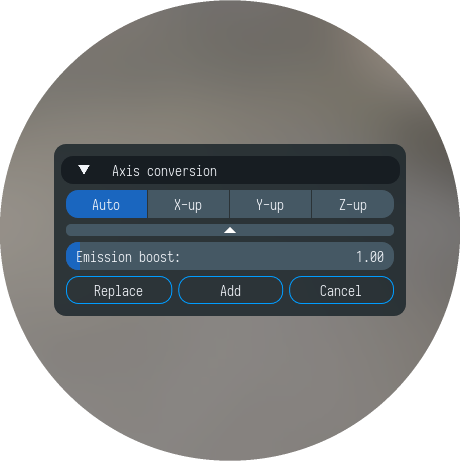
The Auto parameter means that Light Tracer will use the default axis corresponding to the selected format (for example, for glTF this is the Y-axis). There are some settings specific to a particular format. In the case of glTF, you can set the Emission boost parameter, which allows you to increase/decrease the brightness of all glowing objects in the scene. Typically, you may want to boost their brightness 3-5 times for more realistic results. After the import is complete, we will see our model:
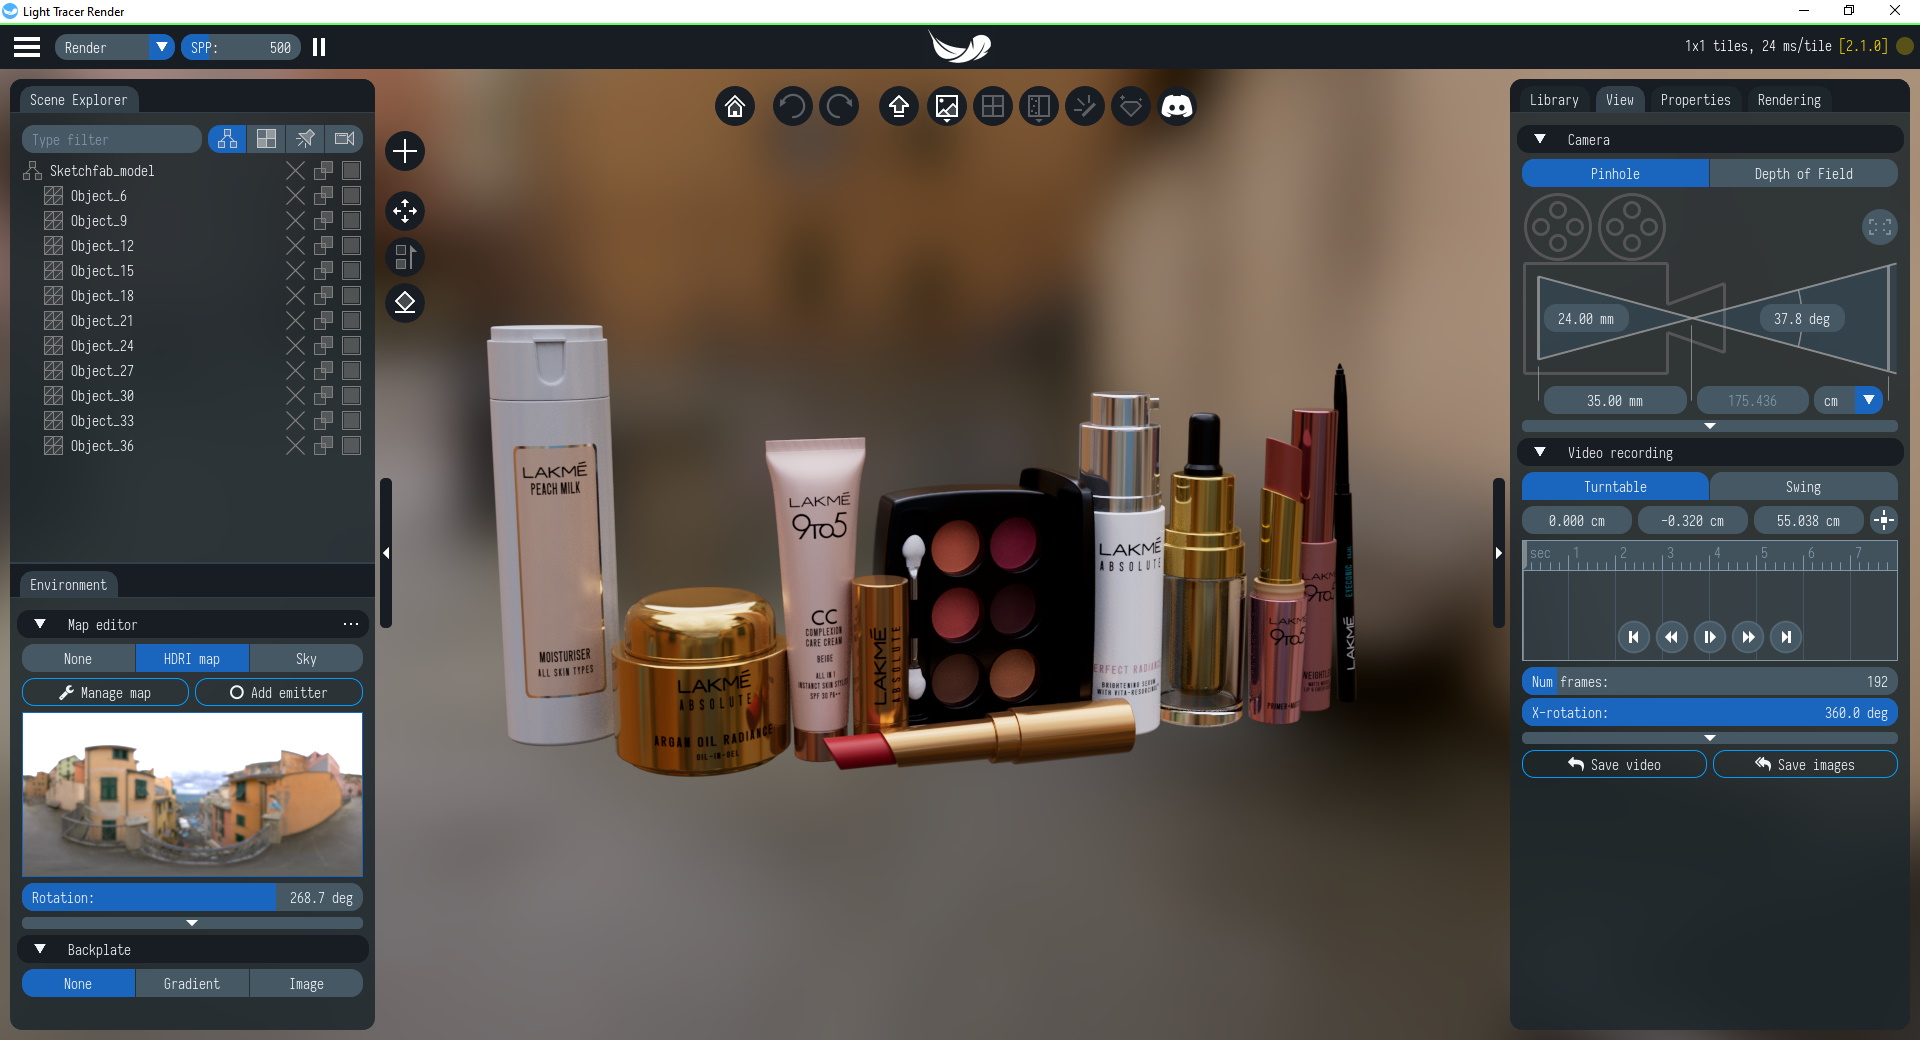
Let's take a quick look at the UI. At the top border of the window, you may see a green progress bar. It shows the readiness of the final render. You can increase the number of samples (SPP) to improve the quality of the render (reduce the noise). In physically-based renderers using path tracing as a visualization algorithm, this parameter is controlled by the user and adjusted depending on the scene, more precisely, on the complexity of the lighting. The more complex the lighting (scenes dominated by indirect illumination and/or caustics), the more SPP we need to achieve the noise-free result. To the left of the SPP field, there is a dropdown menu allowing to switch the render pass to display (Render, Normal, Albedo, Depth, Index). For example, if you choose Normal pass, the normal map will be displayed in the viewport instead of the final render. Render passes are useful for post-processing the rendering in image-editing software. For example, they can be used as masks for applying desired effects.

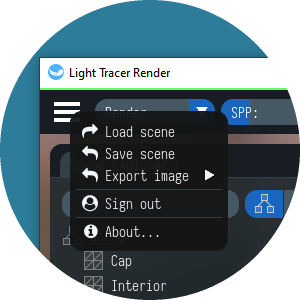
The Burger menu in the upper left corner allows you to save and load scenes, as well as export rendering output in PNG, JPG, and HDR formats:
In the center at the top of the window, you see a row of round buttons, they provide quick access to the most important functions:
| Button | Description |
|---|---|
 |
Return the camera to its default position. Fits all objects in the 3D scene in the viewport |
  |
Undo, redo the last action. These operations apply to transformations, changes in the properties of materials or light sources |
 |
Upload the scene to cloud storage in your lighttracer.org account for viewing/sharing it in Light Viewer for Web |
 |
Save render to an image file. You can choose from three formats: PNG, JPG, HDR |
 |
Toggle tile rendering on and off to render only part of a frame at a time. This allows for better UI responsiveness on weak GPUs or on complex scenes. If UI has become laggy, tile rendering will be enabled automatically |
 |
Select denoiser to use. Real-time denoiser available as well as more advanced AI denoisers based on NVidia OptiX (requires NVidia card) or OID (Intel Open Image Denoise) |
 |
HDR bloom effect on/off |
 |
Turn on/off "Caustic mode" for faster rendering of caustics and scenes with complex indirect lighting |
 |
Go to the community Discord server, where you can always get help and advice! |
Please note that all interface elements have tooltips when you hover over them!
Viewport
The entire Light Tracer window is one large viewport. By default, the rendering resolution is the same as the window size, but you can adjust it on the Rendering tab on the right. Let's take a look at how to navigate our 3D scene:
| Action | Controls | Description |
|---|---|---|
| Orbiting | Left Mouse Button | Orbit the camera around the scene |
| Panning | Middle Mouse Button | Pan the 3D view without changing the relative direction in which you are looking |
| Zooming in/out | Mouse Scroll | Zoom in and out the 3D view |
| Rolling | Left + Right Mouse Button | Rotate the camera about its line of sight |
| First-person mode | Right Mouse Button + WSAD | With first-person mode, the view rotation is performed from the location of the camera. Use WSAD keys to walk around the scene |
Now let's look at how to manipulate objects in the scene. To move or rotate an object, click on it. A 3D manipulator appears that you can drag to move the object along the axes. Alternatively, you can drag the colored areas to move in XY, XZ, and YZ only. Drag the center of the manipulator to move the object freely without reference to the axes.
You can switch between the Translation, Rotation, and Scaling modes using the “T” key on the English keyboard layout, as well as in a Transform widget that can be invoked by pressing the “N” key, or by clicking on the blue round button with arrows icon.
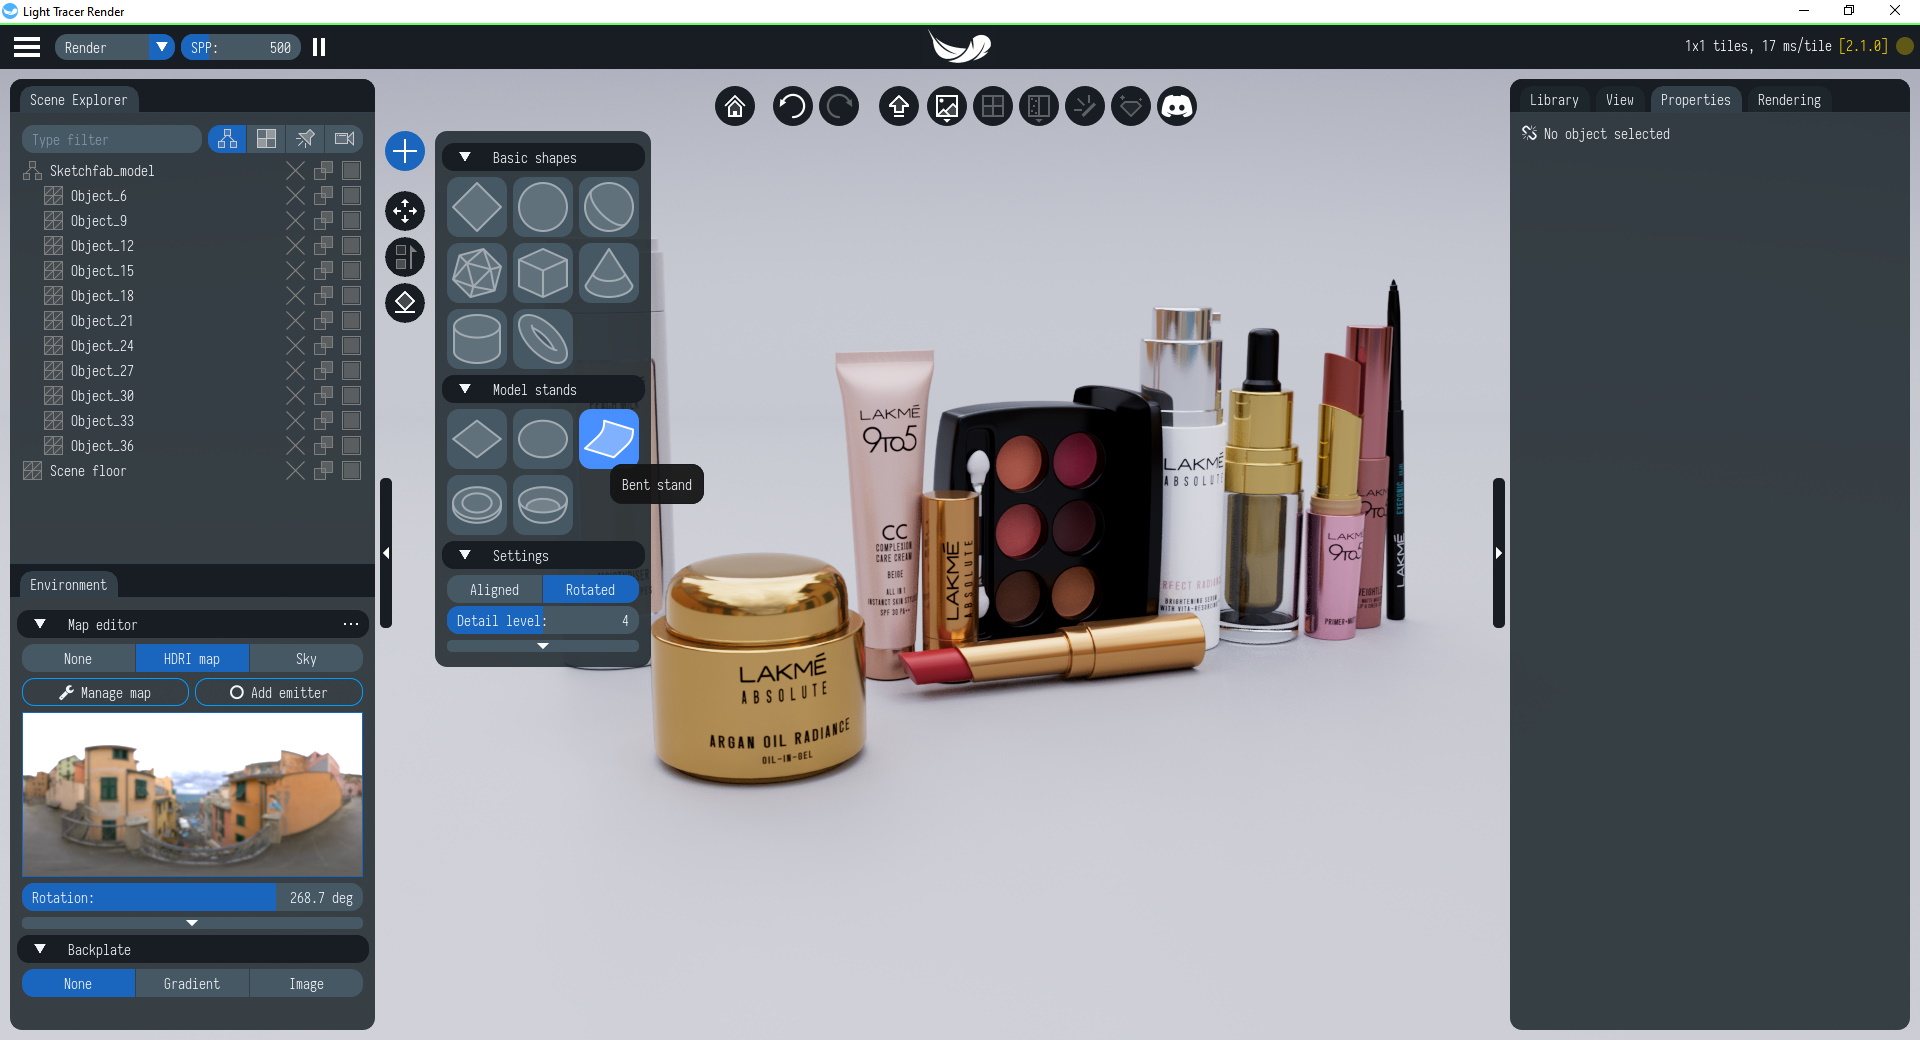
If you click the round button with the plus icon, you will see a Modeling widget with basic geometric shapes that you can add to the scene by clicking or dragging. In practice, it is convenient to add lights this way. Here, you can also choose a stand/floor for your model, so your scene will not hang in the air. Let's add a bent floor right away for a more realistic result.
The third button from the top (or the 'R' key) will allow you to select the entire parent for the currently selected object. This is convenient when, for example, you want to move not the one wheel of a car but a whole car. In this case, you click on the wheel and then press the ‘R’ key to select entire car.
The lowest button (or the 'C' key) enables or disables collision detection. When you click on this button, it will flash red to indicate that it is active. This function will help to avoid collisions between objects, in particular, it is easy to place objects on the floor surface.
Scene Explorer
Scene Explorer displays all model elements hierarchically on the left side of the window. We intentionally show only two levels of the hierarchy to not complicate your life: the lowest (nodes corresponding to actual geometry objects) and the highest (root nodes corresponding to entire models). For each object node as well as the root node, you have the option to delete or duplicate nodes. Double click on a node to rename it, if necessary, or use the context menu.
In Scene Explorer you can hide objects, with two levels of hiding. When completely hidden (empty rectangle icon), the object disappears completely from the scene. This is useful when access to some regions is difficult (for example, you can hide the windshield of a car to make it easier to work with its interior). Partial hiding is also possible (half-empty rectangle icon) when the object is not visible just to the camera, while its influence on the scene is preserved (for example, the light source will continue to shine).
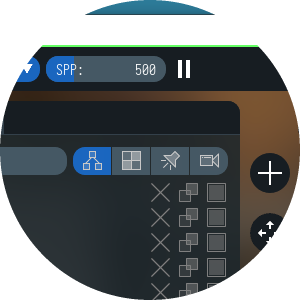
In Scene Explorer, you can switch between scene nodes, materials, map emitters, and a set of saved camera slots:
Note that you may use standard combinations of keys such as Ctrl, Ctrl + A for selecting node groups. We'll talk in details about materials, lights, and camera slots later. Now just remember that you have easy access to everything in Scene Explorer.
Material Library and Properties
It is easy to assign materials to objects. You select an object in the viewport or in the Scene Explorer and find suitable material in the Library tab on the right. Clicking on this material will assign it to all selected objects. In addition, materials can be dragged from the library onto objects without prior selection. The material can then be further customized in the Properties tab, which we'll go into in detail in the following tutorials. For now, just note that Light Tracer uses the Principled material model also known as the "PBR" shader, making it compatible with other 3D rendering software such as Pixar's Renderman®, Unreal Engine®, or Blender.
In this tutorial, we will only touch on the case of material sharing. If you assign a material to some object and then assign the same material to another one, these materials will be independent of each other, and their properties can be configured separately. Sometimes different behavior is required, and we want to set the same material to several objects and adjust it for all objects at once. This can be done by selecting several objects and clicking the Link selected materials button in the Properties tab (you can also press the ‘L’ key). The objects will inherit the material of the first selected object.
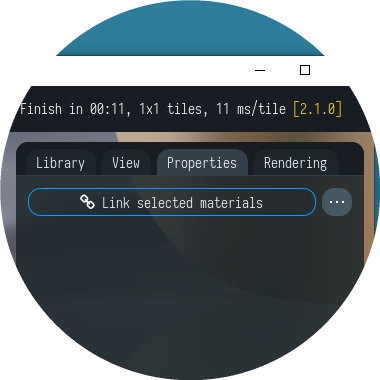
Of course, the material can be later unshared for any object by clicking Unlink from others or the 'L' key.
Scene environment
There is no easier or quicker way to illuminate your 3D scene than to use an HDRI map. Such maps are essentially snapshots of the real world that contain exquisitely detailed lighting information, which can transport your model into realistic environments. In Light Tracer Render, the HDRI map can be configured on the Environment tab on the left side of the window:
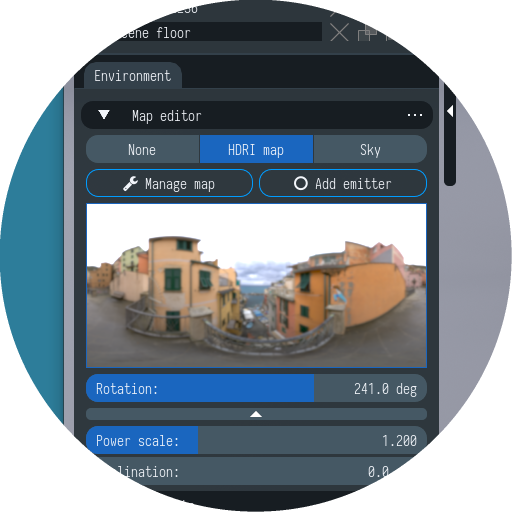
You can choose one of the presets or load your own HDR images by clicking the Manage map button. Let's give a little advice. If you want soft lighting without sharp shadows, use maps with a cloudy sky (outdoor) or smoothly distributed lights (indoor). If you want crisp shadows and/or caustics, you need bright light sources, such as a clear sunny day HDRI. Play around with different environment maps to get a feel for the difference. Check out polyhaven.com for a lot of free HDRIs that can be used even in commercial projects.
Since version 2.1.0, Light Tracer Render also provides a physical model of the sky & sun. To use it instead of an HDRI map, switch the environment type to Sky. We use the Hosek-Wilkie analytic model of spectral sky-dome radiance, ensuring highly realistic results. This type of environment is well suited for exterior and interior architecture scenes.
In addition, Light Tracer Render has a built-in HDRI editor that allows you to add additional emitters to a map. Such emitters will be shown in Scene Explorer. Just click the Add emitter button and configure its properties in the Properties tab on the right. Basically, you can even start with a black panorama (None mode) and build fully customized studio lighting. This is the most time-consuming way but can be useful in a situation where you need to get a certain type of lighting.
All of the above lighting methods are based on an environment map modeled as a large sphere around the 3D scene. Along with this, Light Tracer Render supports mesh emitters. You can create a light source from any object in your scene. For example, you can add a rectangle or disc using the Modeling widget and turn it into light by setting the Emission parameters on the Properties tab:
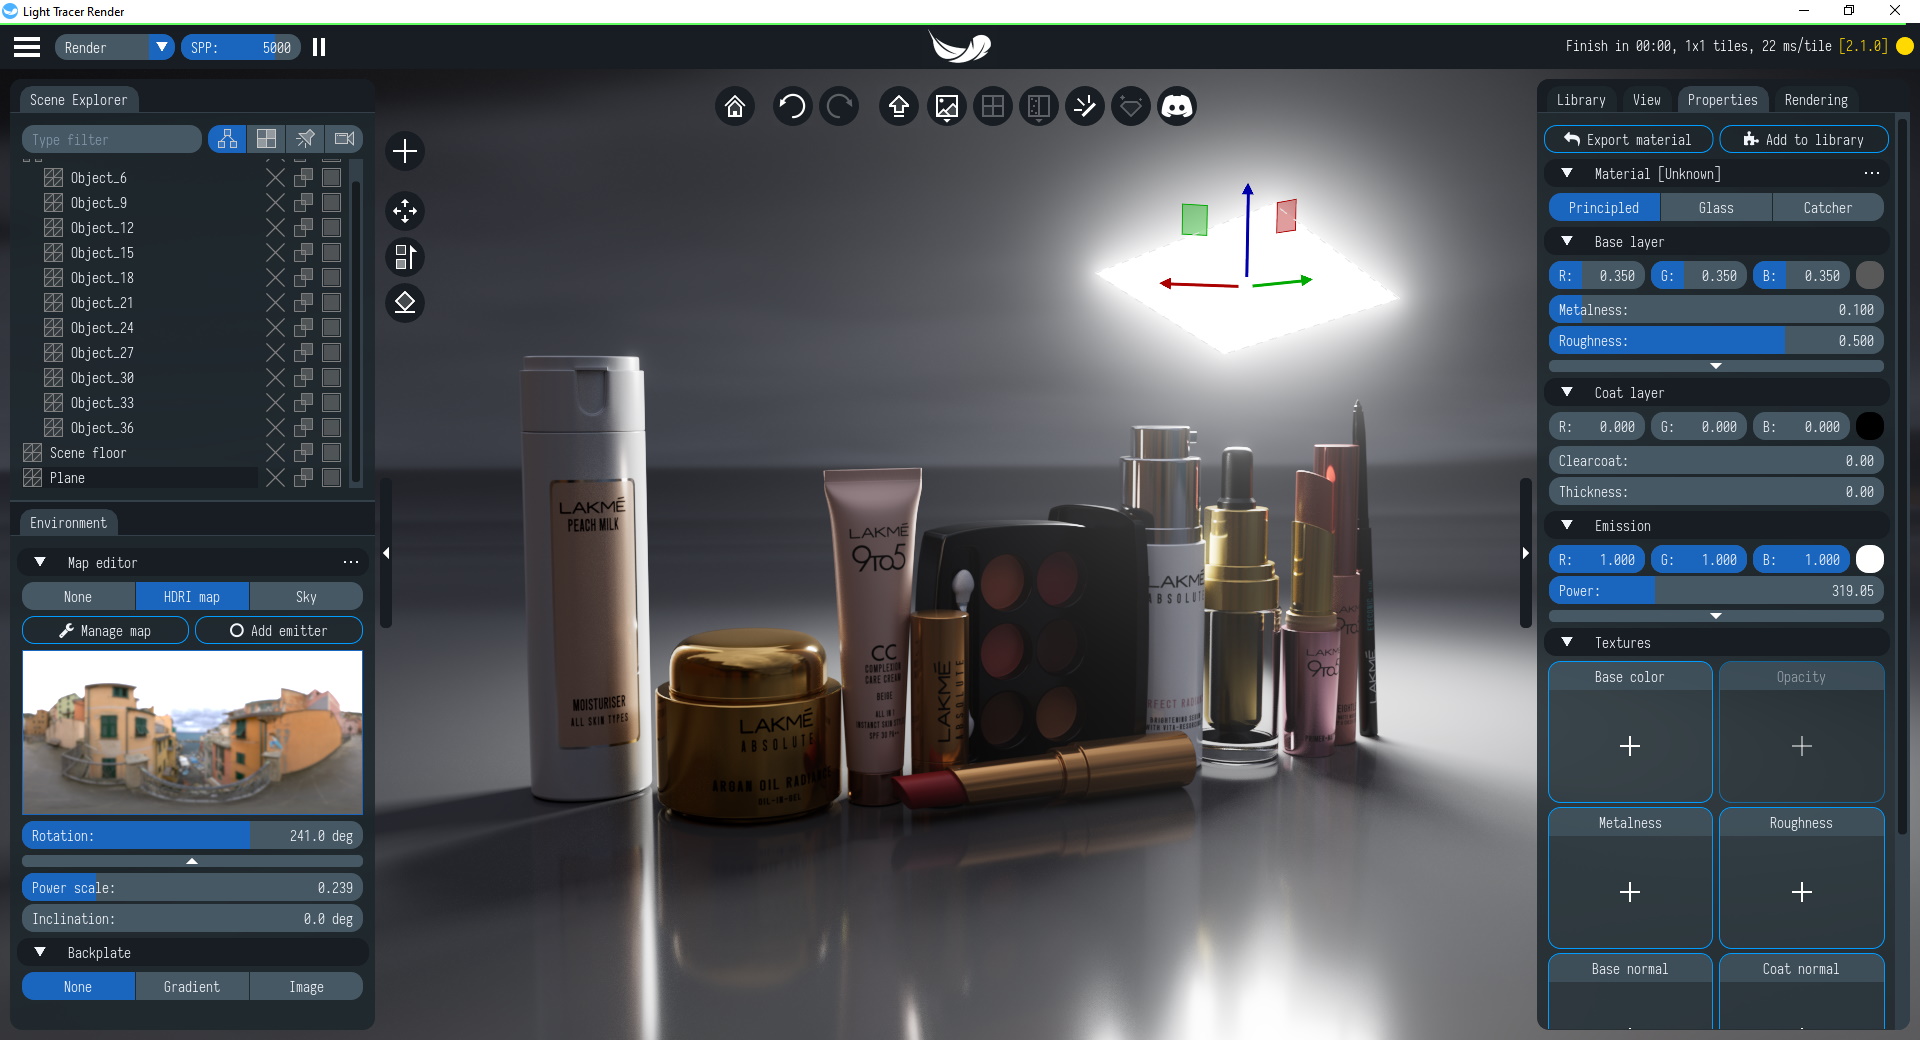
Mesh emitters support IES profiles used to describe the angular distribution of the emitting light (in the Emission parameters). It is particularly useful when the light source is partially covered and/or some lensing occurs.
The light distribution would "bake" the complex occlusion and lensing phenomena allowing for faster rendering. As a result, it is possible to create a light setup that might show how the lights will look in reality, which is especially important for architectural visualization. Light Tracer Render supports industry-standard files in a format called IES. In this file, we can find the physical properties of a lamp, all ready to be used in rendering. Just attach the IES file to the IES profile slot like any other texture.
By default, the environment map is also the background that we see behind the render, but this is not always convenient. On the Environment tab, you can configure a backplate that should be used as a background instead of an environment map. If the render needs to be placed on a website or presentation, it is useful to make the background transparent, while a radial gradient is well suited for rendering game characters, voxel art, etc. In the Backplate section, you can switch to Gradient mode, where you can set both a gradient background and a transparent one by setting the Alpha value (the fourth color field) to 0. Finally, you can turn on Image mode to set a custom image or photo to be used as background.
Camera
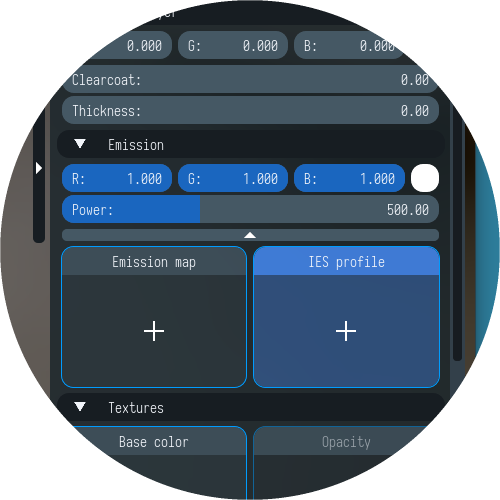
The View tab in the upper right corner is for camera settings. Here you can choose between a simple Pinhole camera model and a physically accurate model that supports Depth of Field.
Switch to the second mode for more photorealism. Depth of field is the distance between the nearest and the farthest objects that are acceptably sharp in an image. Outdoor and architecture scenes should have a deep depth of field, while small objects ("macro photography") tend to have shallow depths of field. Bokeh is the blurred effect seen in the out-of-focus regions of the render taken with shallow depth of field. You can easily create a bokeh effect by selecting the subject you want to focus on and adjusting the f-number of the lens, which determines the depth of field. We recommend using the autofocus function (cross-hair button) when the focusing distance is automatically adjusted to the center zone of the image. This corresponds to the default mode. If you click the focus mode button (cross-hair), you can manually select the subject on which you want to focus.
Rendering
Having opened the Rendering tab, we see three presets (Fast, Normal, Quality), which allow you to quickly change a set of settings that affect the rendering quality and its speed. This is convenient for quick customization, but you can manually tune all the rendering parameters.
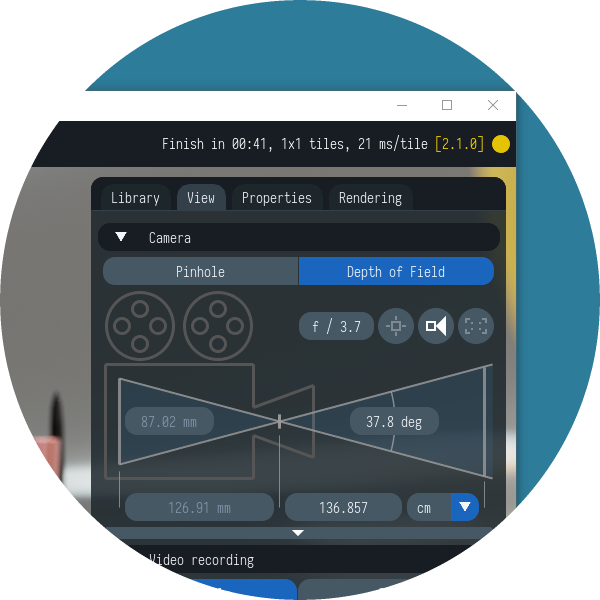
Light Tracer has become particularly popular in the voxel art community. The specificity of these datasets is that the textures must remain "pixelated" under any conditions, without the use of any smoothing filter. For that purpose, there is a switch between Pixel textures / Smooth textures.
Let's say we are visualizing jewelry, gems, or glass objects. Typically, such objects require a large tracing depth. On the Rendering tab, this is controlled by the Max bounces parameter (maximum number of light bounces) that should be set to 20-30 bounces. For scenes with complex indirect lighting and caustics, the Power clamp parameter is also important, which is responsible for the maximum light energy that a single ray can bring to the image. By default, this parameter is undervalued, so that the super bright rays that lead to slowly fading noise (fireflies) are not allowed. This is okay for typical lighting conditions and results only in small bias, but absolutely insufficient for complex light transport paths like caustics. For such scenes set the Power clamp to 300-500 or more. Alternatively, you may just use a Quality preset for scenes with complex illumination and/or caustics.
You can also improve the realism with the HDR bloom effect. Click on the Bloom round button on the quick-access toolbar and adjust the Intensity value.
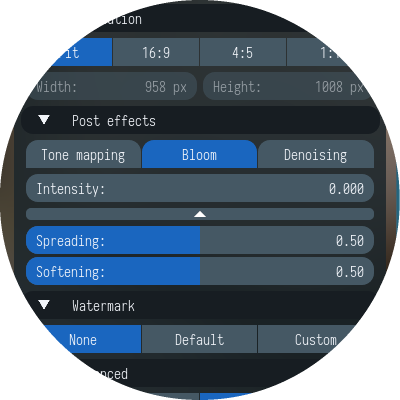
On the Rendering tab, you can choose among several denoising options (real-time, CPU, GPU), adjust the contrast of the image, add/remove the logo or replace it with your own.
Save render
You can save your final render as a JPG, PNG, or HDR image. To do this, use the Export image item in the burger menu in the upper left corner or the quick-access button at the top. You can also create a video with camera animation in MP4 format.
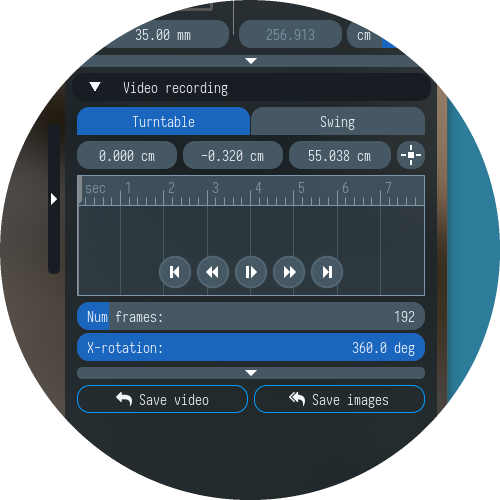
On the View tab in the Video recording section, you choose between Turntable (the camera orbits around the object) or Swing (the camera follows the trajectory of figure eight). In both cases, the angle(s) of rotation of the camera can be adjusted. Then click the Save video button, and Light Tracer will start rendering the video sequence.
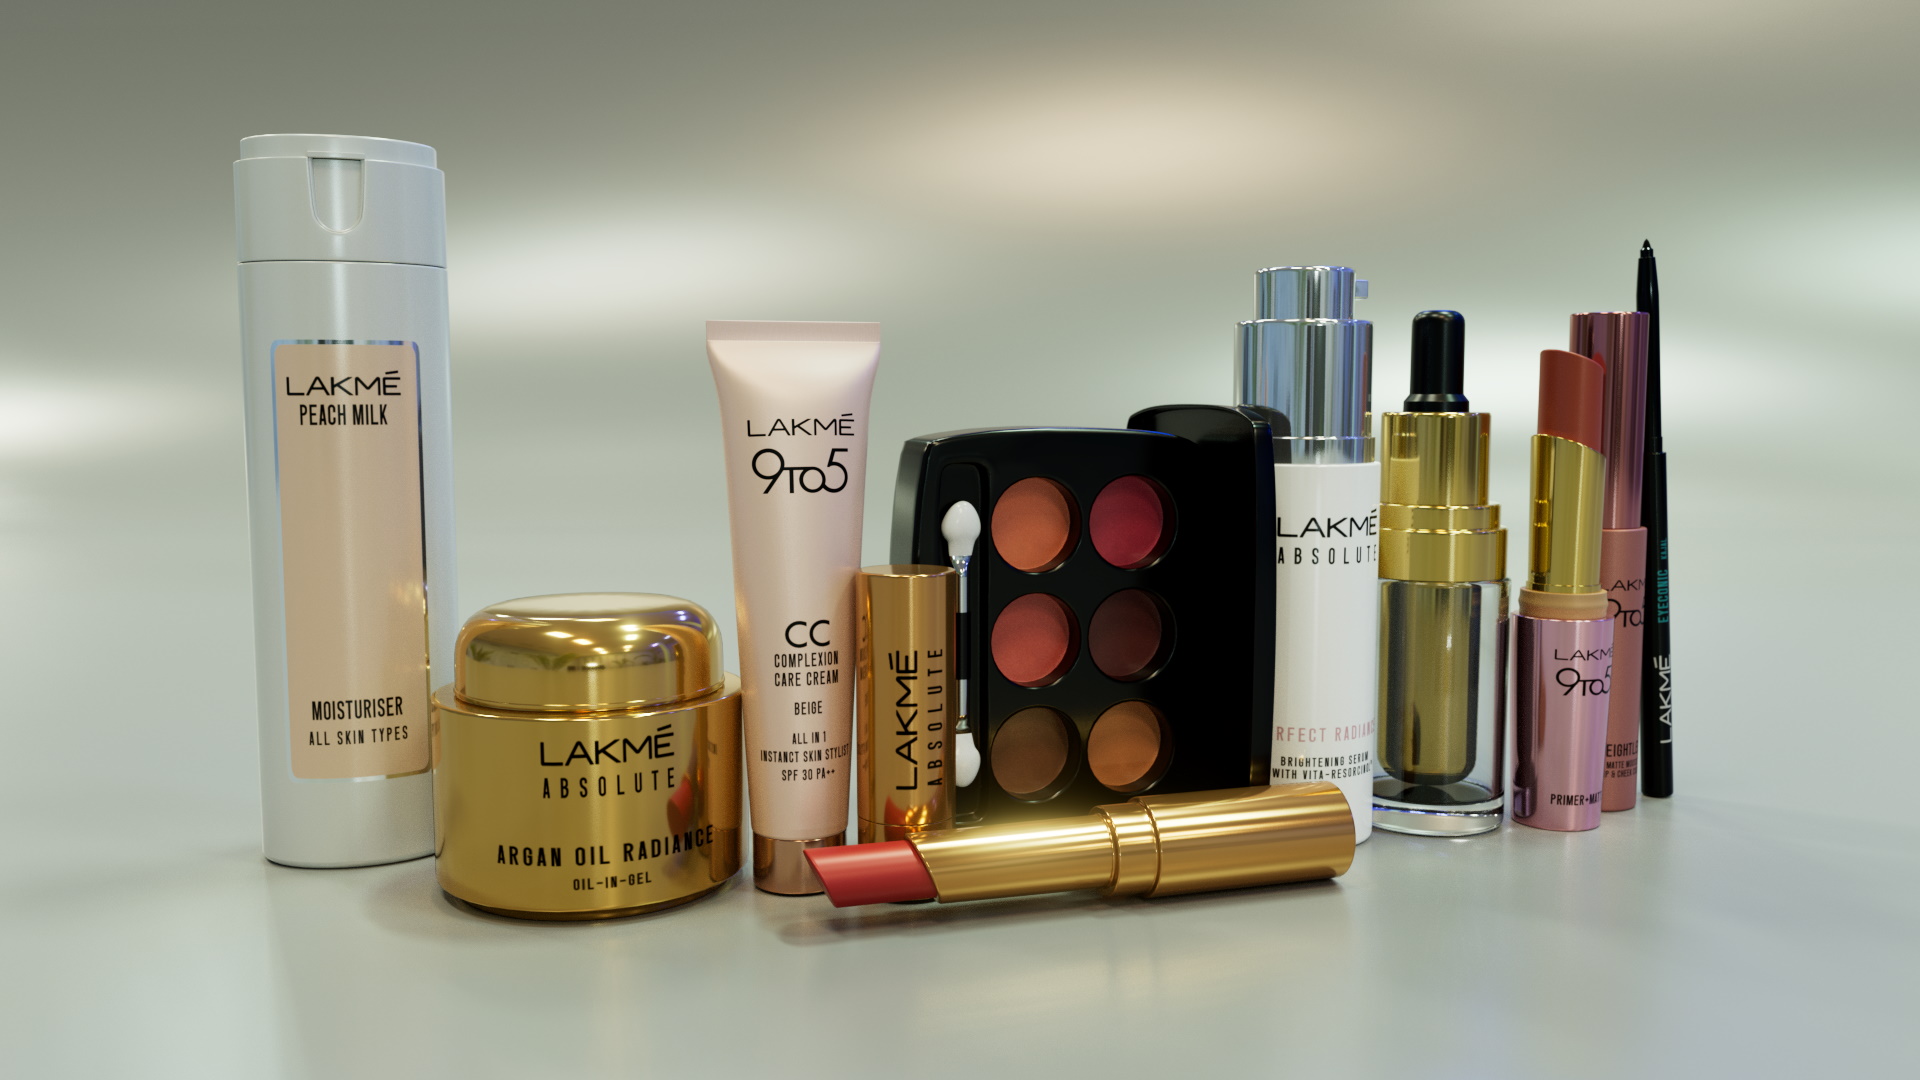
As a result of all adjustments, we got the following final render of our cosmetics model:
As always you are welcome to join our Discord community. Light Tracer Render team will be happy to help you!