Tutorial: Jewelry rendering
Tutorial demonstrating a basic Jewelry Rendering in Light Tracer Render
Updated: December 2023, Light Tracer Render 2.8.0
The techniques you'll learn in this tutorial are fundamental to creating high-quality jewelry 3D visualization in Light Tracer Render. While basic principles are similar to other 3D product rendering, the particular challenge with jewelry rendering is that metal is fully specular (meaning it reflects like a mirror), and the gemstones are highly refractive. As a result, these objects virtually do not have their own color, and their appearance depends entirely on lighting and the environment. So, we have to ensure enough contrast and light in our 3D scene to make the jewelry attractive.
Start using Light Tracer Render today
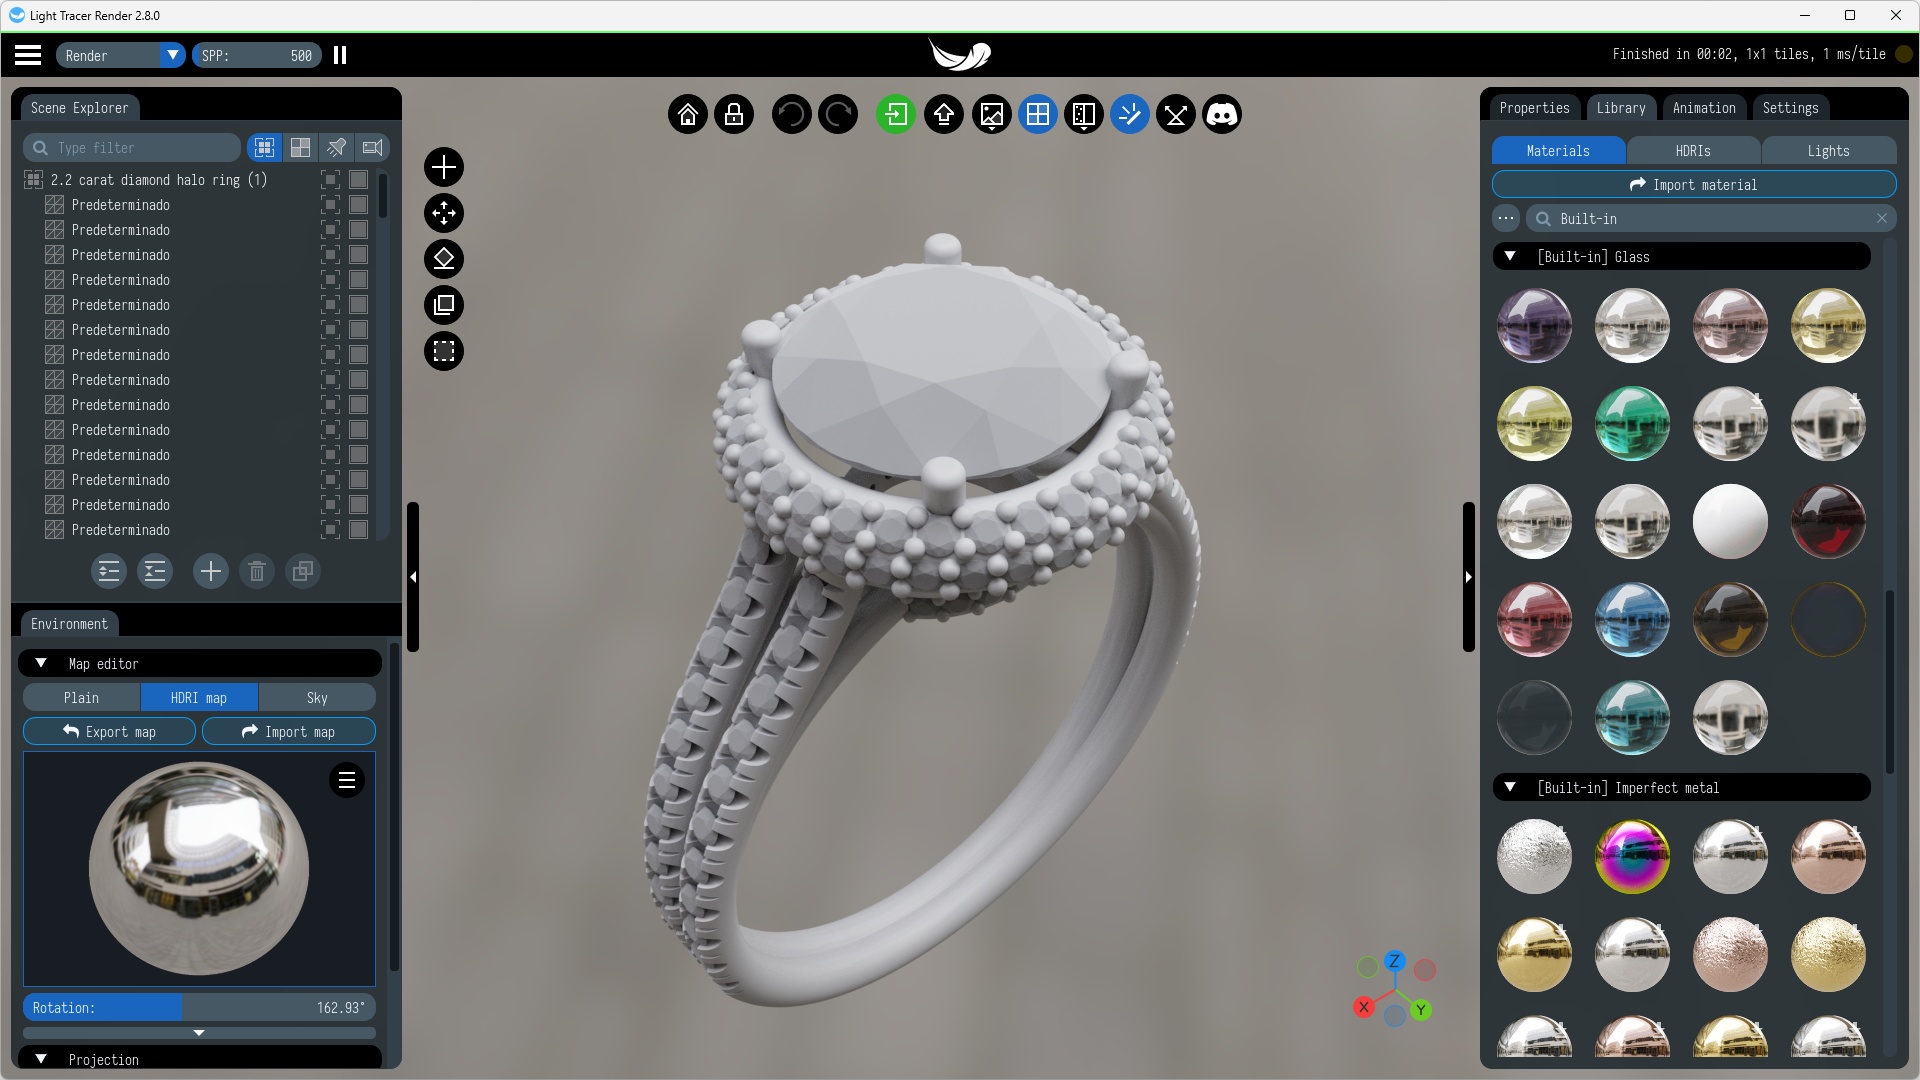
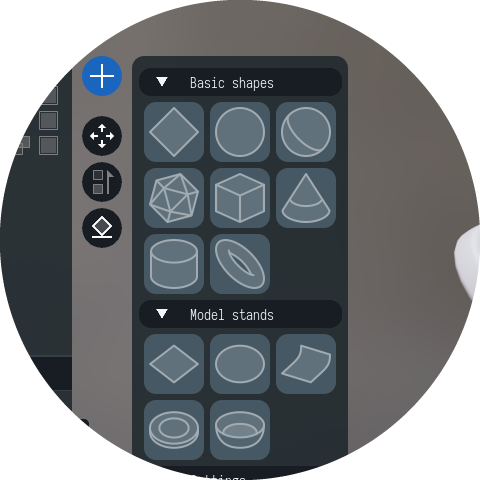
Import 3D model
A good visual starts with a good model! We have downloaded a great work by JOSE from GrabCAD. Most jewelry models are designed in CAD software and available in corresponding formats, such as 3DM, STEP, and IGS. All these 3D formats are natively supported by the standalone versions of Light Tracer Render for Windows and macOS, so you can simply drag the downloaded 3DM file on the app window:
Compose 3D scene
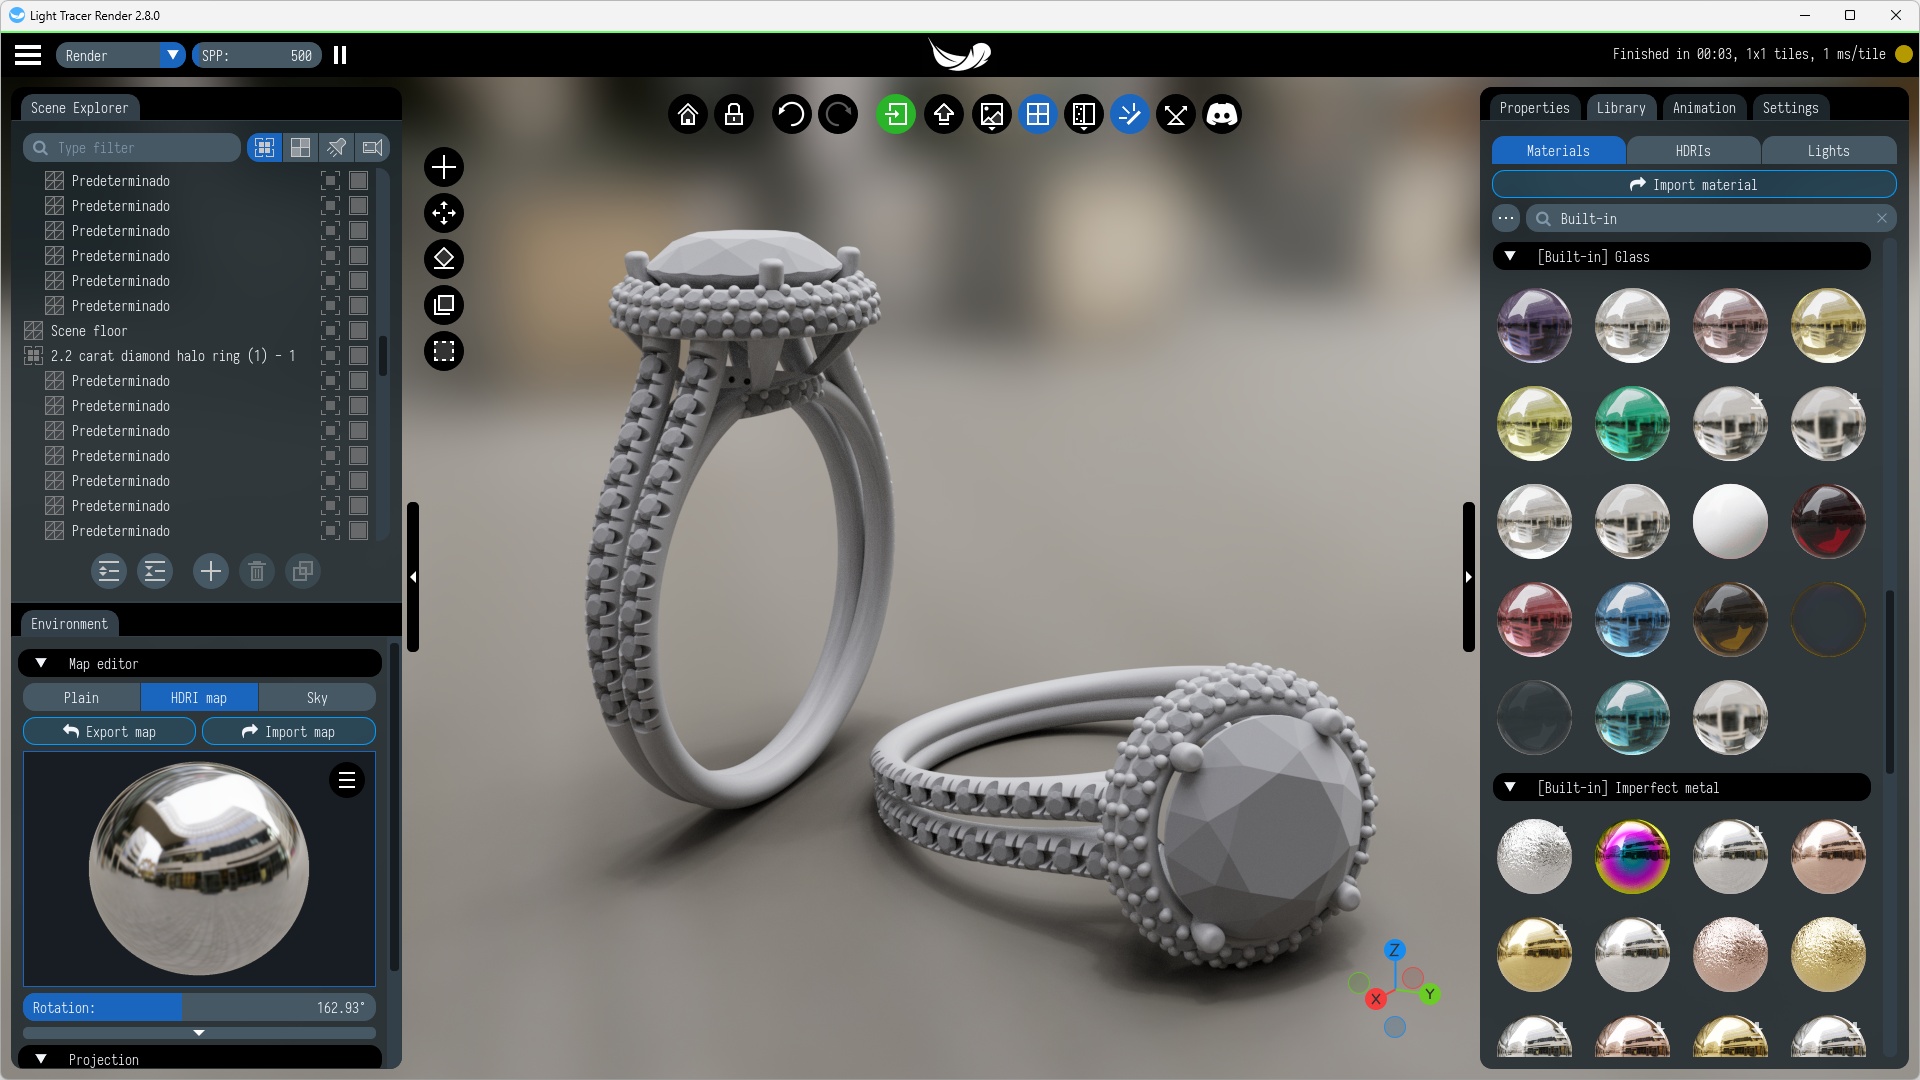
Next, let's add a base for our model so it doesn't look like it's floating in the air. In Light Tracer, you can make different floors and stands. Let's choose a simple flat floor:
It comes with a special Shadow catcher material that can't be seen but can 'catch' shadows from lighting within the scene. This is useful if we want to have a 3D object added on top of a photo or background.
Let's also duplicate the entire ring using the Scene Explorer, and place it on the floor next to the first ring to create a more engaging scene. For positioning scene objects, you may use a 3D manipulator and Transform widget described in the Basic UI tutorial.
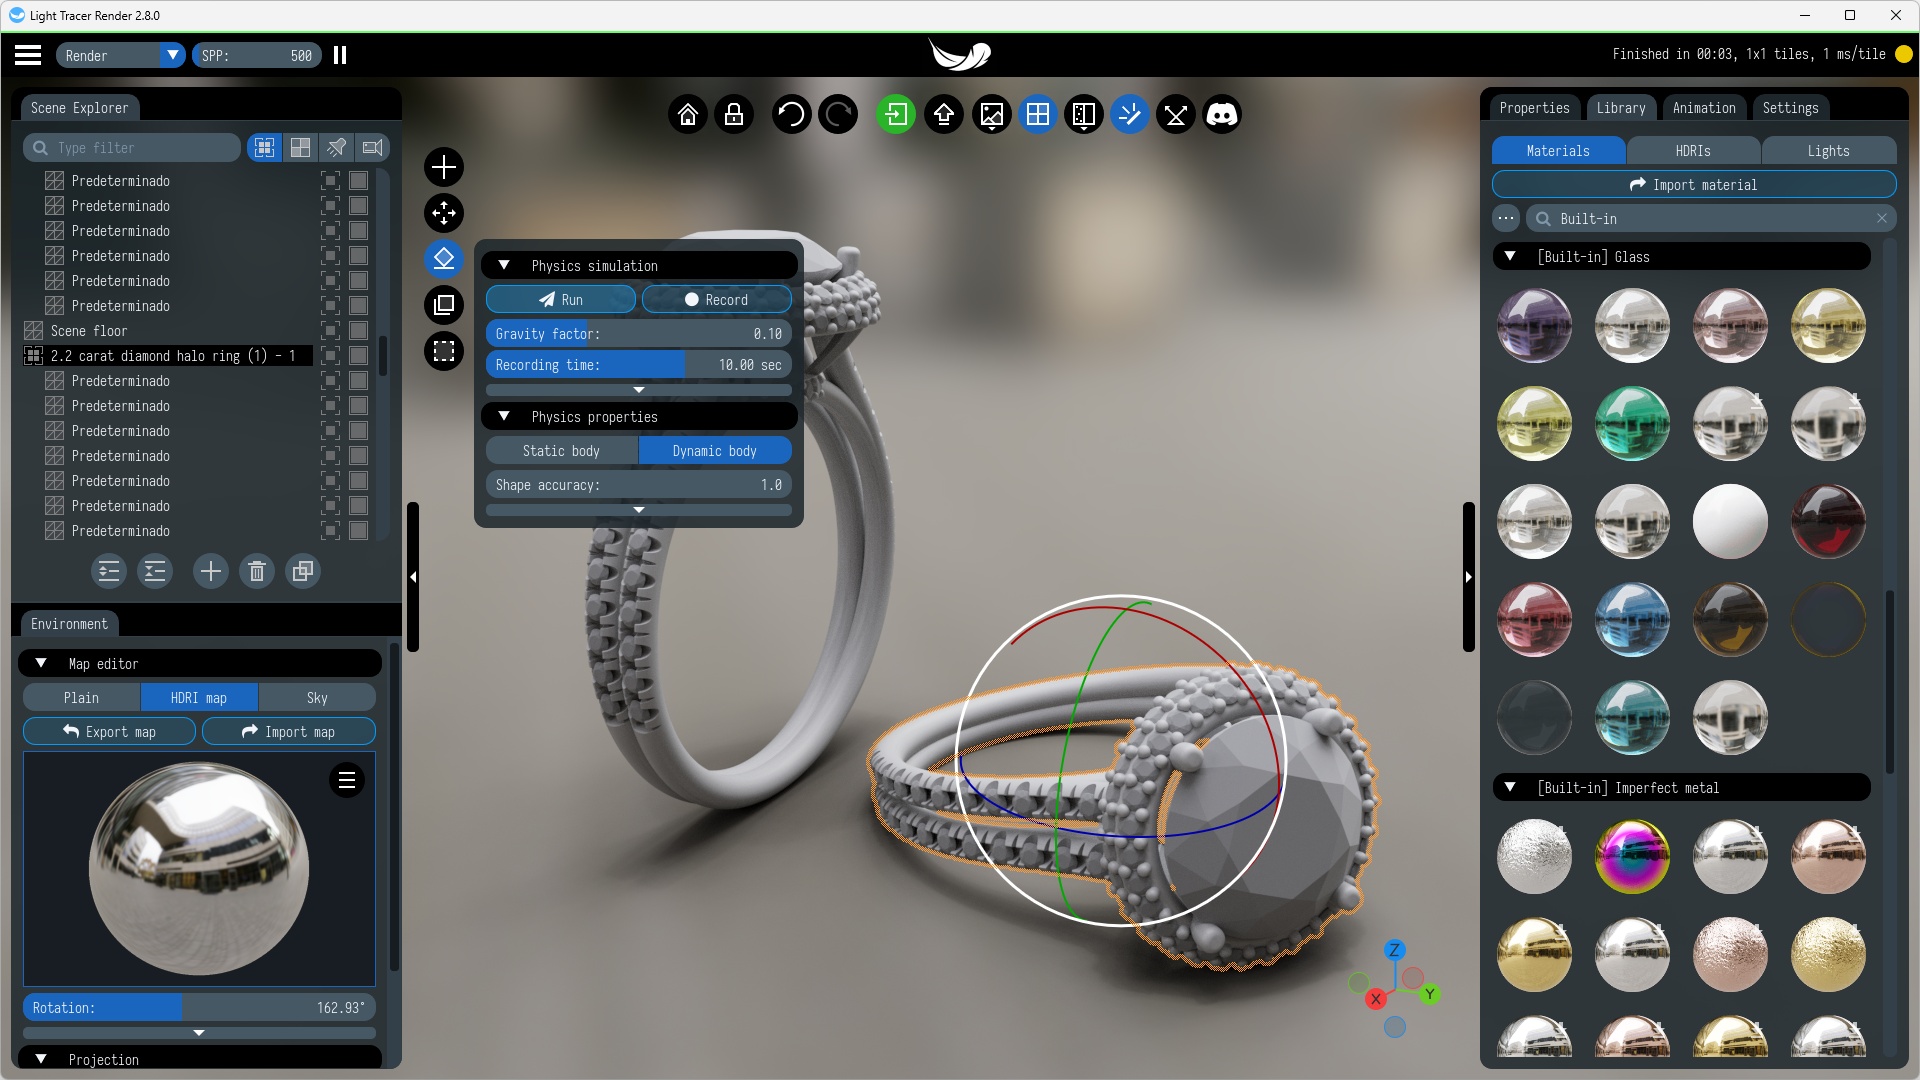
Note you can use a built-in physics engine to position the ring naturally using gravity force. To do this, open the Physics widget, select the ring, make it a Dynamic body, set non-zero gravity, and start the simulation by clicking the Run button. During the simulation, you can push and rotate the ring using a 3D manipulator. Once it reaches the position you want, finish the simulation using the Stop button.
Setup lighting and materials
For photorealistic 3D jewelry rendering, it is better to use high-contrast HDRI maps with neutral lights. A clear sky map provides good contrast but gives a blue tint to the frame and diamonds, which is highly undesirable. On the other hand, soft indoor lighting or cloudy skies will prevent a "fire" effect on the diamond. A diamond's "fire" is produced when white light disperses into rainbow colors when it hits its facets (the angled cuts in the stone). All this needs to be kept in mind when choosing an environment map.
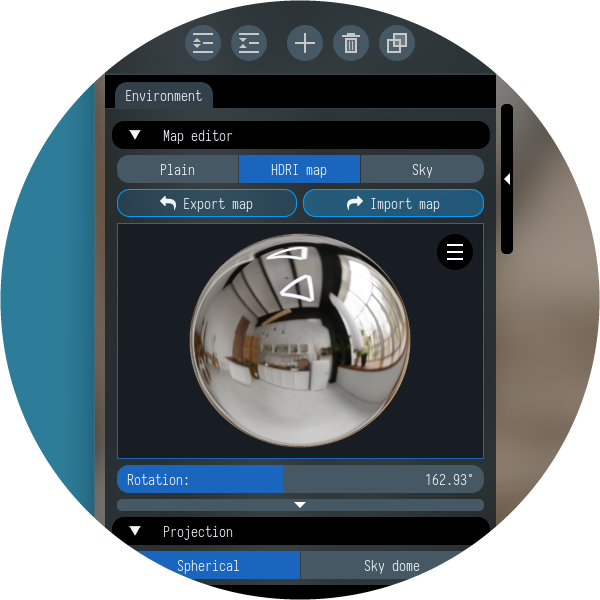
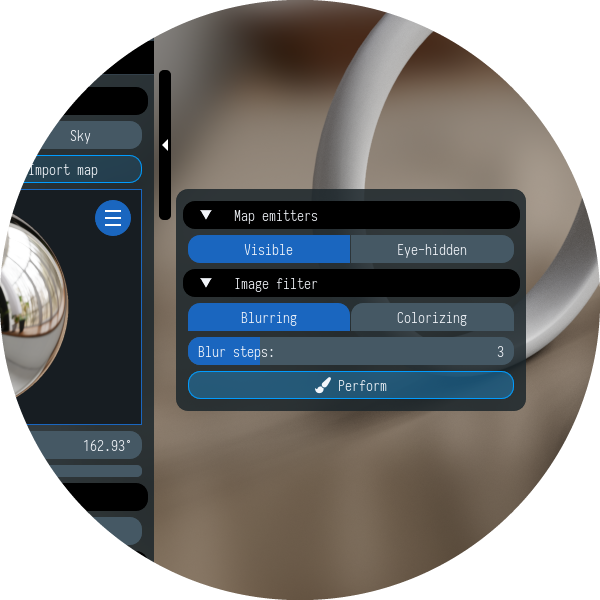
A lot of free HDRI maps can be found on polyhaven.com. We have downloaded a Brown Photostudio map, which has neutral lights and medium contrast. Go to the Environment tab, and then click on the Import map button to open the HDRI file (HDR and OpenEXR formats are supported). Alternatively, you can just drag the HDR file into the Light Tracer window. Note, that you can make lighting smoother by blurring the HDRI map: click the "burger menu" button and set the number of blurring steps (more steps -> more blur).
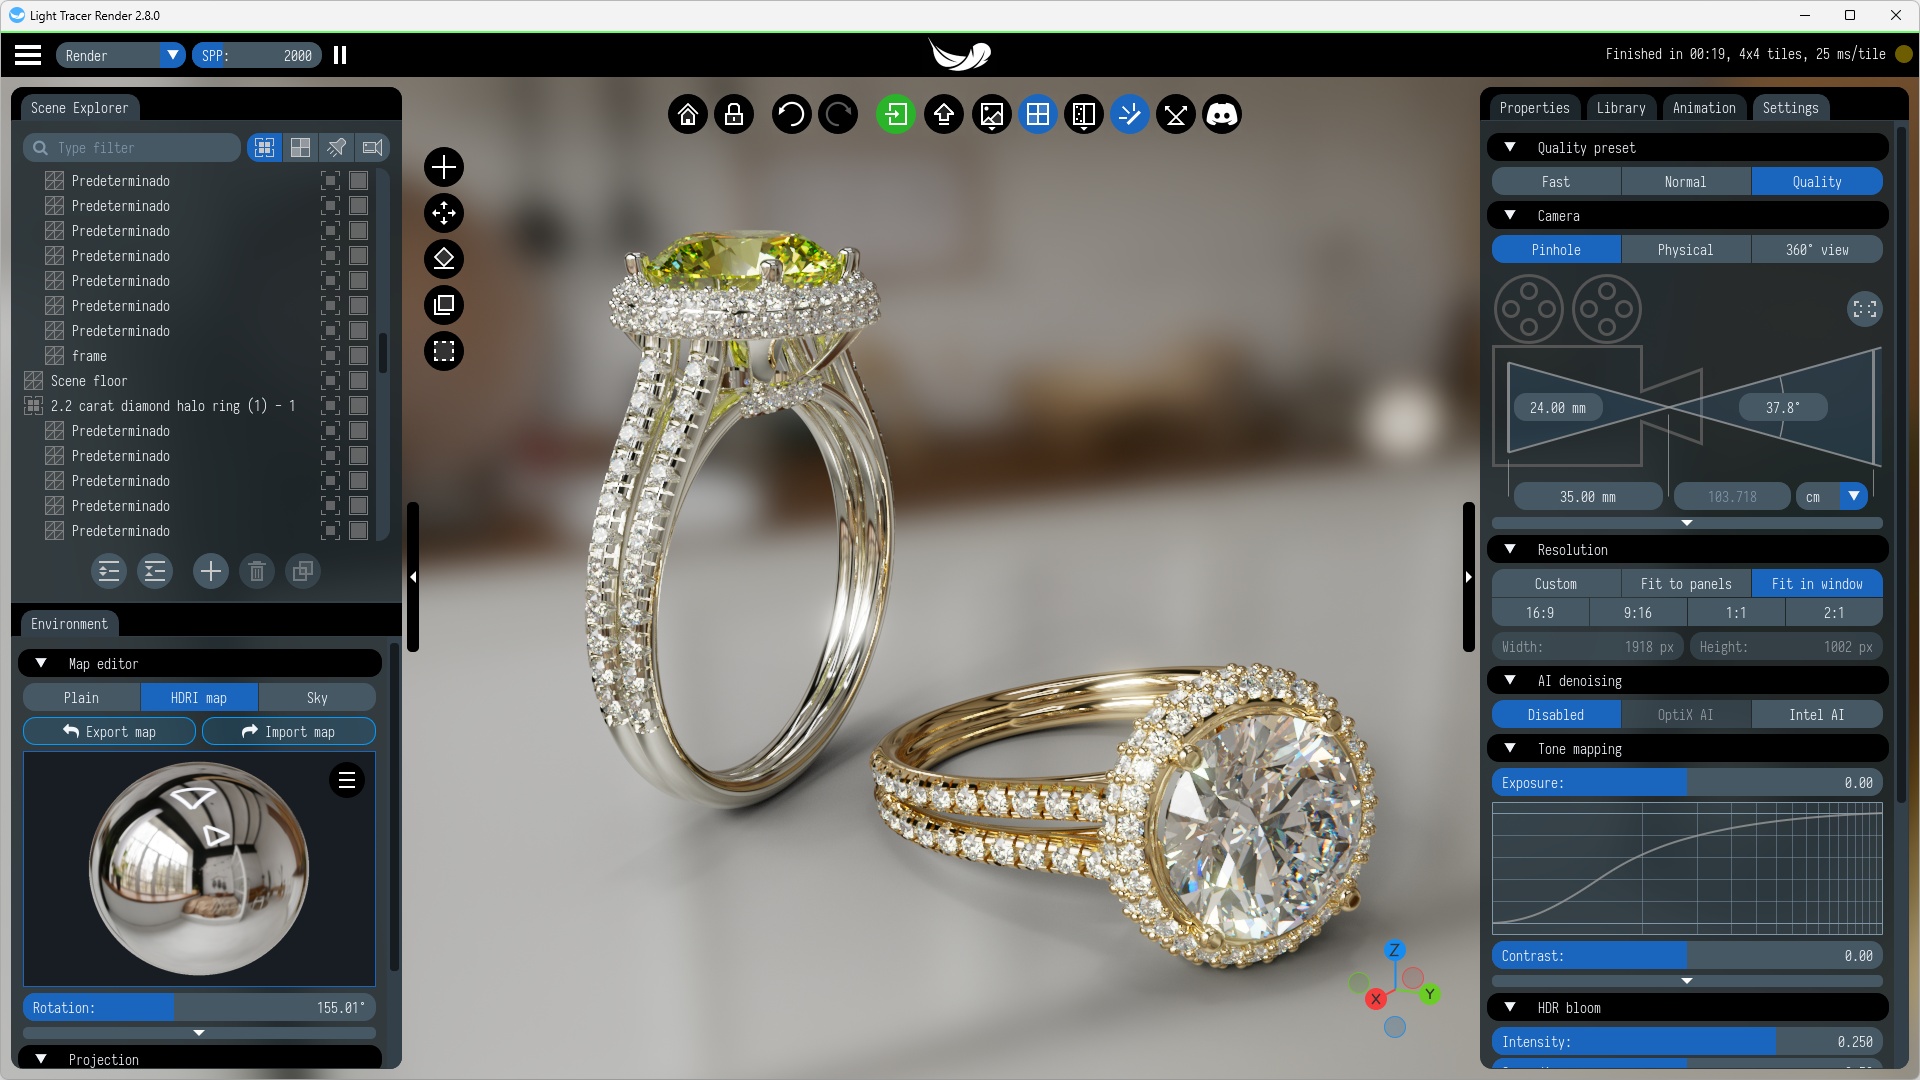
Now, let's assign materials to the objects in our scene. In the updated Library, there are a lot of physically accurate presets for precious metals such as gold, silver, platinum, and various alloys, ensuring you can find the perfect match for your jewelry designs. All the materials are divided into categories, and you can quickly find the right one using the search filter. E.g., type "gold" in the search box to display all gold presets.

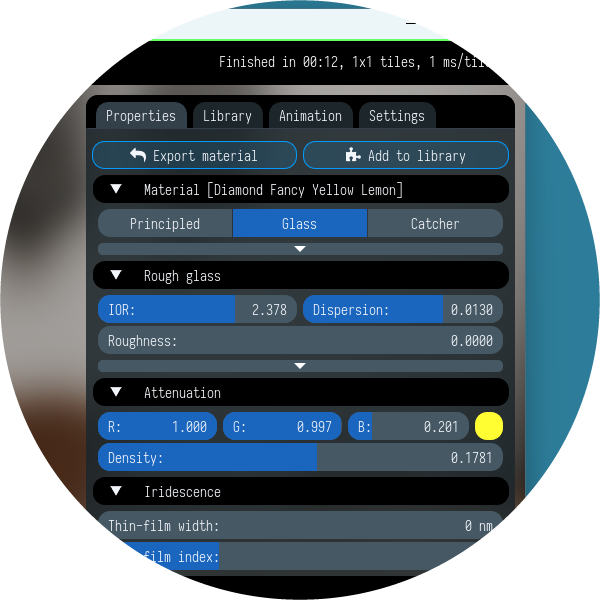
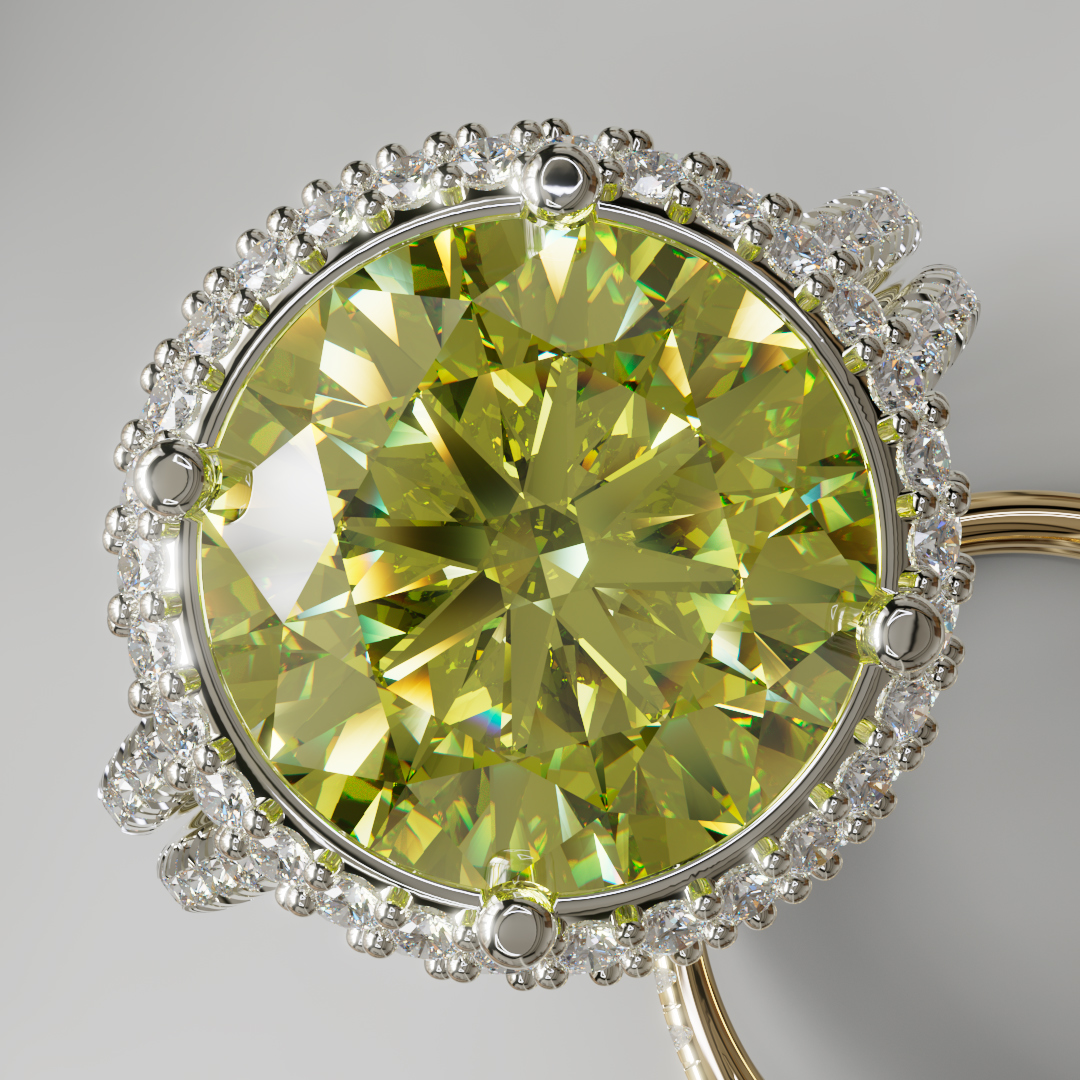
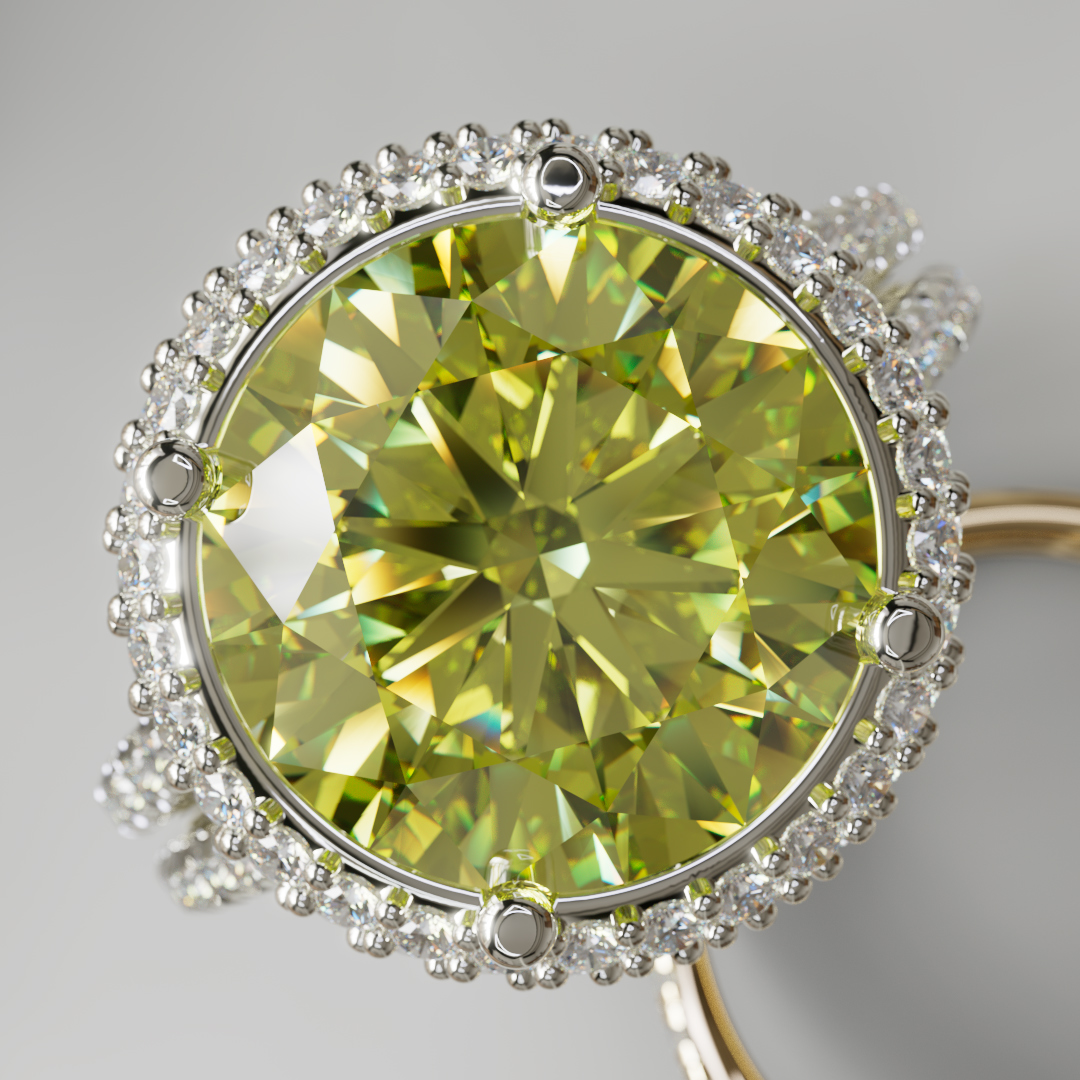
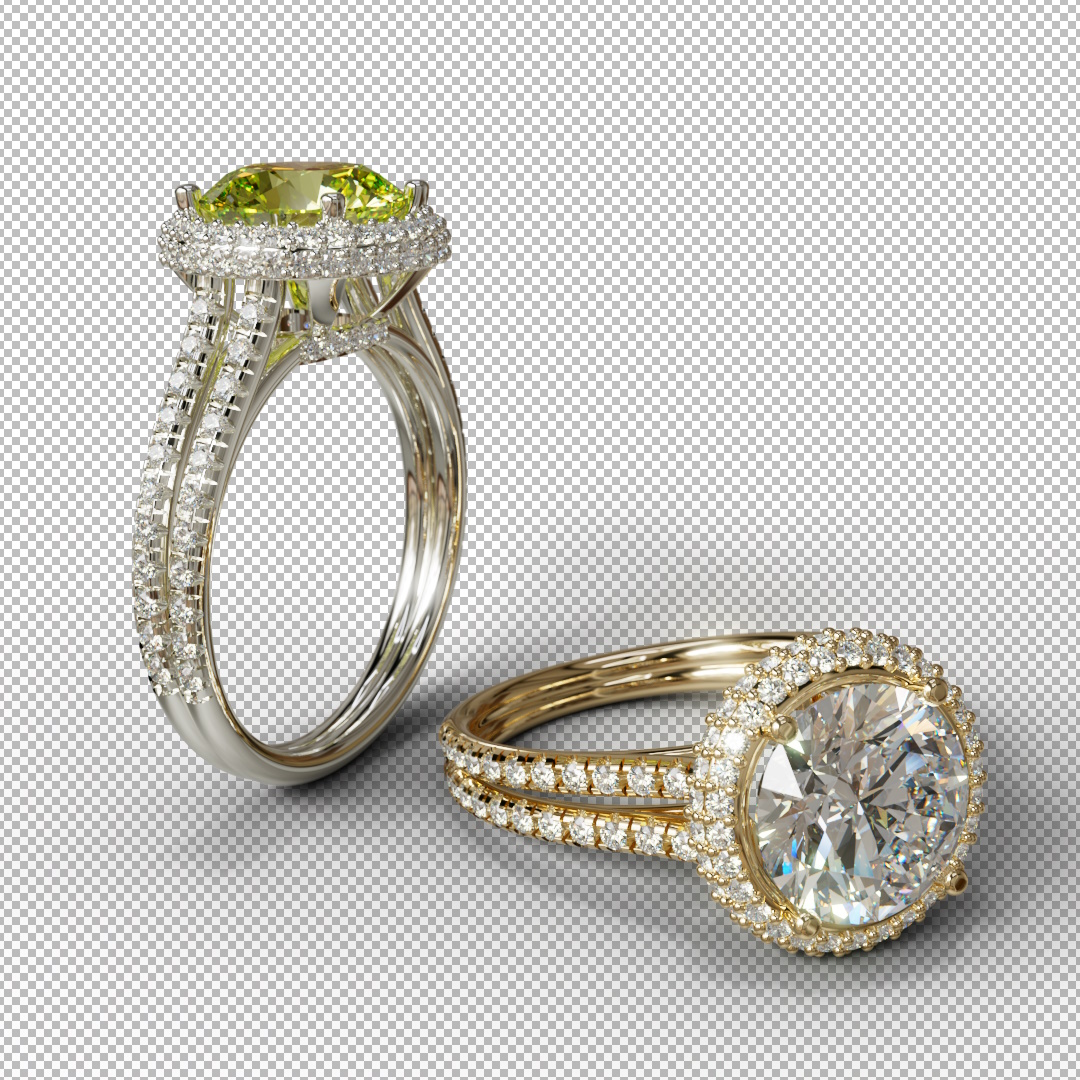
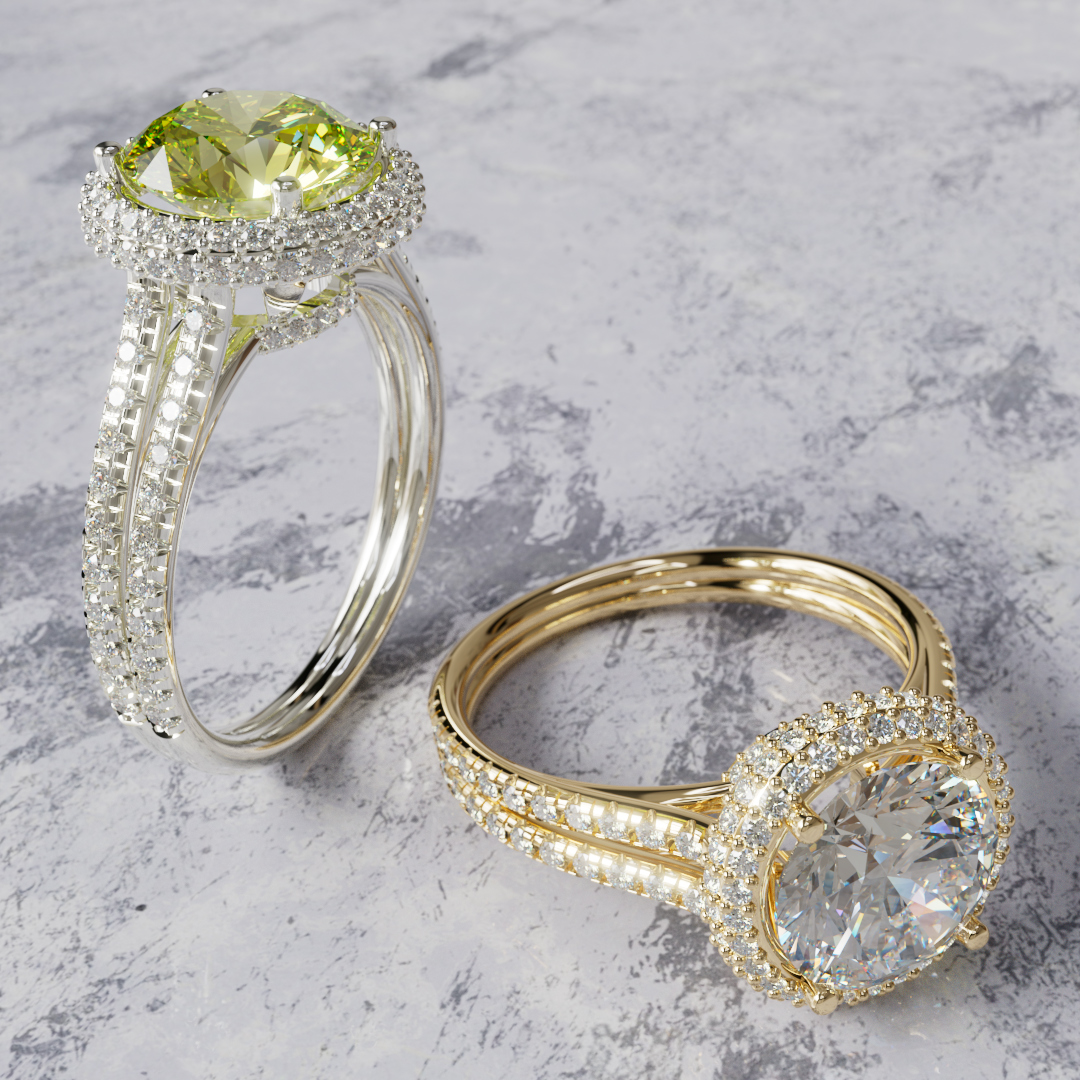
There is also a diamond preset providing the correct refractive index and dispersive behavior. To make the scene more interesting, let's change the absorption color of the stone in the Attenuation section of the Properties tab. For example, you can set the yellow-green color and adjust absorption using the Density parameter. Natural-color green diamonds are very rare and one of the most valuable.
Alternatively, you can find some colored diamond presets in the Library. After all the above settings, we got the following result:
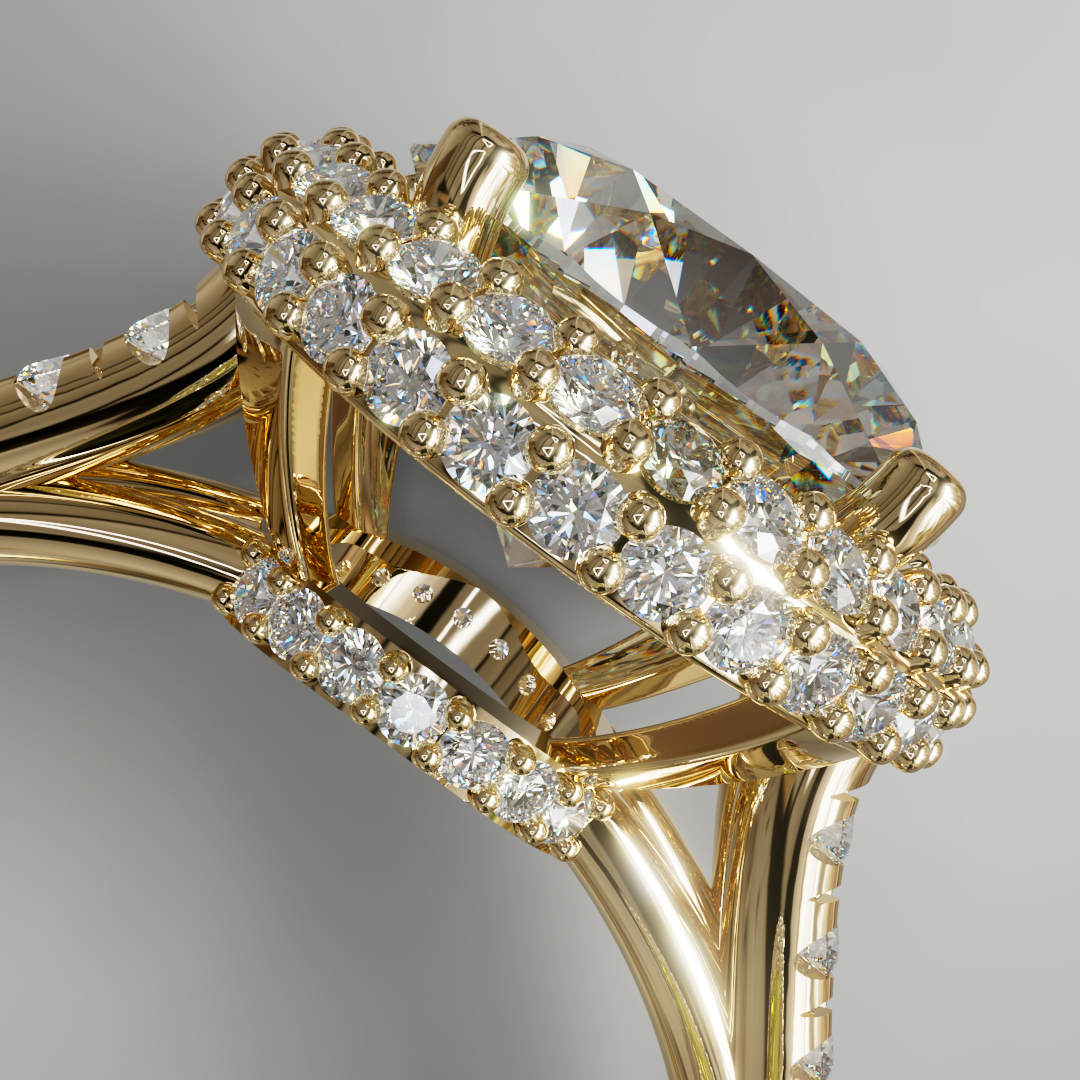
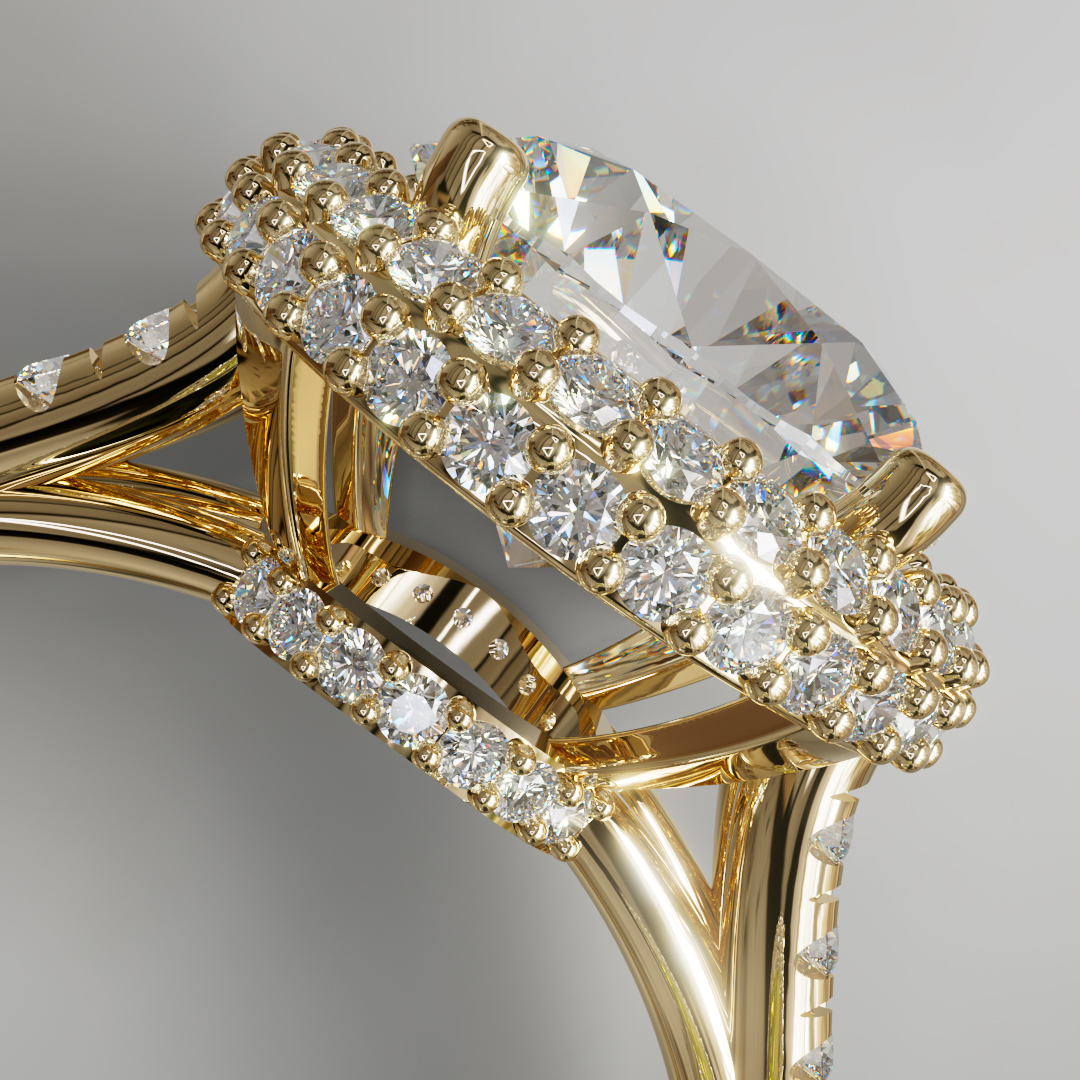
A common modeling challenge arises when the stone's geometry overlaps with the setting. In the case of a ring, the prongs often don't accurately reflect the real-life adjustments made when setting the gemstone, resulting in noticeable visual discrepancies. This overlap disrupts the path of light rays, leading to improper refraction through the stone.
To address this, Light Tracer introduces a novel solution. There is Isolated mode for the diamond. In this mode, all rays refracted into the stone will disregard other objects in the scene. This means that even if an object intersects with the stone, it won't impact its appearance. Note that this only applies to refracted rays; reflections will still be accurately rendered. This feature is a significant time-saver in modeling. If you are using a gemstone preset from the Library, this mode will already be activated. See what rendering artifacts appear if you turn it off:
Adjust rendering settings
To ensure that diamonds look right it is better to choose the Quality preset on the Rendering tab. Alternatively, you may adjust settings manually. First of all, set the Max bounces parameter (maximum number of light bounces) to 20-30. For scenes with complex indirect lighting and caustics the Power clamp parameter is also important. It is responsible for the maximum light energy that a single ray can bring to the image. For the most accurate results, you need to set it to 300-500 or more.
Set depth-of-field
For the realistic rendering of diamonds, it is crucial to use the physical camera model with proper depth-of-field. The point is that if the ray of dispersed light is shorter than the width of the pupil of the eye (or lens aperture), the light is recombined and perceived as white light, which is light made up of all of the colors together. So, a pinhole camera (with zero aperture) produces unrealistically high dispersion. Our goal is to adjust the camera's f/stops just right to get a result similar to the human's eye. To get the idea, compare two pictures generated with pinhole and physical camera models:
You can switch to the physical camera on the Settings tab. Below the camera model switch, you will see one input field and three round buttons:
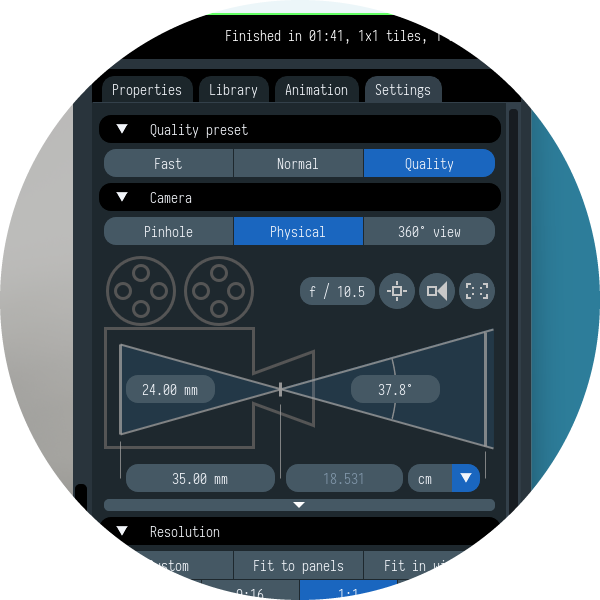
The input field sets the lens f-number, which determines the depth of field. The larger the f-number, the greater the depth of field.
The first button turns on/off the autofocus mode. If autofocus is on, the camera will focus automatically on subjects in the center of the frame. If you click this button, you can manually pick the object on which you want to focus. Clicking this button again will return to autofocus mode.
The second button enables automatic adjustment of camera parameters for optimal depth of field. In this mode, the appropriate sensor size and focal length of the lens are adapted to the scene size. You only need to choose the f-number. By turning the auto-adjustment off, you can manually set all camera parameters.
The third button enables the 3x3 grid displayed over the frame for a more convenient composition.
Adjust backplate ...
Backplates are fairly straightforward. Check out the Backplate section of the Environment tab, where you will see several options:
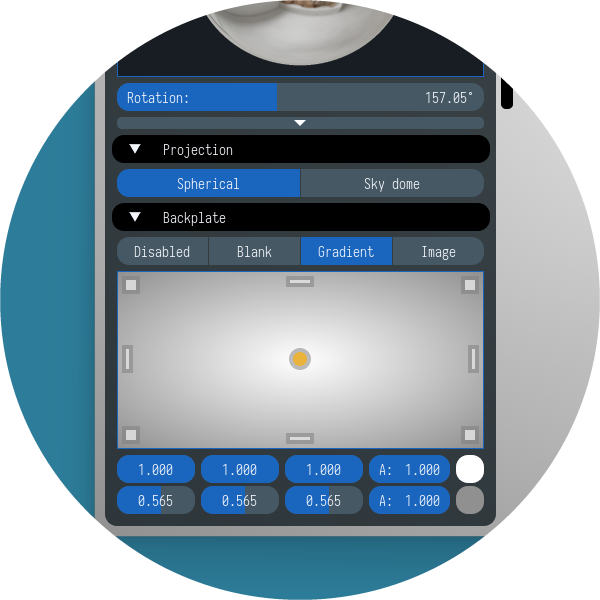
The first option is Disabled, which means using the HDRI environment map as a background. The second is Blank, allowing us to set a fully transparent backplate for our render. The third is Gradient, and can be used to create a solid color or gradient backplate. The last one is Image which brings up a file browser and allows you to open any image to be used as a backplate.
Two widely used options for jewelry renders are white and transparent backgrounds. The second one is particularly useful when you need to put the render on a website, configurator, or presentation on top of another background/image. Below, you may find two renders made with white and transparent backgrounds:

... or set floor material
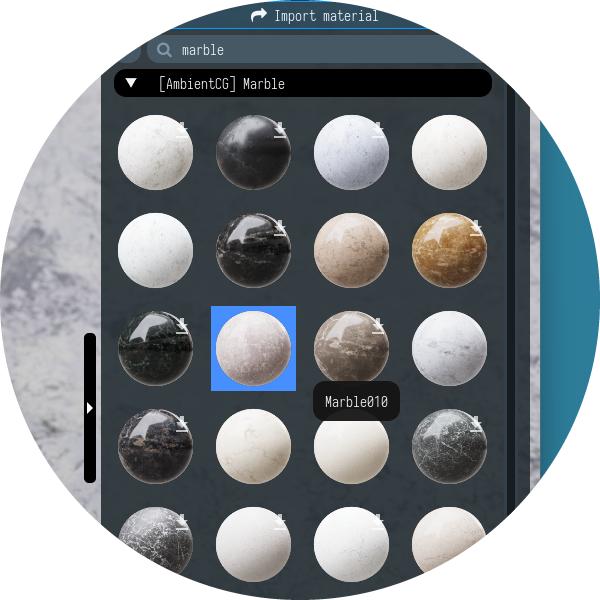
Alternatively, you can assign textured material to the floor. For jewelry rendering, textures of natural stone or fabric are a good choice. Recently, the Library has been significantly expanded, and now it contains over 1900 PBR material presets. All presets are available under the Creative Commons CC0 1.0 License. Just type "marble" in the search box and drag the appropriate preset onto the floor:
Our setup is complete. All that remains is to choose the appropriate view angle and take the shot.
Keep in mind that in addition to static images, Light Tracer Render also allows you to render videos with different camera trajectories for a better presentation of jewelry products. Along with camera animation, you may use a built-in physics engine to record physics simulations. Please visit our YouTube channel for more tutorials.