Tutorial: Using HDRI editor
In this tutorial, we will take a brief look at the HDRI editor and show how to quickly create a custom HDR environment for your Light Tracer Render scenes
Watch the quick video or read the full post bellow.
Start using Light Tracer Render today
While working in Light Tracer Render, you essentially have two options for lighting your scenes. First up is using local mesh lights, which you can drop into the scene along with other objects. Any object in the scene can be turned into a light source. To do this, you need to set the Emission parameters for its material in the Properties widget.
The second option employs the Image-Based Lighting (IBL) approach. As the name suggests, IBL captures lighting information as an image (usually HDR). This image is then projected onto a dome or sphere surrounding the scene to mimic real-world lighting. Often, IBL is quicker to use than mesh lights and gets you faster rendering times. That's why we have decided to focus on it today.
Light Tracer Render provides some default environment map options within the Library tab, but you can find a lot more on third-party resources such as HDRi Haven. Alternatively, you can craft your environment using the tools provided by Light Tracer Render, which is our focus today.
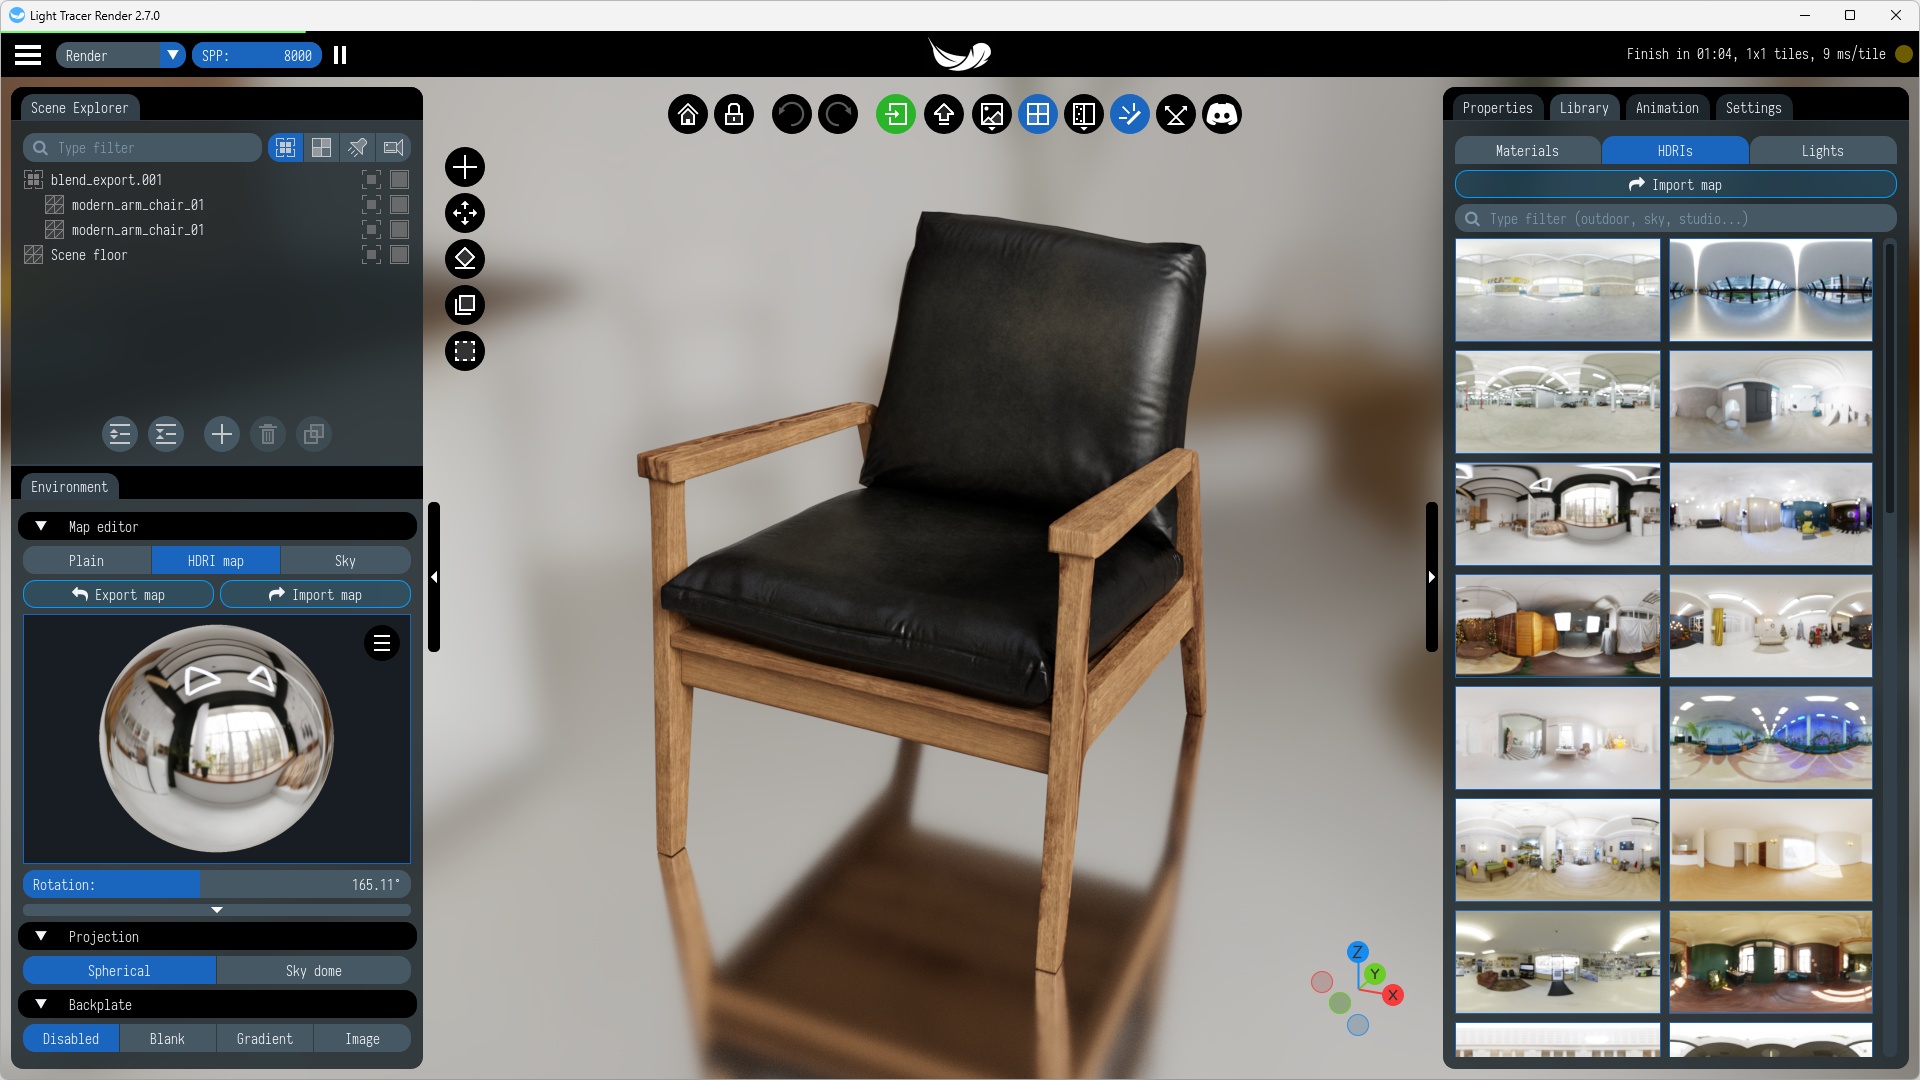
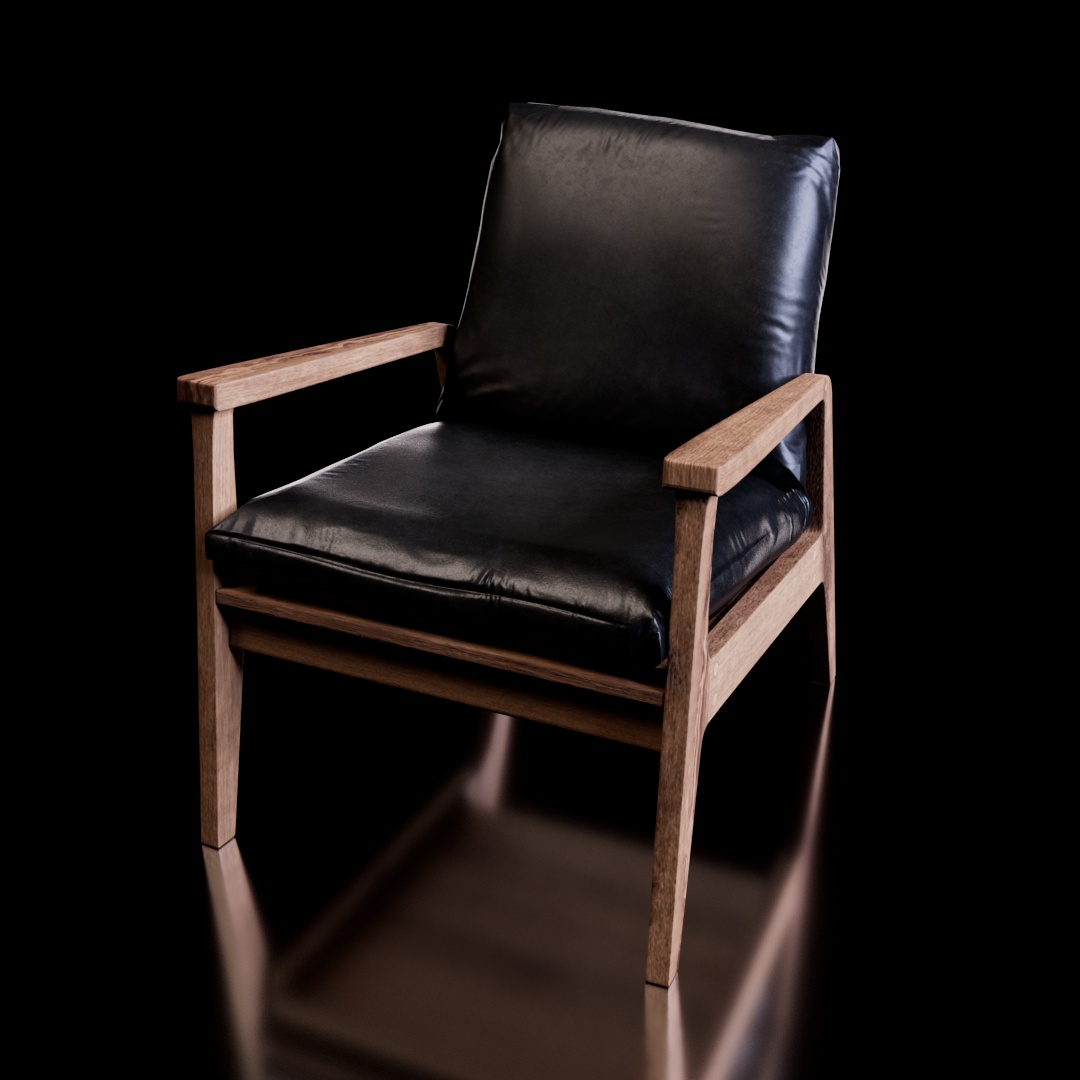
For the tutorial, we picked the Modern Arm Chair model by Vibrant Nordic. One nice thing to add to our scene is a glossy reflection catcher, so we get a basic product rendering setup:
Three-point lighting
Let's use the HDRI editor to build a basic three-point lighting setup consisting of a key light, fill light, and rim light.
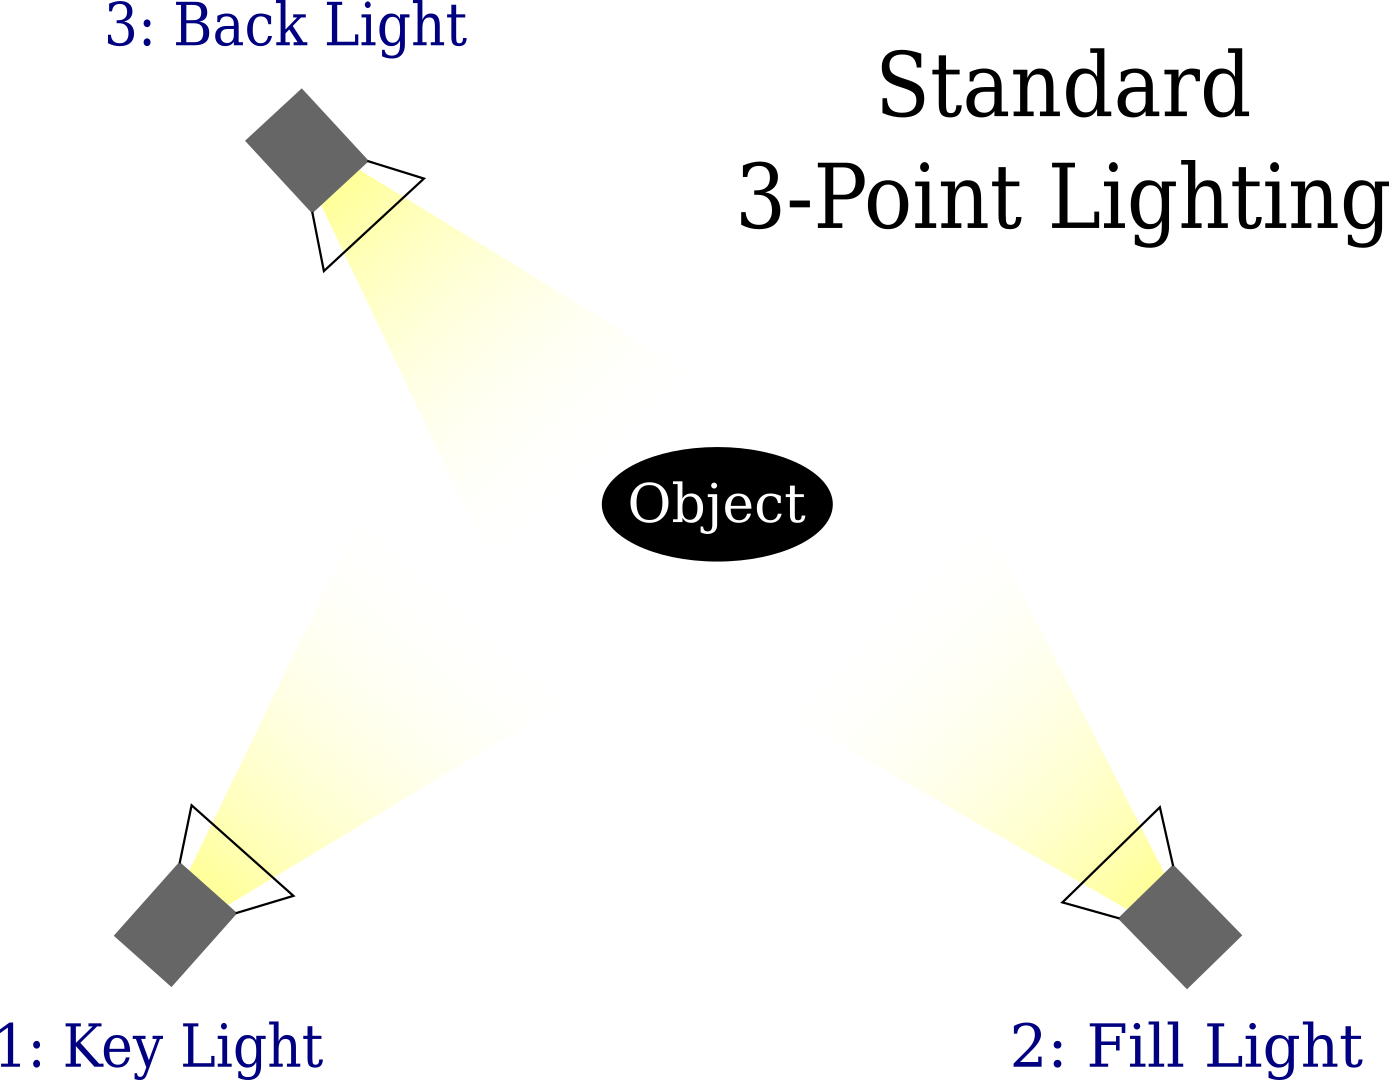
A typical three-point lighting setup (from Wikipedia)
The key light stands as the brightest and most significant light source in the classic three-point lighting arrangement. It sets the overall brightness of a scene. Filmmakers usually place this primary light on one side of the camera, facing the subject, typically at a 45-degree angle. This light is pivotal in establishing the atmosphere of a scene. Its positioning, along with the use of additional lights, can either produce a high-key image characterized by soft, uniform lighting and a cheerful ambiance, or a low-key image marked by stark contrasts, deep shadows, and a more intense mood.
On the flip side, the fill light, positioned on the camera's opposite side, serves to soften the shadows cast by the key light on the subject, revealing more details in the darker areas. This secondary light is generally dimmer than the key light. The degree to which cinematographers adjust the intensity of the fill light plays a crucial role in shaping the scene's overall ambiance.
Completing the trio is the backlight, also known as the rim light, which illuminates the subject from behind. This light casts a halo-like outline around the subject's head, effectively separating them from the background and adding depth to the image. Filmmakers typically position the backlight directly behind the subject or high enough to remain out of the shot.
Using HDRI editor
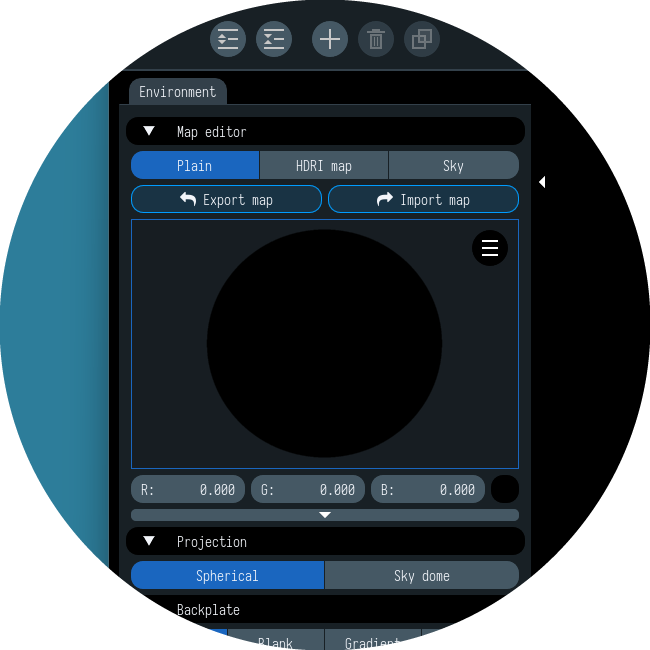
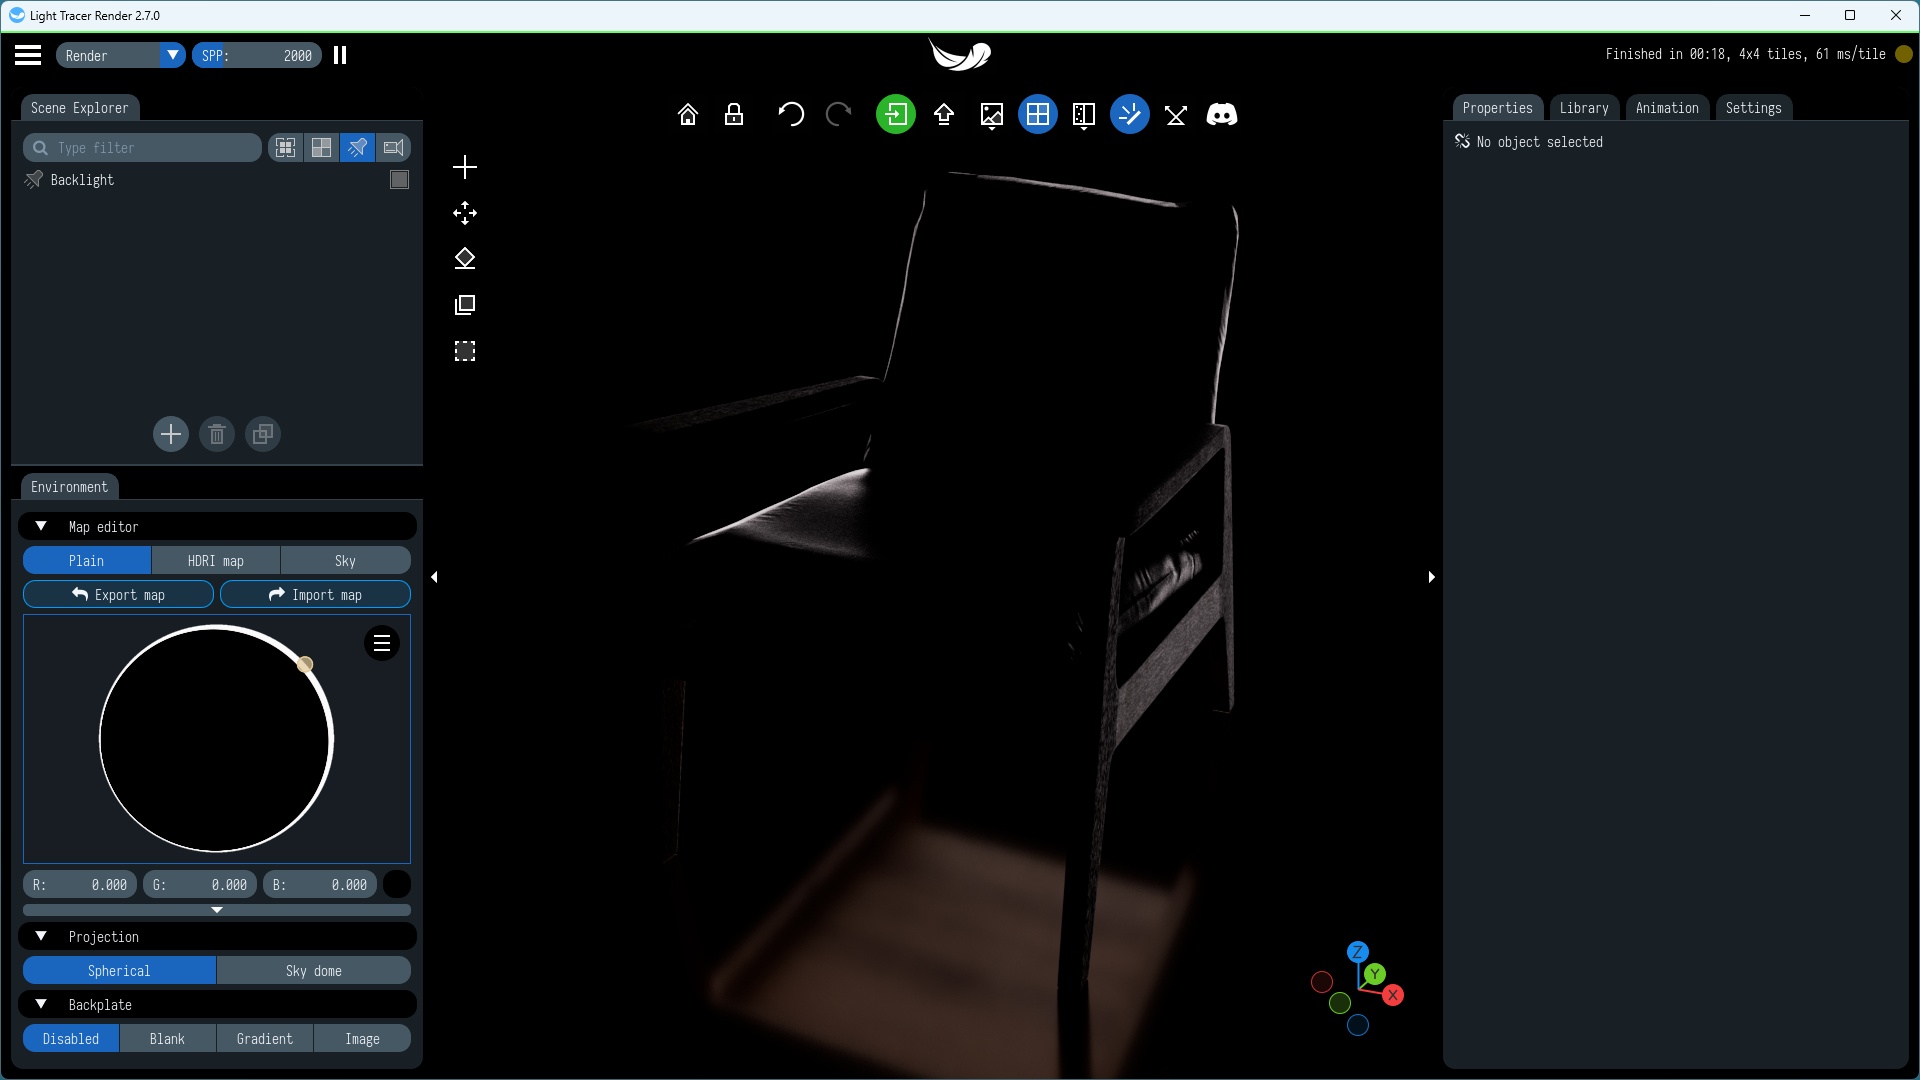
Let's start with a Plain environment map completely filled with a single color. We will set the color to black, thereby our environment will not emit light at all:
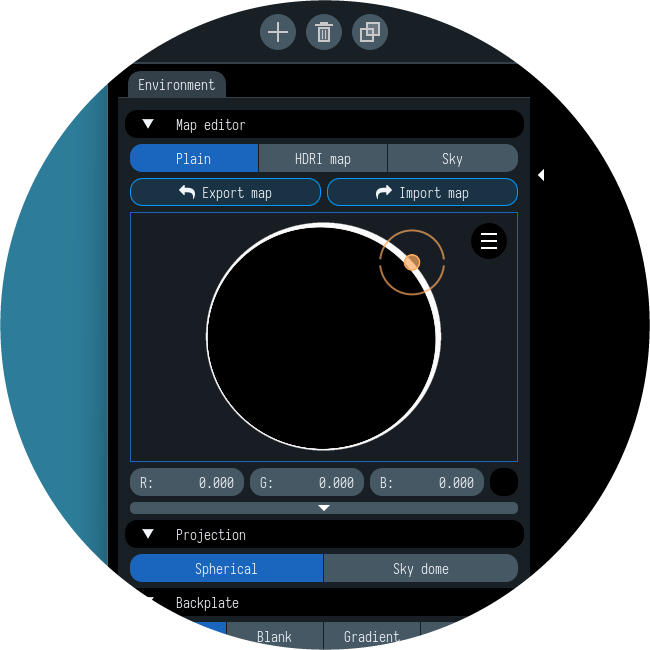
Let's start with the rim light and place it right behind the model. Go to the Map emitters tab in the Scene Explorer and click the Plus button to add a new light to the environment map. We can move the light using the interactive preview on the Environment tab. Think of this preview as a chrome ball seen from the current camera view point, so you are positioning the lights relatively to the current view. That is very convenient because you always understand how to move the light source, so that it shines from the right, left, below or above. Our goal is to give the subject a rim of light, serving to separate the subject from the background and highlighting contours. To do this, we need to drag the source as far as possible to the edge of our chrome ball:
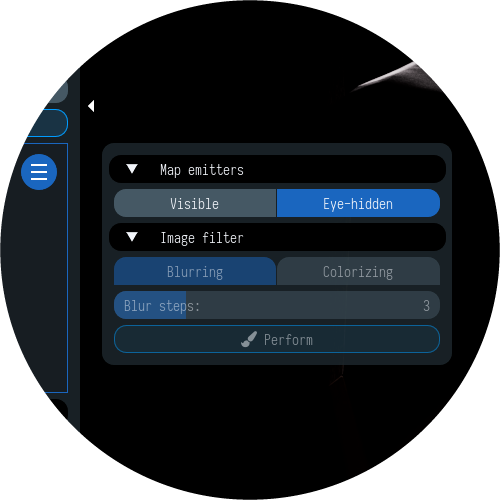
Our source will shine directly into the camera, obscuring the subject itself. We can hide sources from an "eye" while keeping the illumination from them completely. There is the dedicated option available here:
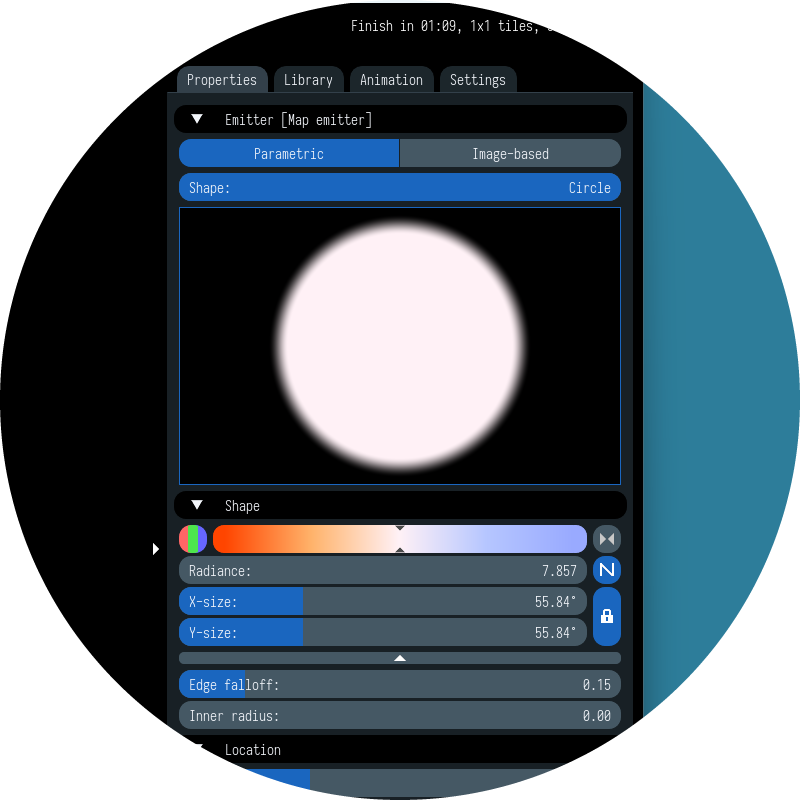
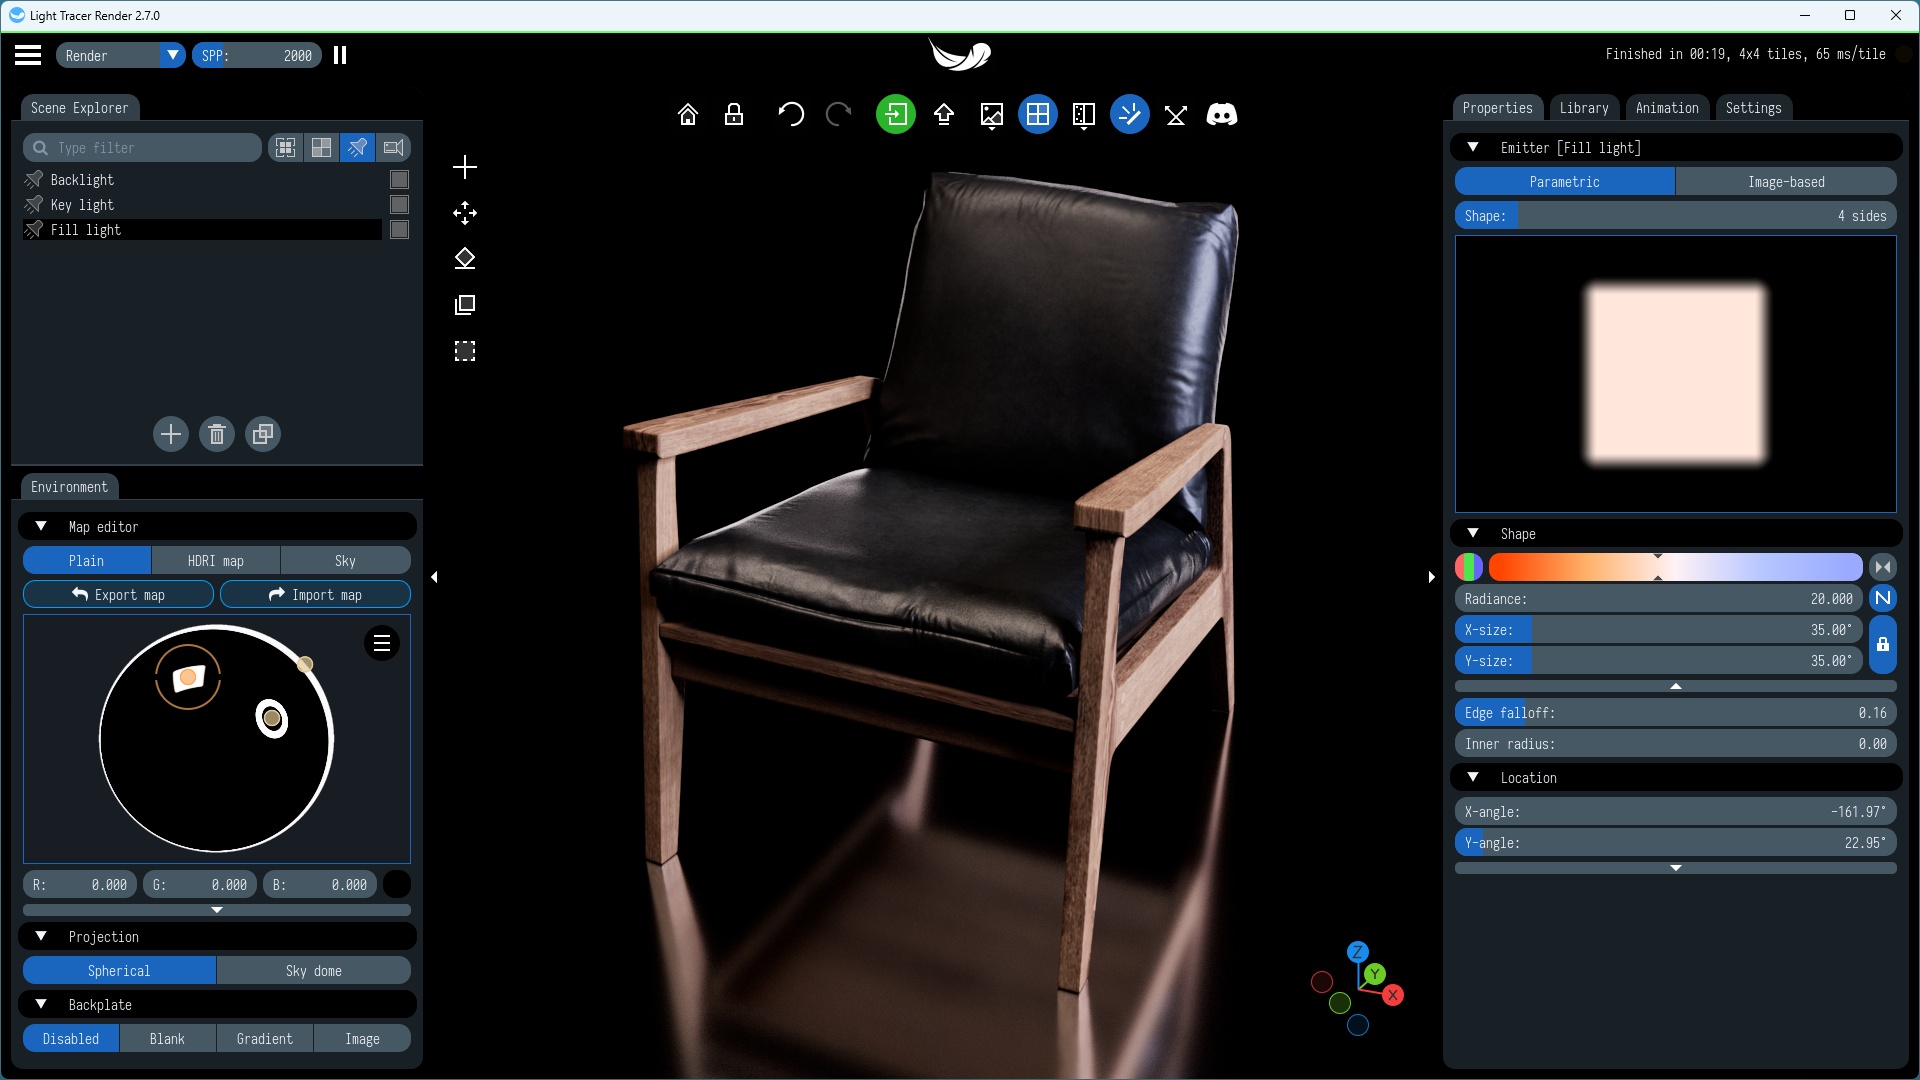
We can also adjust the size of the light in the Properties widget to control the width of edge highlights. Additionally, you can change the emission power or color by tuning the temperature or using the RGB control:
As a result of the above actions, we will get our object illuminated from behind:
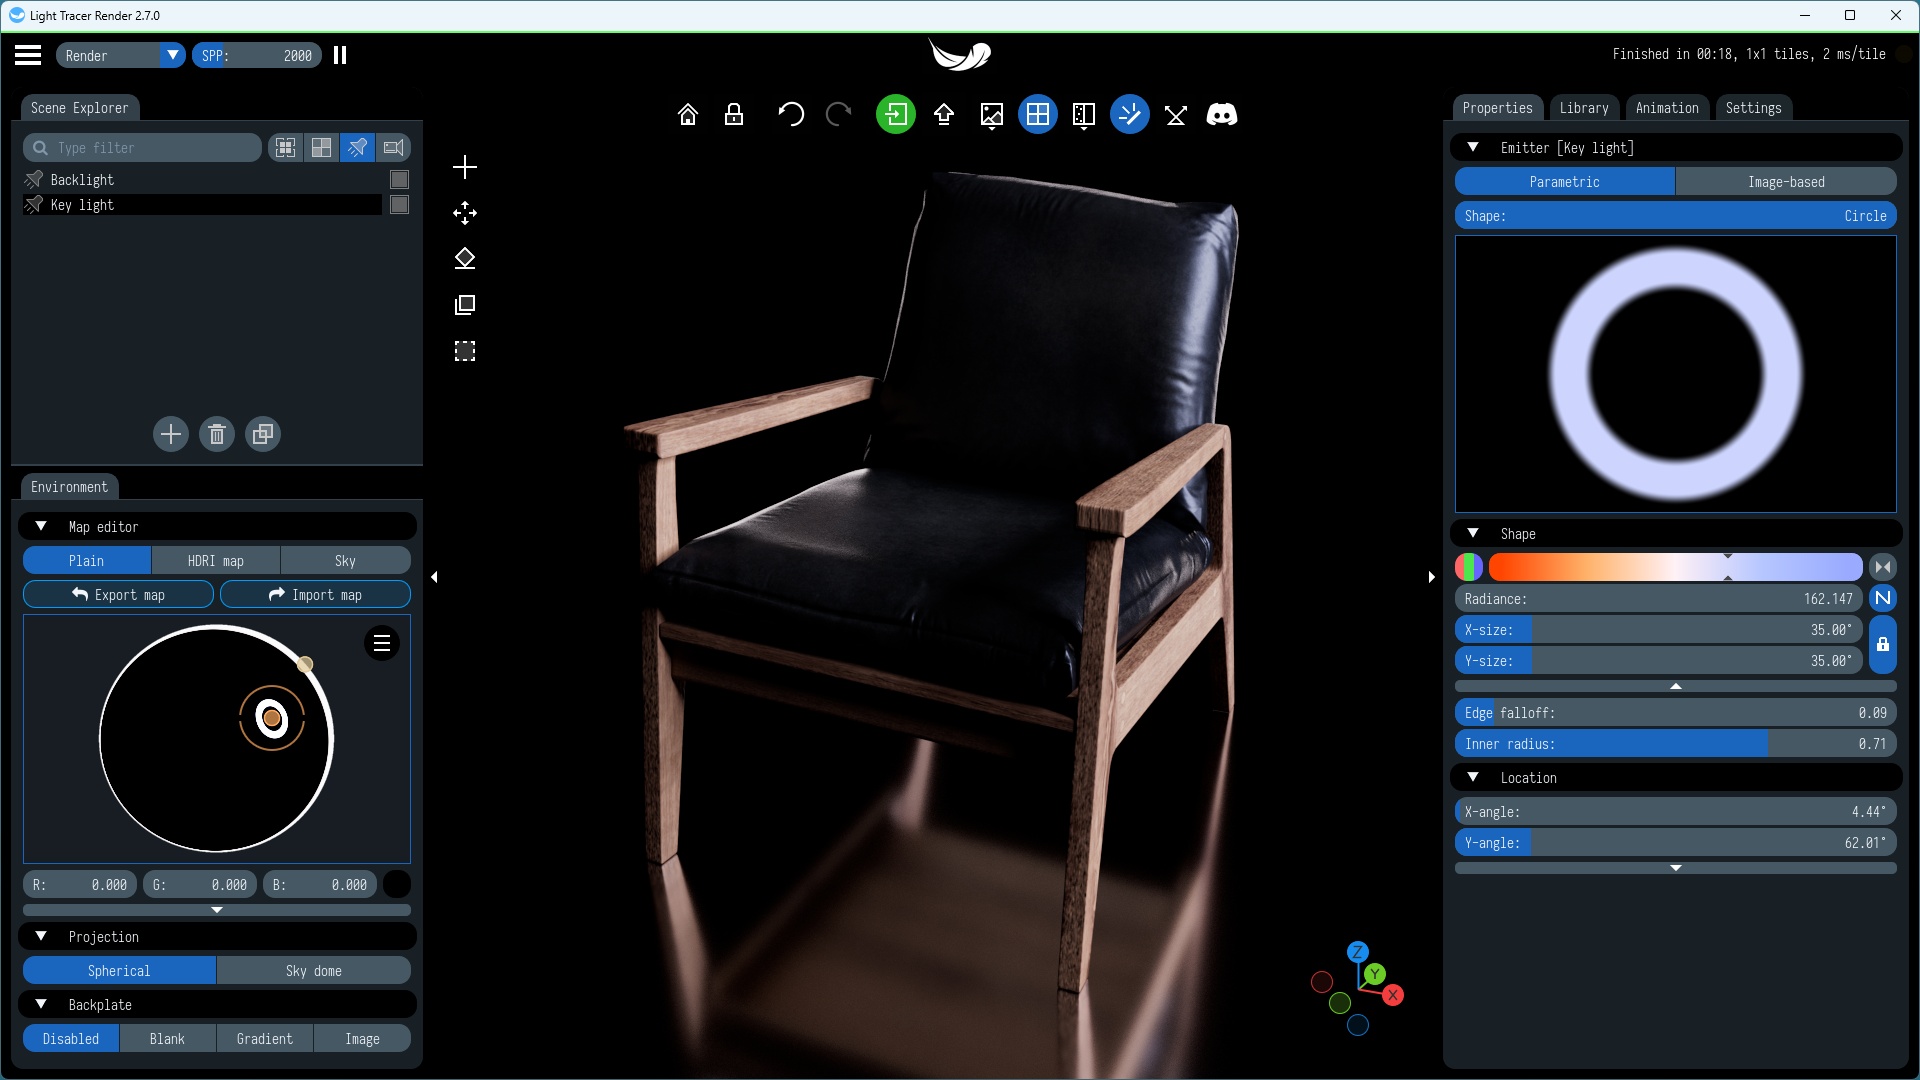
Next, we'll introduce a key light which, as implied by the name, shines directly onto the subject, acting as its primary source of illumination. Note, that the Falloff control lets you tweak the softness of the light, while the Shape slider allows picking between possible light shapes: round, square, or polygonal. Also, you may create ring lights by adjusting Inner radius slider.
Lastly, we'll add a fill light to complete our three-point lighting setup. The fill light also illuminates the subject, but from a side angle relative to the key light, and is often positioned lower than the key light.
In this brief tutorial, we've touched on the basics of the HDRI editor. It is super easy to use and proivide enough flexibility for creating environment you envision.
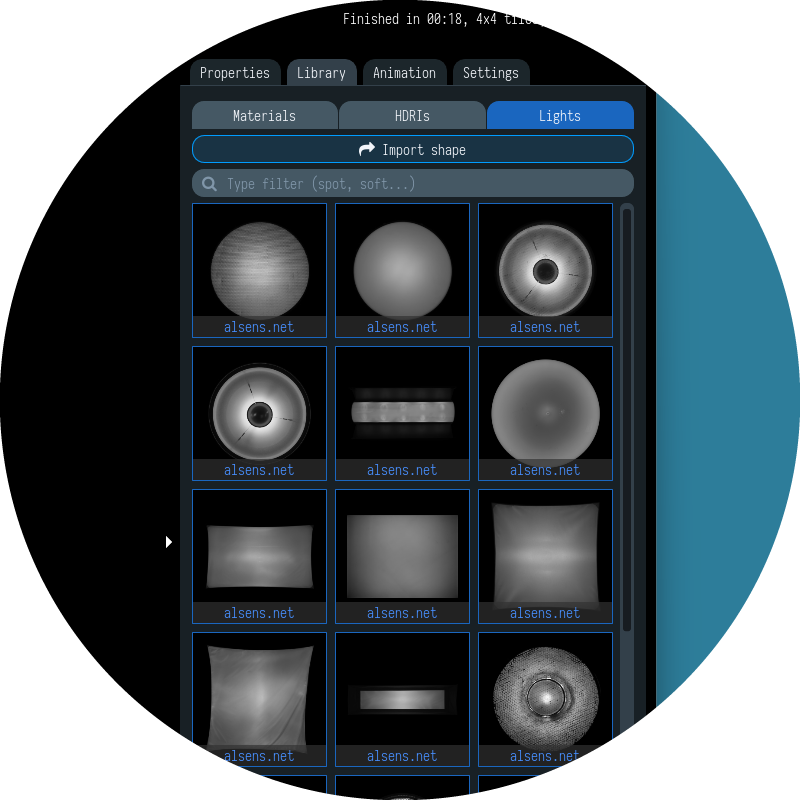
Keep in mind, that along with parametric lights (the shape of which is defined by a set of parameters), you can use image-based lights from the Library tab. Here, you'll find over 30 studio light presets. Some of presets are synthetic, but most are based on real-world HDR measurements and capture techniques. Each one is adjustable for size, color temperature, and more. Read more about studio lights library in dedicated tutorial.
Hopefully, this quick overview helps you start on the path to mastering lighting in Light Tracer Render. We are looking forward to see your renders! Feel free to ask any questions in our Discord community!