Light Tracer Render 2.6.0
Dear Light Tracer users!
With this release, we were focused on the Light Tracer’s GPU rendering engine to bring it to a new level. The significantly improved Caustics mode (introduced in Light Tracer 2.0) is now based on Bi-Directional Path Tracing (BPT) and allows you to render amazing scenes with complex indirect illumination. The material model has been significantly extended. Now, you can simulate such effects as rough coating with an independent bump map, a thin-film iridescence, and spectrally accurate dispersion. You can seamlessly put your 3D models into an HDRI environment with an improved shadow catcher. The new version also introduces non-photorealistic rendering features allowing you to add outlines to your renderings or stylize your art to make it look like sketches. As usual, UI has got a lot of attention to make designing your products and scenes a simple and fun process. We invite you to read the details about the new features below.
Start using Light Tracer Render today
Caustics mode / Bi-Directional Path Tracing
Classic uni-directional path tracing can not handle complex lighting, such as caustics (especially from small light sources). Starting from version 2.0, Light Tracer got a more advanced Caustics mode capable to simulate such effects with some limitations. In the new version, this mode was deeply reworked and now uses Bi-Directional Path Tracing (BPT), which allows you to get the result much faster and does not require any training for a particular 3D scene. That allows to render caustics almost instantly, and the noise decreases more quickly. Just check out how cool it looks:
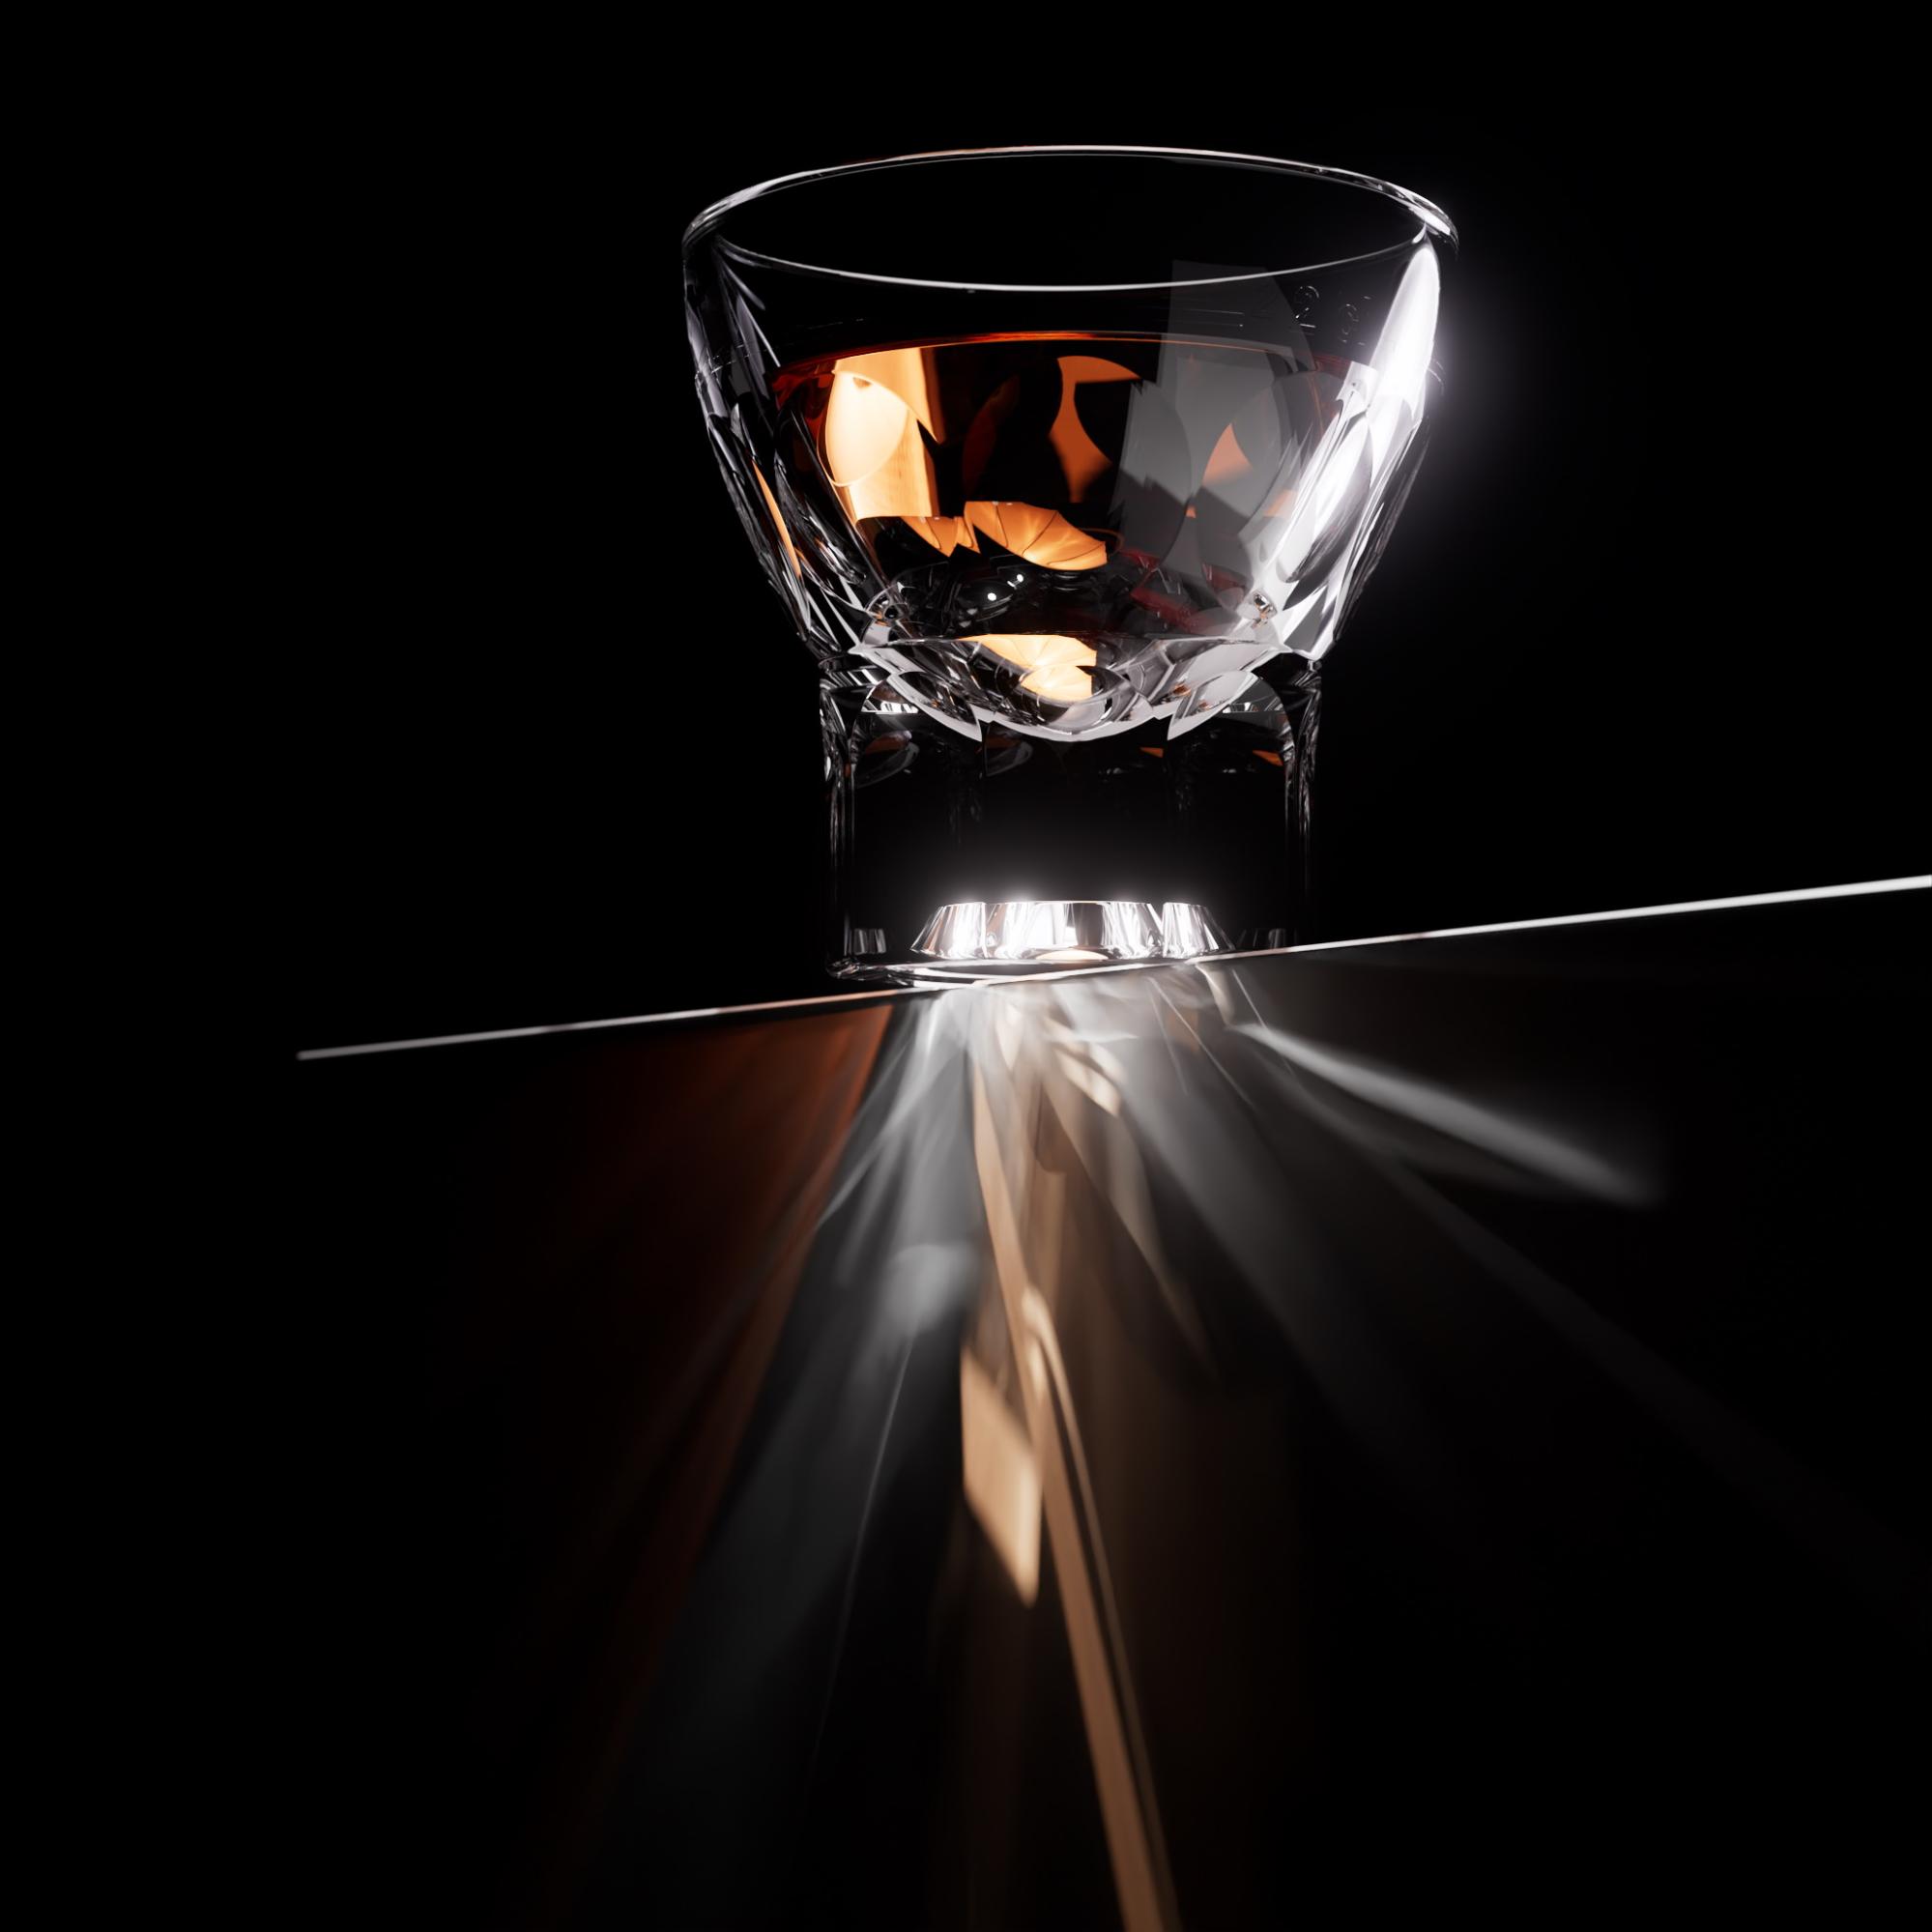
Model by Roland Schneider
Keep in mind that, by default, this mode is turned off since for most scenes with simple illumination, it is more efficient to use uni-directional path tracing. But you can activate it at any time using a button in the upper row:
As a rule, this mode reduces rendering performance by 2-2.5 times. However, please note that each frame (or sample) in this mode has less noise. Therefore, typically this mode requires fewer samples to achieve the same noise level when using classical path tracing. Unfortunately, the new Caustics mode is only available on Windows (and not on macOS or web). However, we will continue to work to ensure that our users get the same features regardless of the platform, so you may expect Caustics mode on macOS in future releases.
Improved materials
The materials have been significantly upgraded to give you more creative options. Let's go through the main innovations.
The dielectric coating was reworked. The previous version gave a strong darkening effect on the base material layer and allowed to model only a perfectly smooth coating. The updated model is free of these shortcomings. The base material layer is no longer darkened, and now you can control the roughness of the varnish. See how the new coating looks on different renders:
Guitar model by T-FLEX CAD, Car model by wallon
The new material property Iridescence allows modeling thin film interference making a rainbow effect like on soap bubbles, sunglasses, or butterflies wings. Film thickness (Thin-film width) and refractive index (Thin-film index) parameters allow controlling the appearance of this effect. In the absence of a clearcoat layer, the iridescent film applies to the metallic component of the base layer. The higher the Metalness parameter of the material, the stronger the iridescent effect will be. So you can simulate the anodized aluminum and "rainbow" chrome, as well as different iridescent and pearlescent fabrics used in the fashion industry. In case the clearcoat is used for the material, the iridescent film applies to it instead of the metallic component. That allows for simulating such objects as soap bubbles.
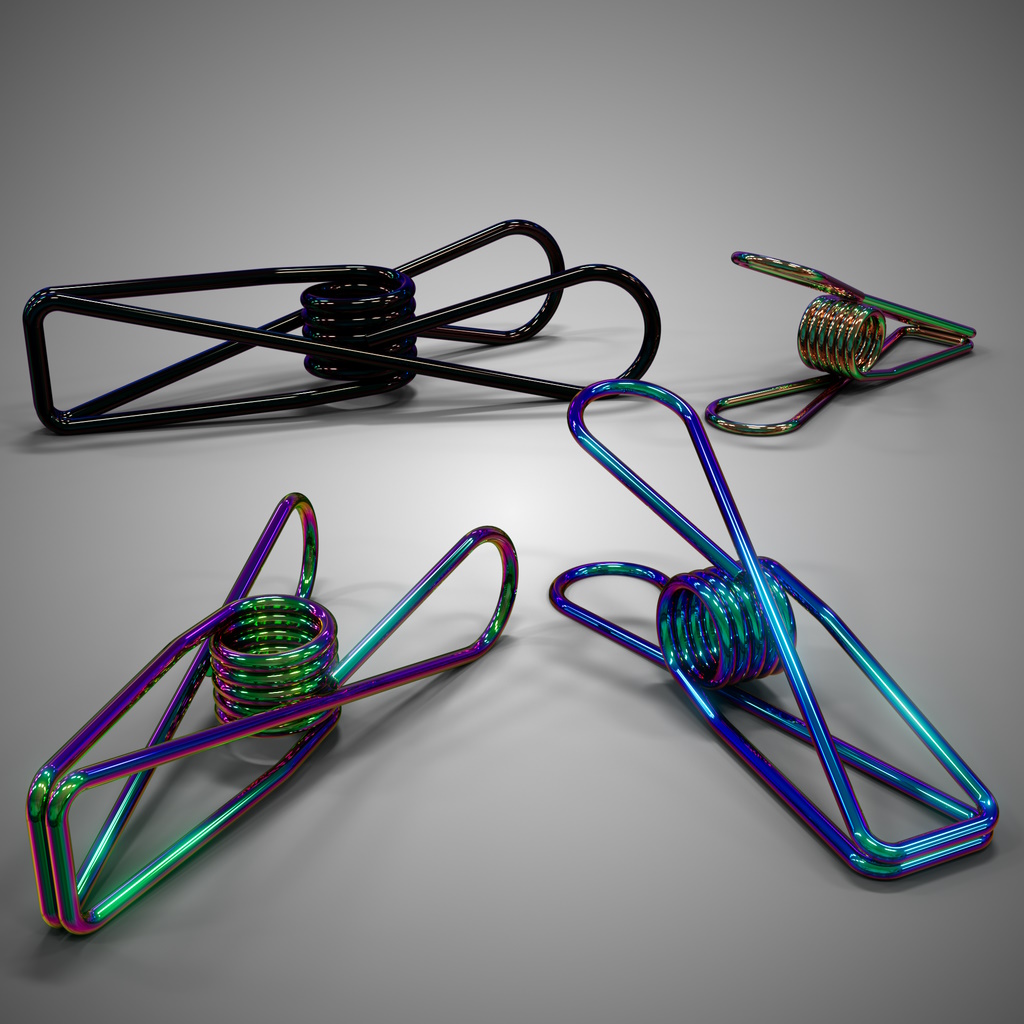
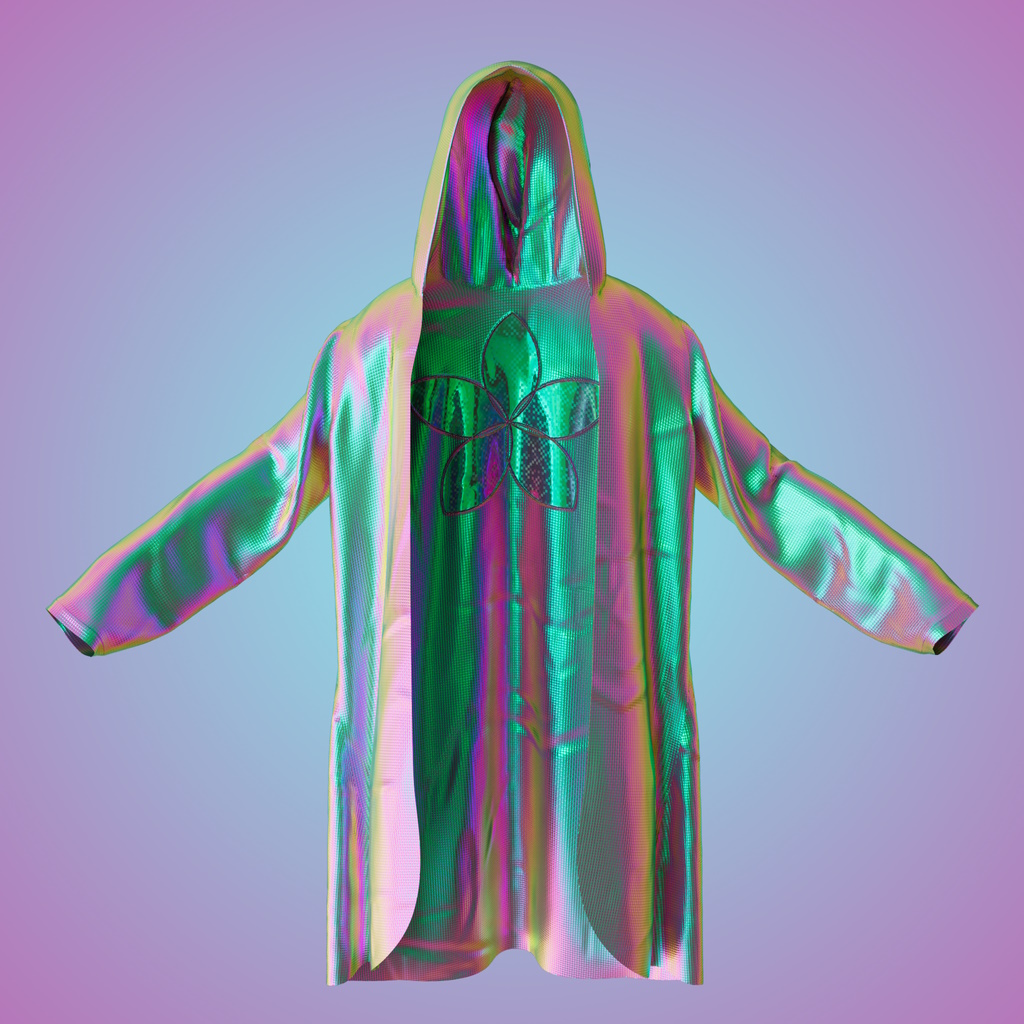
Paper Clip by Roland Schneider, Iridescent Coat by dejan31
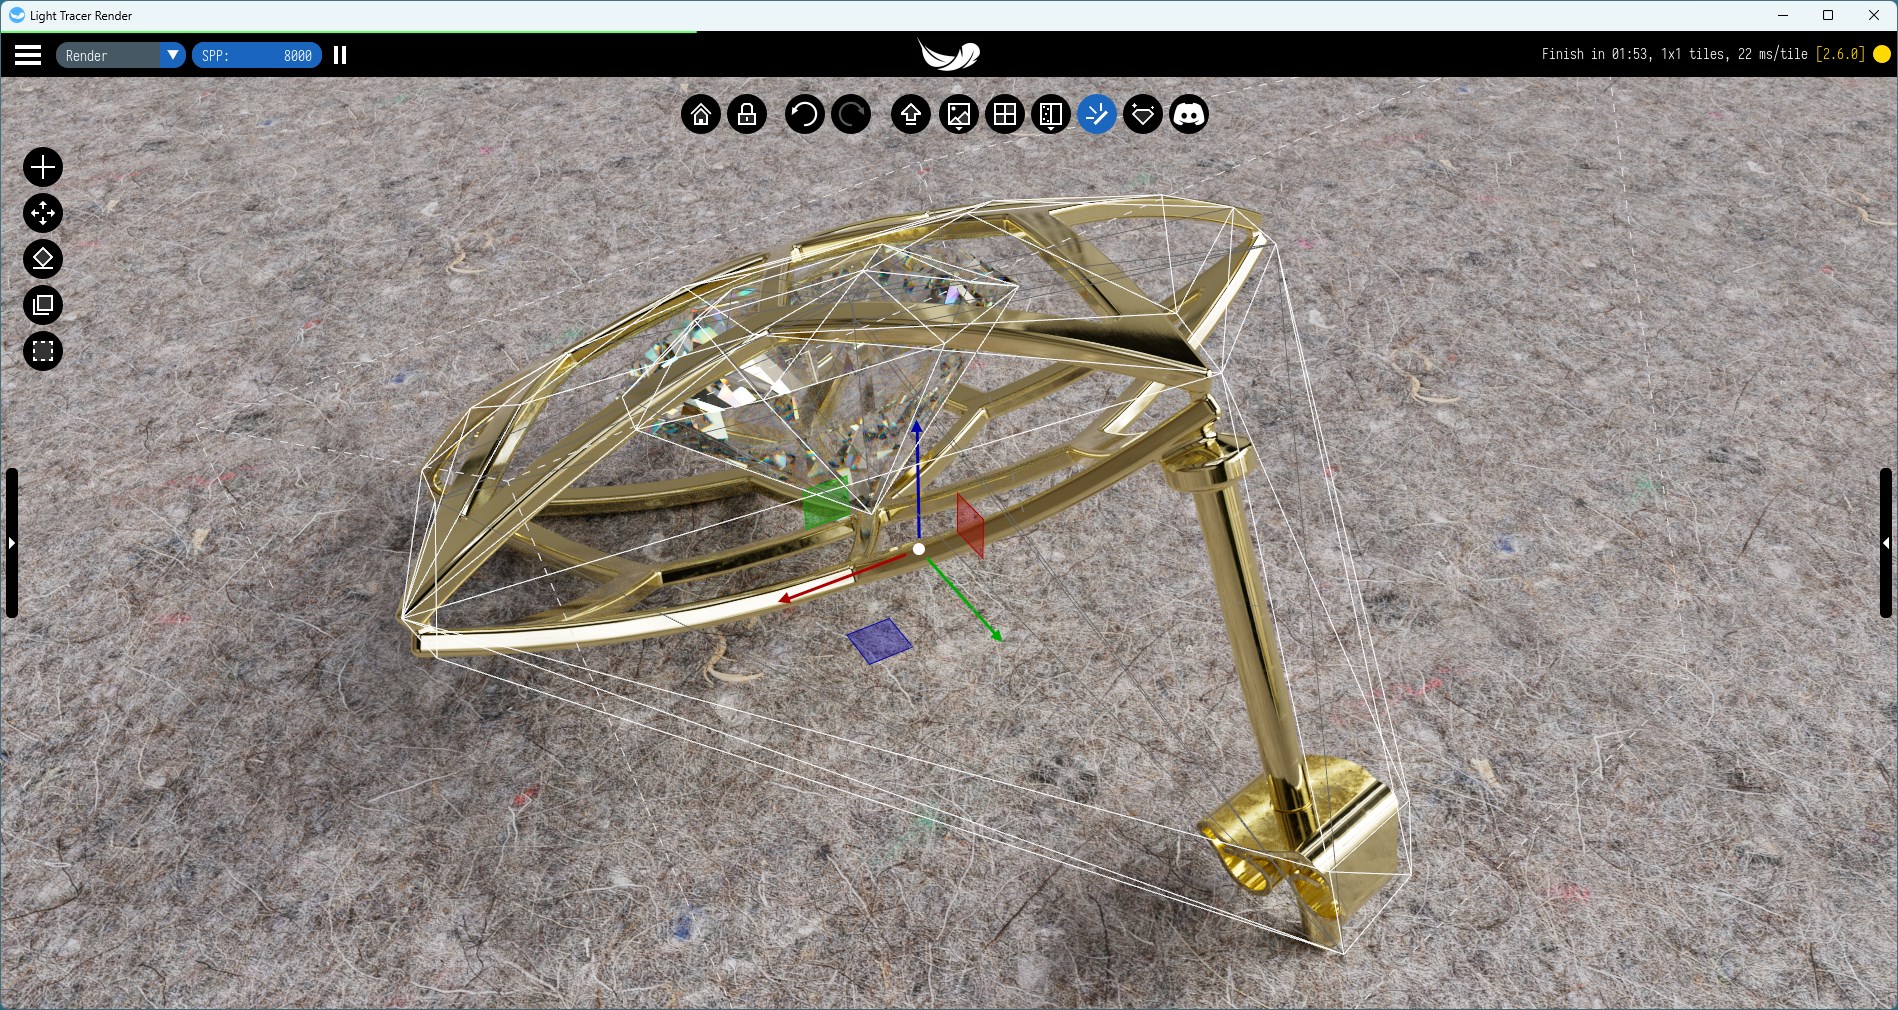
The modeling of light dispersion has also been improved. This optical phenomenon is the rainbow-like coloration occurring with refractive materials like diamonds, crystal glass, and glass prisms. Such light transmission causes the incoming light to split into constituent colors as it passes through the medium. In the fresh release, dispersion is spectrally accurate. When a white light beam hits a dispersive object, the wave length from the visible part of the spectrum is selected, and the engine continues to trace only a part of beam corresponding to its specific wavelength. That guarantees smooth and precise dispersion effects with a full range of all color shades. You will definitely like this innovation if you work in jewelry visualization. Almost all gemstones have strong dispersive properties. With the Caustics mode, this allows you to create absolutely stunning images.
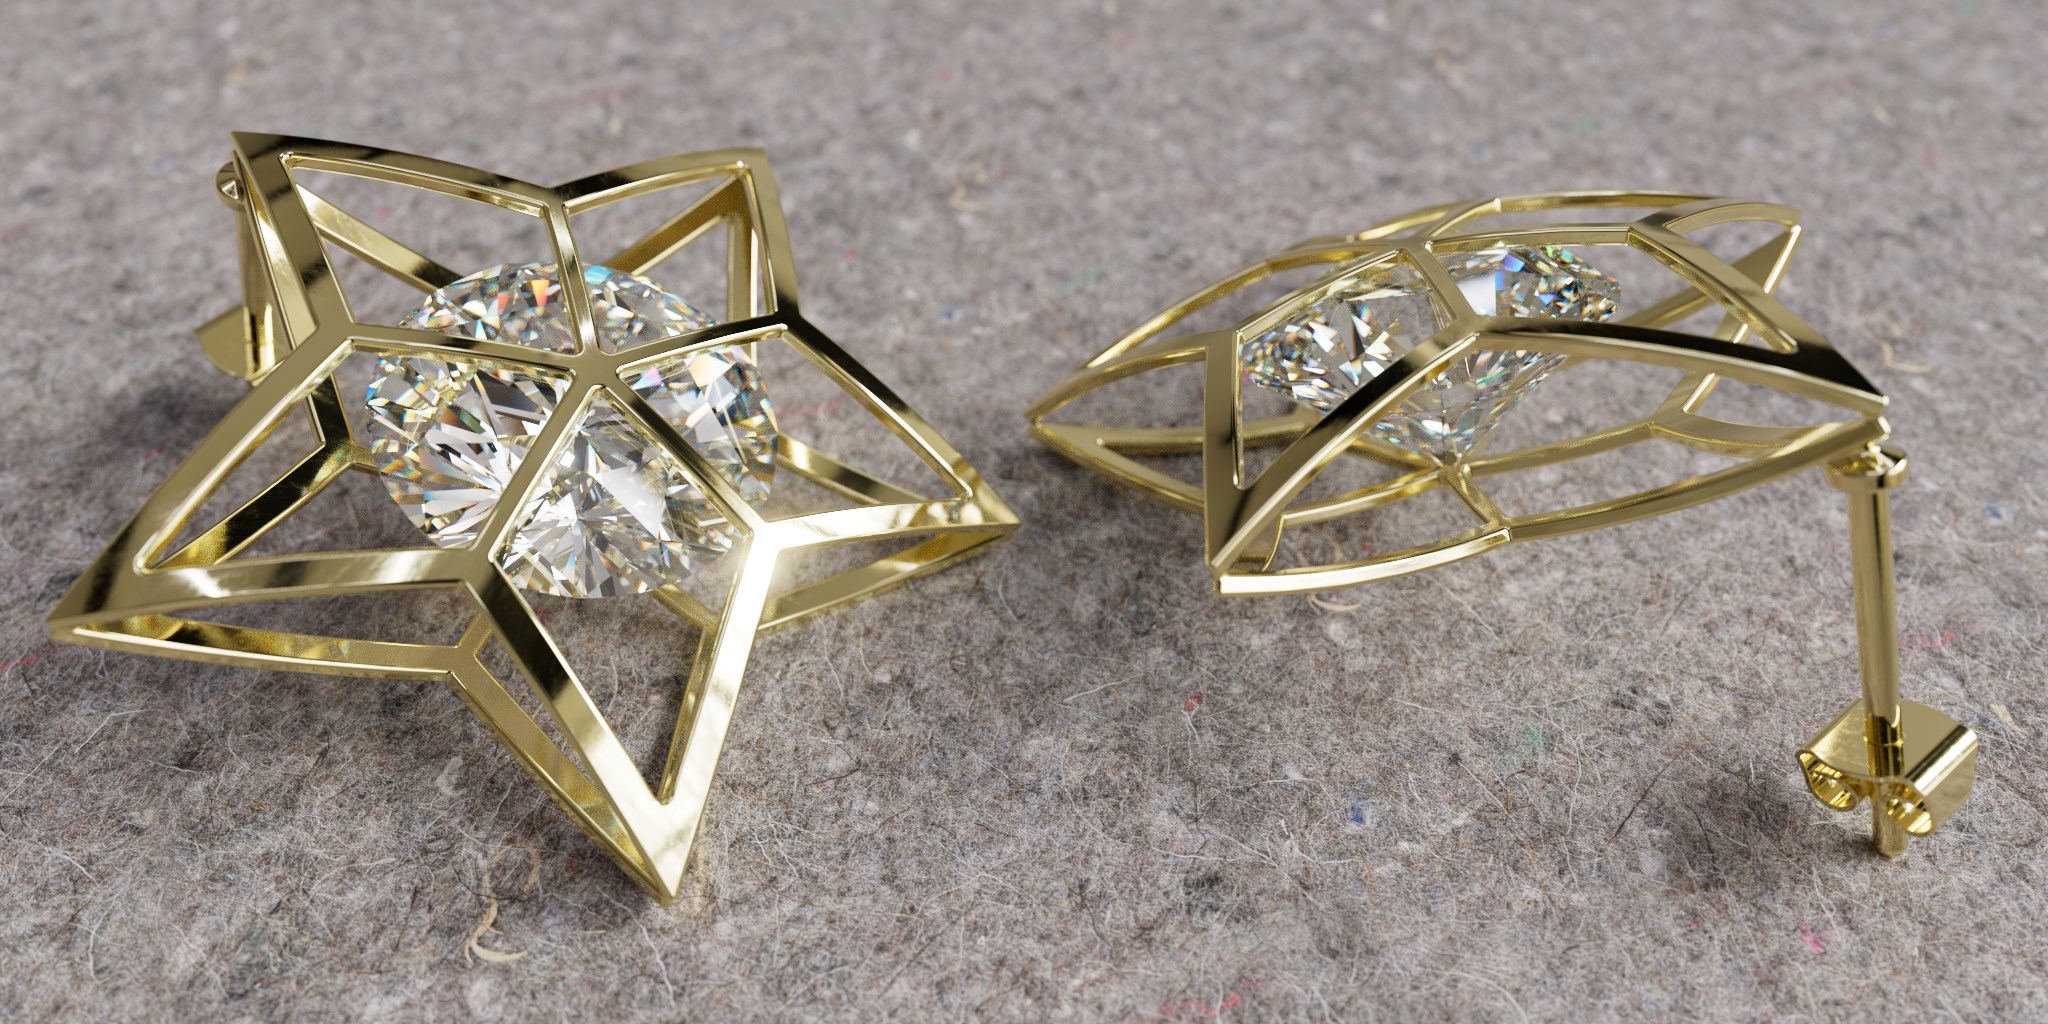
Model by Roland Schneider
As you may know from previous versions, the Anisotropic parameter is used to stretch the reflections of an object. Think of brushed metal with a circular pattern, such as the underside of a frying pan. Instead of having a bump map to model that pattern, you can turn this input up to simulate it.
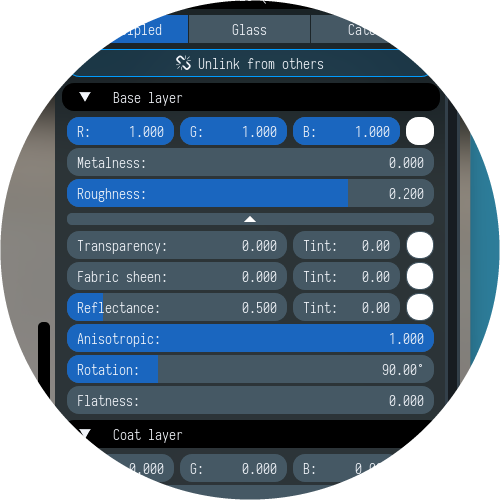
Now you can also adjust the Rotation of anisotropic reflections, which gives more control over the final look. On the image below, anisotropy rotation differs by 90 degrees:

Another nice feature is separate transformations of texture (UV) coordinates for the base and coat layer. This allows assigning a specific bump map for the clearcoat and scaling it as needed without affecting the base layer. You can explicitly choose for which material layer you want to transform your texture maps:
Outlines rendering
Outlines are used to create a cartoon or comic-book-like style. You can overlay it on top of your rendering and tune the appearance with intuitive controls in the Settings tab:
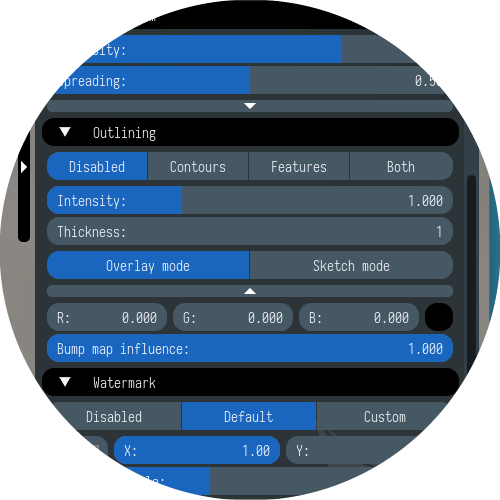
Also, outlines can be used for engineering visualization to produce a sketch-like look of your renderings (just switch from Overlay mode to Sketch mode). Note that you can leave only the contours of the object (Controus), only the edges (Features), or all at once (Both). See what these renders look like:
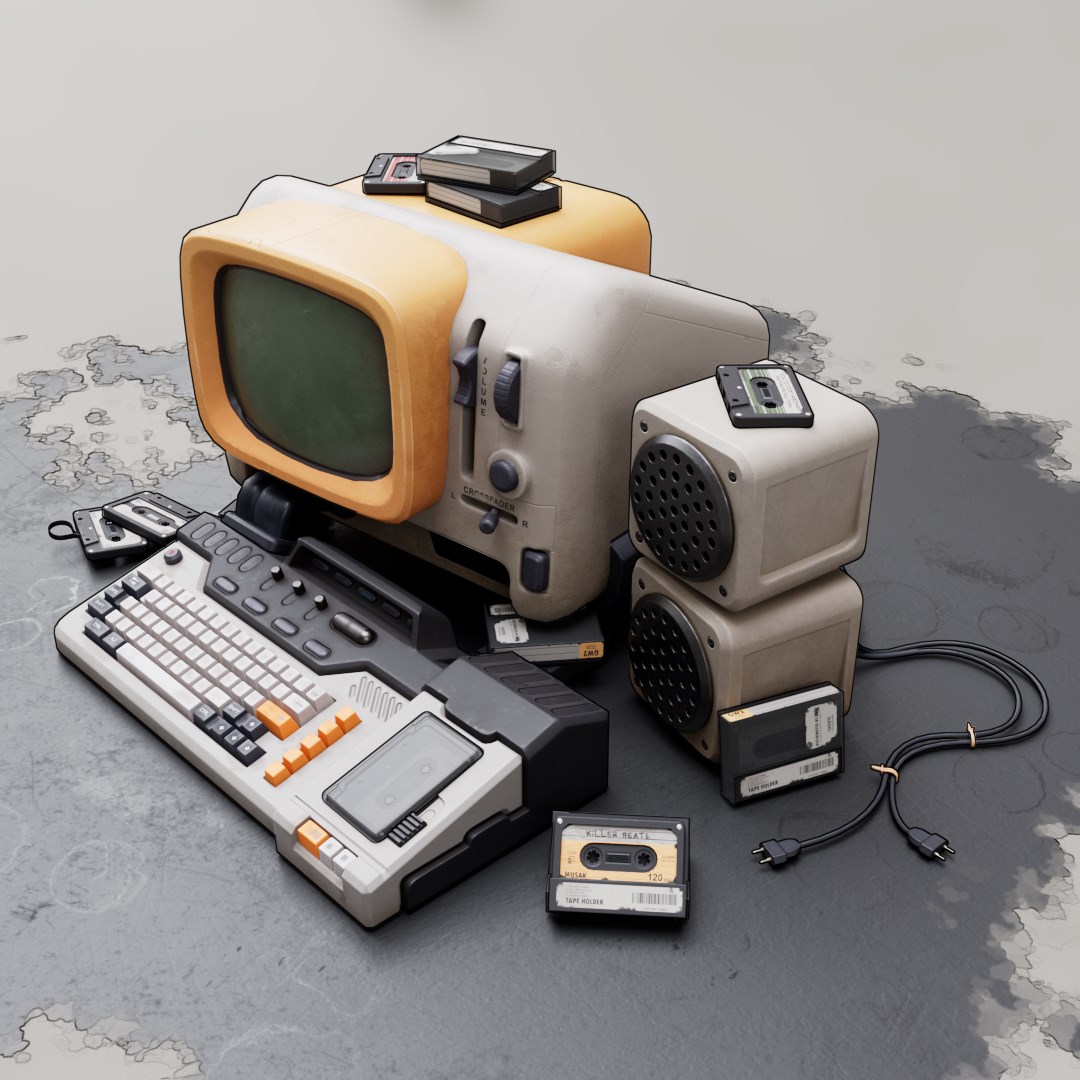
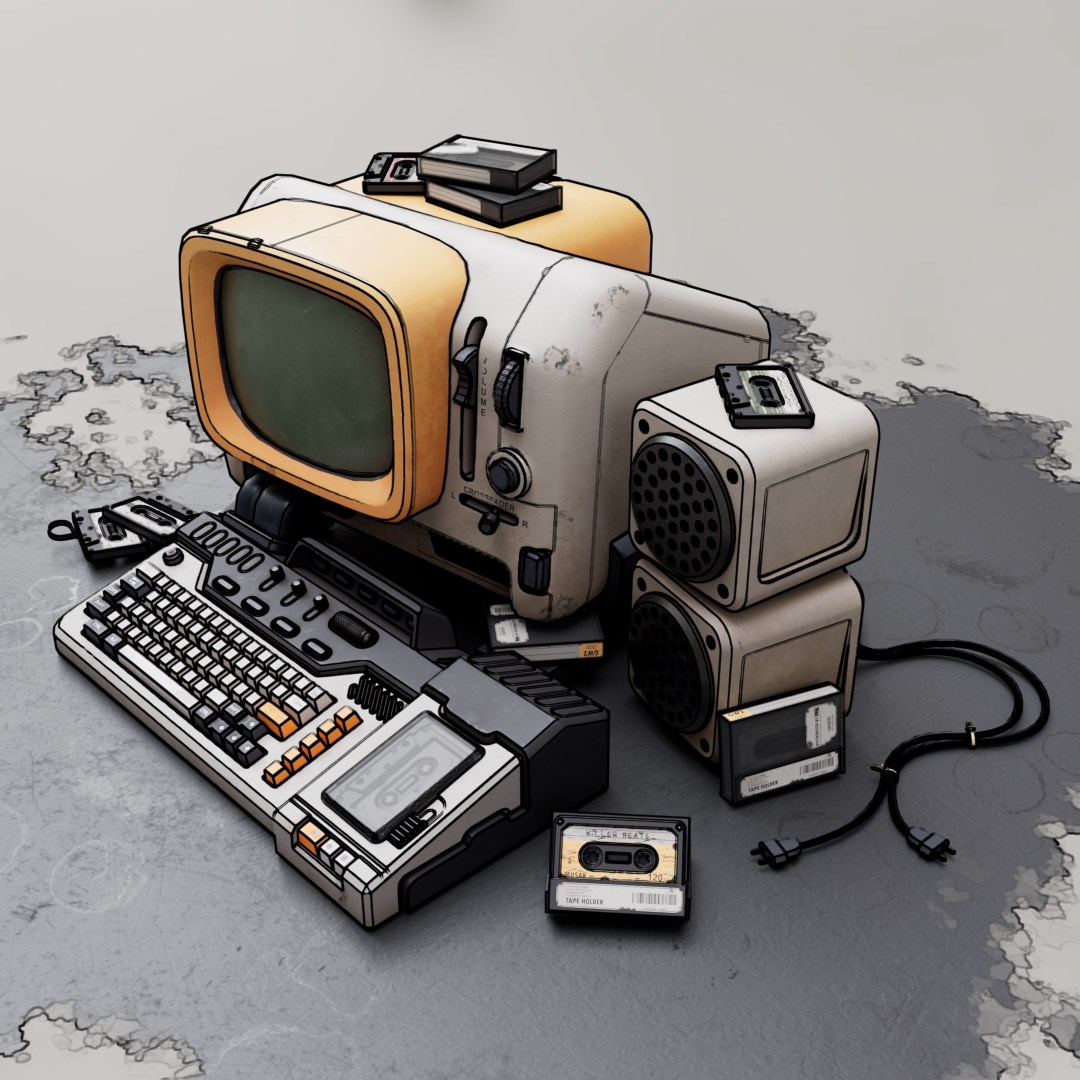

Model by Mikkel Garde Blaase
Other improvements
The fresh release also contains a lot of small but nice improvements and fixes that you will enjoy. Below we have listed only the most significant of them.
Improved shadow catcher
Previously, you may have encountered an issue when the shadow catcher almost disappeared on a bright backplate. In the new version, the catcher has become more contrasting and dark. So now it’s possible to make a good ground shadow in various lighting conditions.
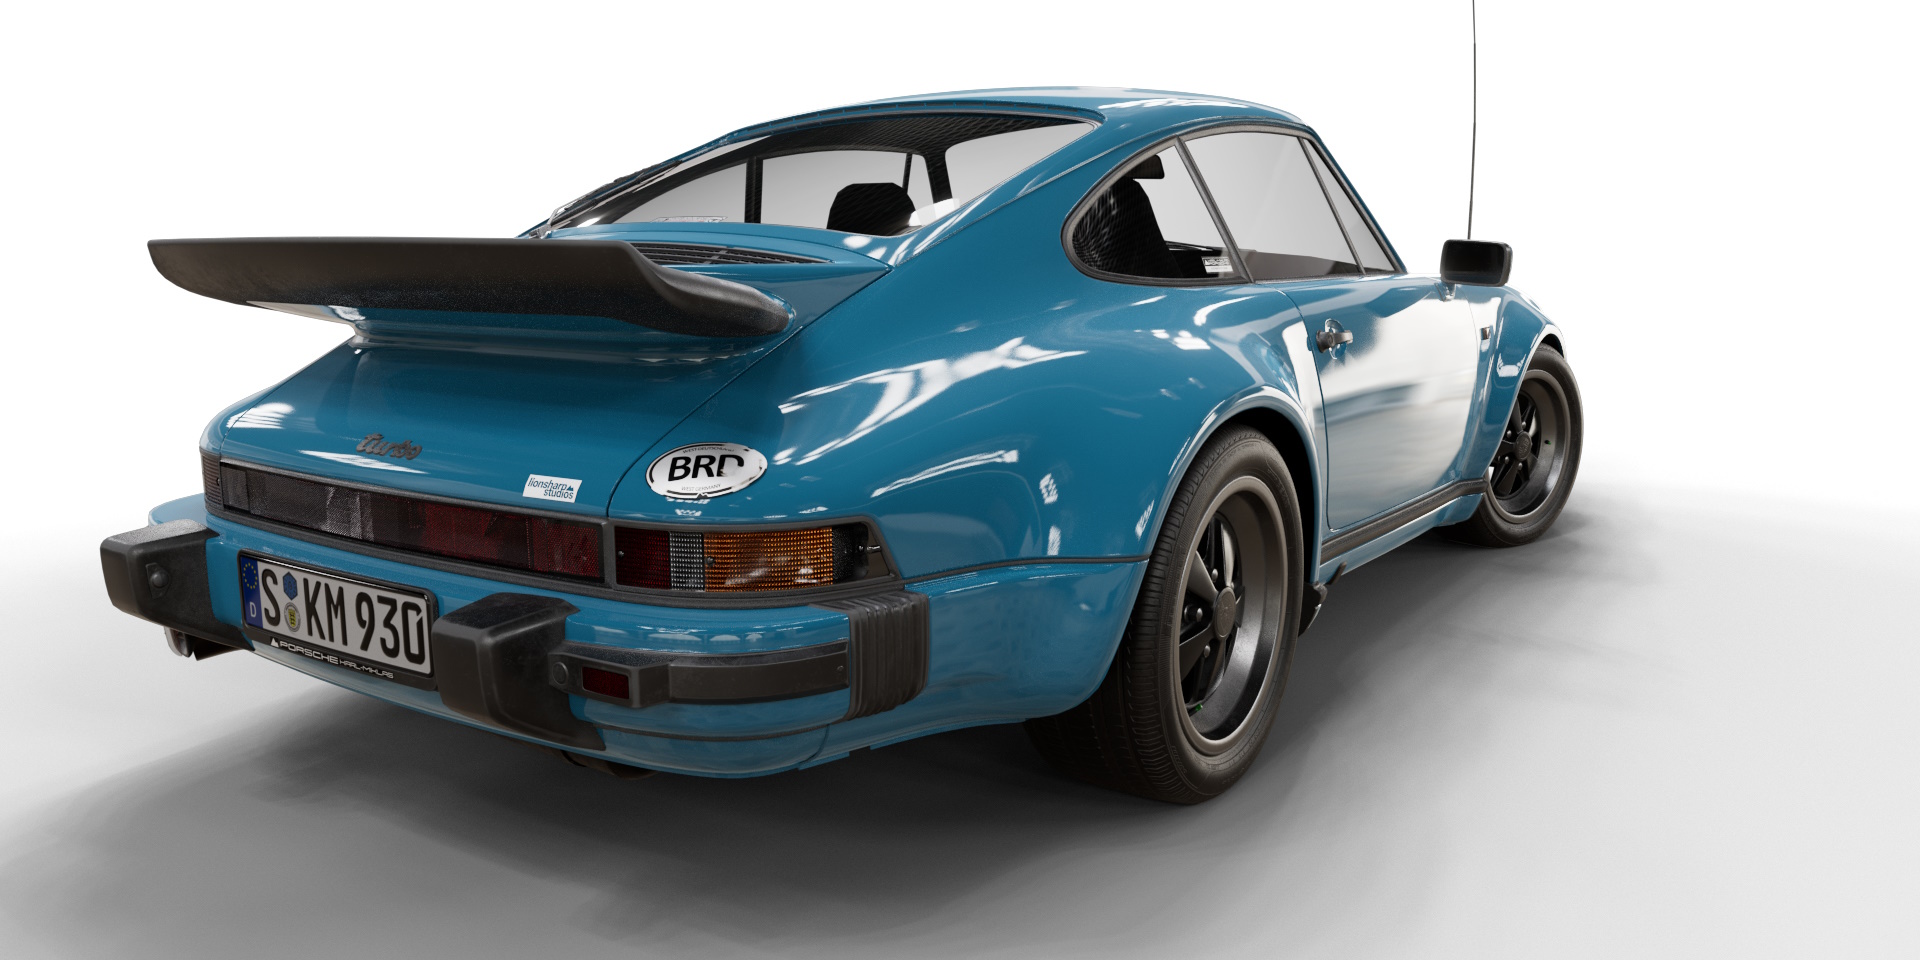
Model by Karol Miklas
Extended drag & drop
You can drag texture maps directly to texture slots in the Properties widget of the Light Tracer Render window. Environment maps (in both HDR and OpenEXR formats) can be dragged directly into the 3D viewport. Also, HDRI maps and Light Tracer materials (in LTM format) can be dragged into the corresponding tab of the Library widget to add them to the user’s library.
Advanced cloning
Have full control over cloning behavior with the new cloning dialog. You can choose whether both the material and geometry will be cloned (duplicated) or shared with the original object.
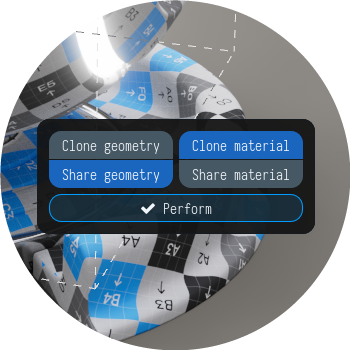
Most of the time, it makes sense to share the geometry, but sometimes you would want to duplicate it, for example, if you need to mirror the cloned part and do not want to affect the original one.
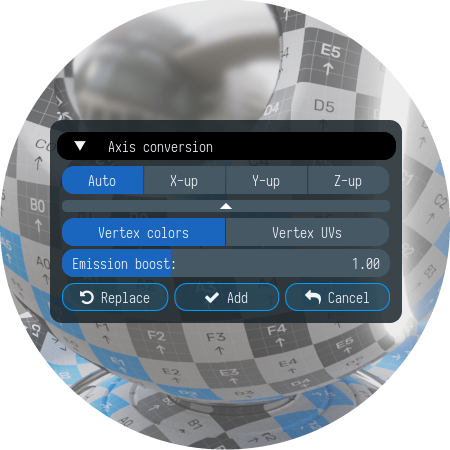
FBX vertex colors support
It is now possible to import vertex colors from FBX (previously, it was available only for glTF and PLY). Note that if the model has both vertex colors and texture (UV) coordinates, you will have to choose which one to import in the Import dialog. By default, vertex colors have priority over texture coordinates.
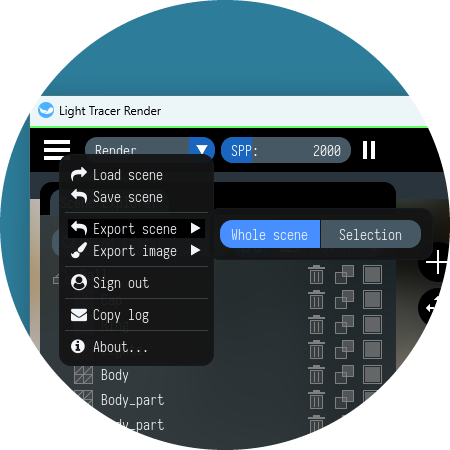
Export scene to OBJ
You can use Light Tracer Render as a 3D formats converter with a new Wavefront OBJ export feature. So, you can import a 3D model from any supported format, including STEP, IGES, and 3DM CAD formats, and export it to OBJ format supported everywhere. As for STEP/IGES CAD formats, Light Tracer provides tessellation capabilities so that you can produce output OBJ models with desired geometrical accuracy.
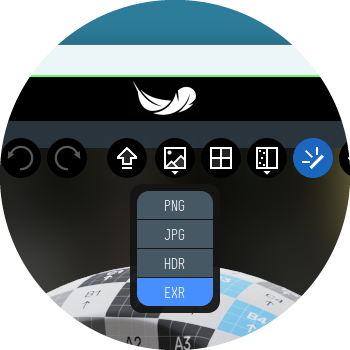
Support of OpenEXR format
OpenEXR format is widely used for storing HDR images. You can import EXR HDRI maps and export rendering results to an EXR file. Exporting a rendered image to EXR format allows for custom post-processing in third-party software. Note that it allows exporting a 4-channel image with an alpha-channel, while HDR format only supports 3-channel images.
Tune loaded PBR maps
Ever wanted further increased roughness after applying roughness texture? Now you can! A new Offset parameter placed on top of the texture slot allows for fine-tuning the effect of Roughness and Metalness texture maps.
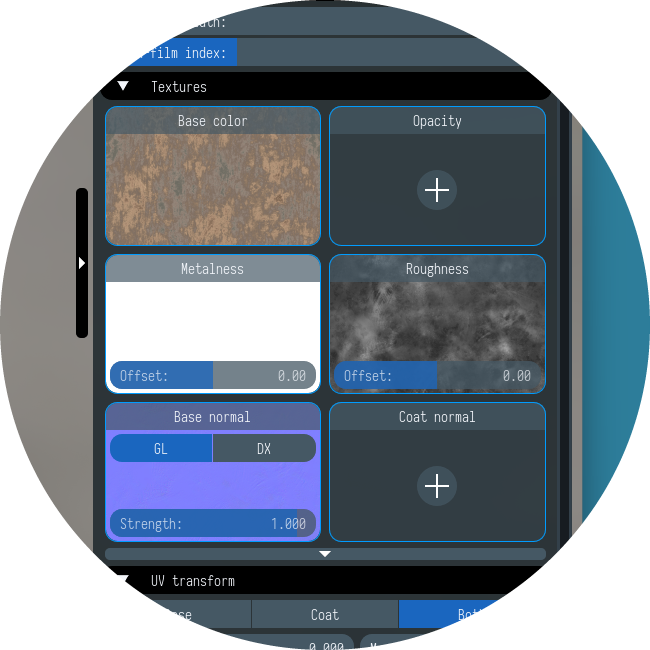
This parameter works like the brightness filter in image editors, i.e., by adding or subtracting the specified value from the map pixels.
Displaying physics bodies
The physics engine used by Light Tracer Render can not work with an arbitrary geometry directly to make dynamic bodies. That's why we are building approximate geometry called convex hulls for it to work with. It is not always obvious to a user why physics interactions are occurring in some particular way.
Model by Roland Schneider
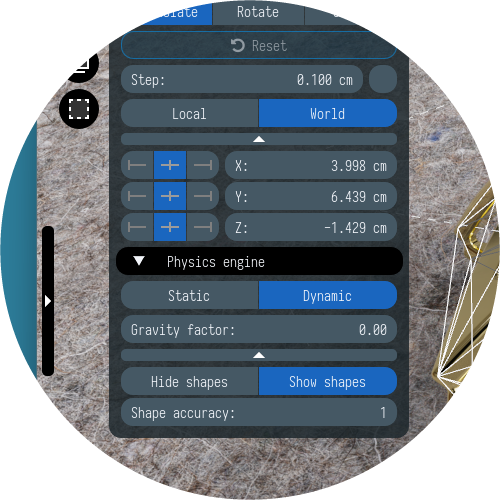
With the ability to visualize these hulls, you can better understand how it is affecting physics behavior and have insights to tune Shape accuracy parameters. You can turn on/off the displaying of the physics bodies in the Transform widget:
Hopefully with the new update of Light Tracer Render you will be able to create even more stunning images of your 3D projects. Your feedback is very welcome, as always. Feel free to ask any questions in our Discord community!